Feel free to share this with any stitching friends or groups! ETA here is a new tutorial as requested for a similar pattern that uses different fabric for the front and the lining.
(my kids are helping me film some quick video tutorials, stay tuned! In the meantime, please read the tutorial through before starting, people have made some mis-steps trying to go by just the photos)
I’ve been trying out a lot of face mask patterns and tutorials and while each had elements I liked, they also all had something about them I thought could be improved. The craft passion mask has a great nose bridge that sits more comfortably beneath the eye than the HK mask but the CP mask has a flat bottom edge that doesn’t seem to cup the non-flat bottom edge of people’s faces. The folded masks are great for mass production but they sit close to the face and create breathing difficulty for those with respiratory issues, and they gape in places. Elastic degrades with hot laundering so sewn in elastic could quickly become worn out without a way to replace it, etc etc etc.

This mask has fit every face I’ve tried it on so far, even faces with beards (I’m not talking a ridic hipster facefull, those guys are on their own!). It can be made without a nose wire but I recommend it for the best seal. It cups the chin, it stands away from the mouth and nose for easy breathing. It is fairly sealed around the sides. The tie can be replaced as needed and can be any configuration, over the ear, behind the head with double ties or one loop around the neck and one tie at the back of the head.

I am really into the economy of sewing, making the best use of time and sequence of application. I can knock this mask out in about 15-20 mins each and I am not rushing. I hope some of you will test it out and post your feedback, I would appreciate your suggestions for anything that could be made better.
The wonderful @Kwality570 rendered this image for us, & posted it to Google drive doc. If you don’t have a printer, copy the image onto your computer and then reduce or increase the size until the 1" square is exactly 1" on the screen, then you can hold a piece of paper against the screen and trace the pattern.
Large fits my 6’ man with a beard and also my skinny faced 6’ teenmanboy. Medium fits my face and would fit youth around age 15 or so. Small fits my 13 year old daughter. Extra small has not been tested for fit but should be ok for under 7 years old.

Interfacing is optional but highly recommended. It adds an extra non-woven layer for filtering and also adds structure to the mask which keeps it from bunching up around the face. I have also found it keeps the fabric of the lining from pulling in to the face on each inhale, that feels so suffocating to me. It’s worth ordering some interfacing if you haven’t got any on hand.
In my experimenting, I found it quicker to fuse the interfacing to the fabric before cutting rather than cutting out both shapes individually. However, if you would prefer to save interfacing by fussy cutting you may do so. The seam allowance is 1/4"-3/8" (I actually use 3/8" because it’s where the edge of my presser foot falls), if you are using thick interfacing and want to cut down on bulk, trace the pattern and reduce it by 1/4"-3/8" all the way around except at the fold.

I saved a bit more time by folding the fabric as shown to cut all the pieces out at once.

I don’t bother to pin, this is easy enough to cut out. If you cut your pattern out of card stock you can trace it on the fabric, that’s also a very easy option.

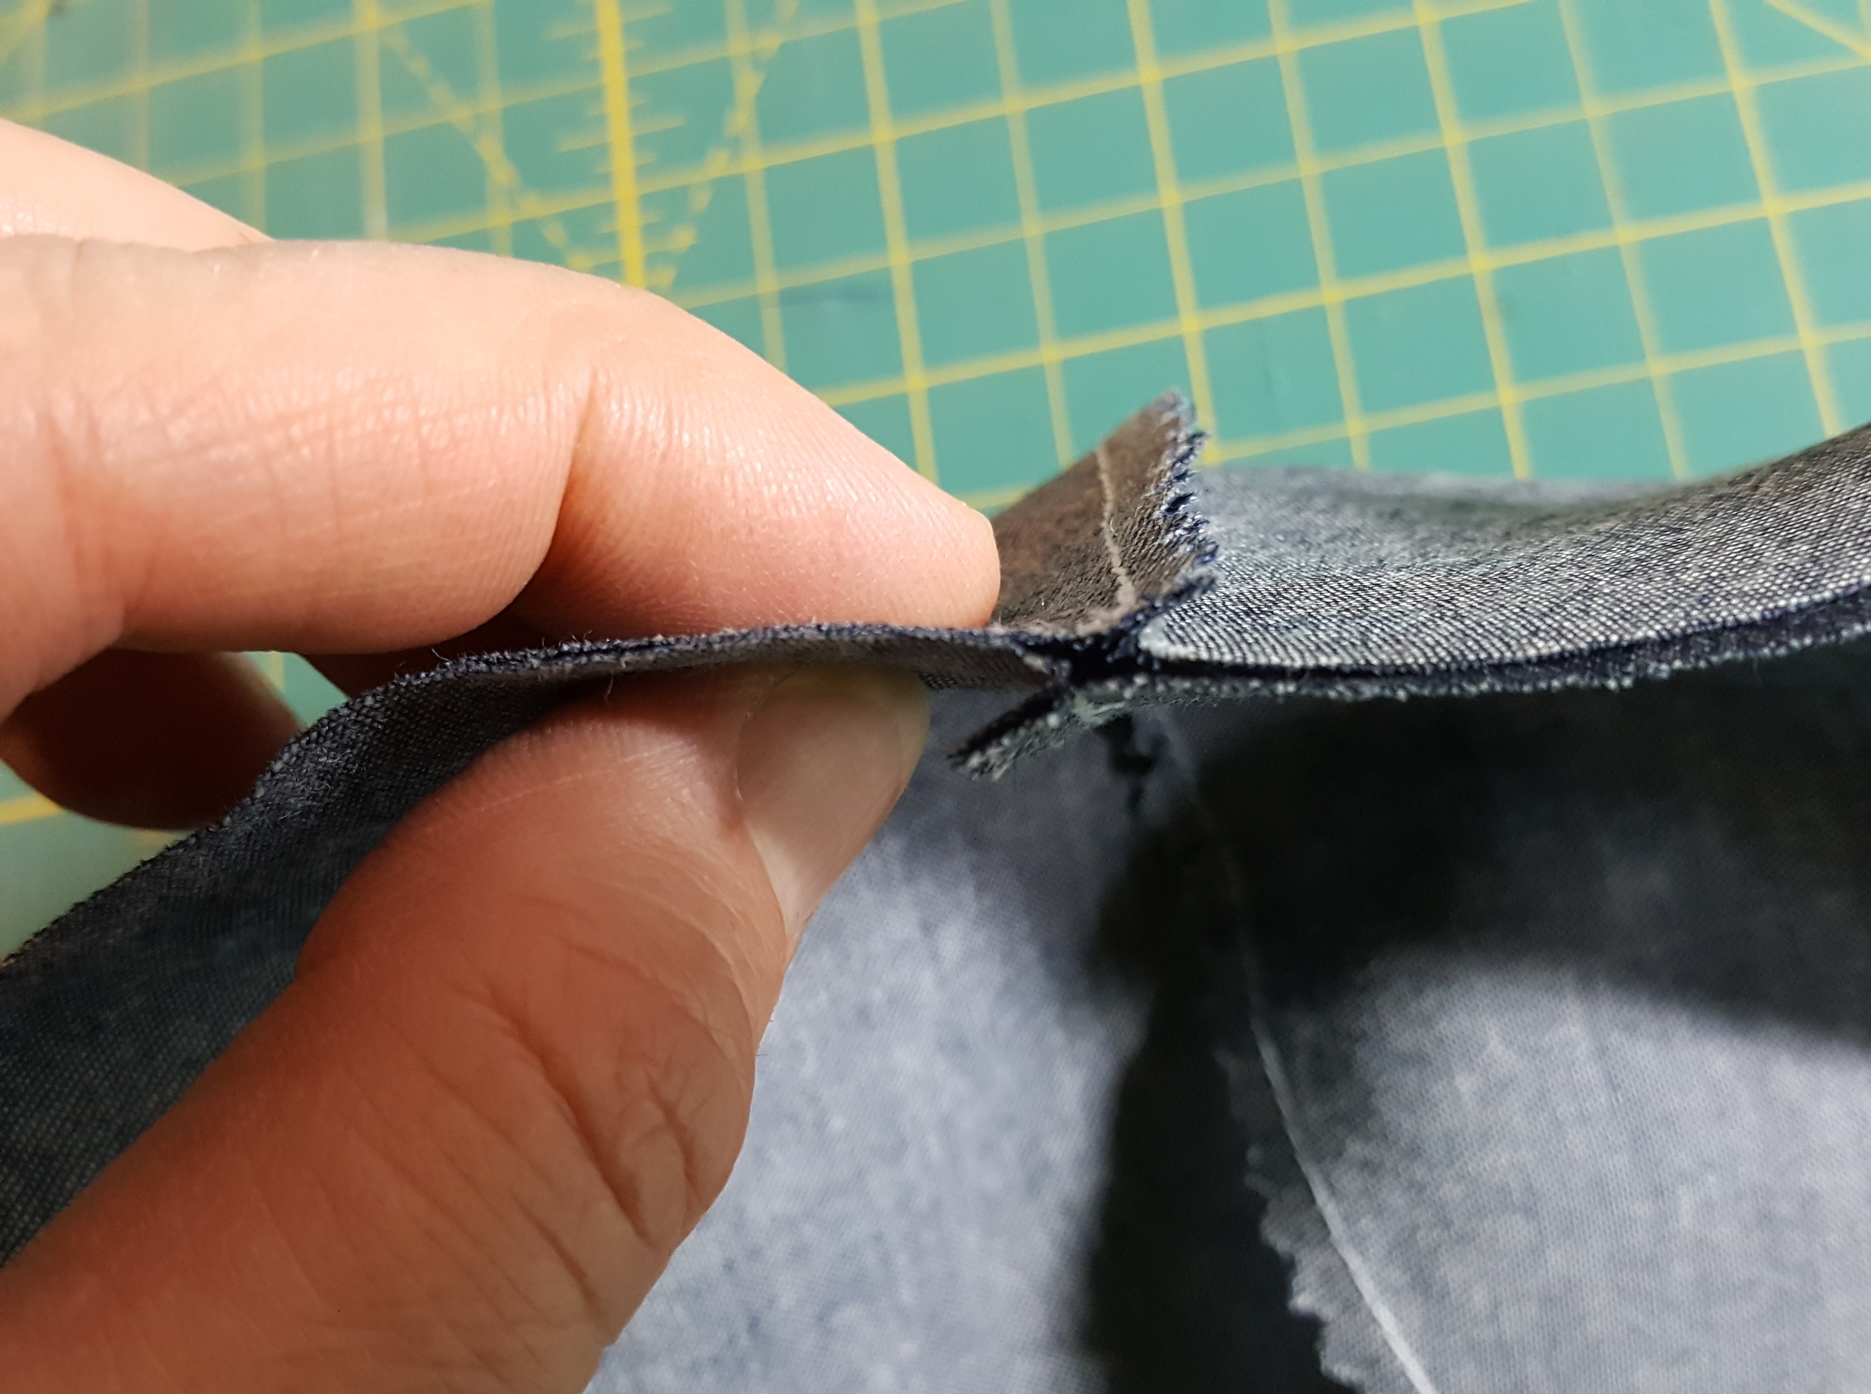
Unfold the pieces and place right sides together. Mark the centre fold top and bottom on both pieces, also put a dot at the the upper corner of what will be the top of the outside piece. One last thing I do which is optional but I recommend it, is to trim a scant 1/8" from the top corner of the centre front lining. This will help the lining cup inside the outer piece (like the lining of a bag, it is a tiny bit smaller because it sits inside).

Here’s a close up of those markings before I trimmed off the 1/8" on the left.

Sew both curves with 1/4"-3/8" seam allowance, back tacking to lock the stitches at the start and the end. (Optional: sew the seam on the outside curve, trim, press and edge stitch. Then sew the curve on the lining pieces, etc. I find this gives the mask more structure and also indicates which is the outside of the mask but it’s not necessary)

You can clip the curves or trim with pinking shears which I recommend as a quicker and easier option.

Fold with the centre seams together like this (different fabric, don’t be confused!)
Pin around top and bottom. Mark your stitch start/stop line 1.5" in from the side folds on both sides, top and bottom. This is the large size mask I’m working on so this measurement will be a bit smaller on the smaller masks but no less than 1". I’ve also marked where the gap for turning should be at the bottom.

Here’s a close up of that.

Now stitch those lines, back tacking to lock at the beginning and end of each line.

Here’s a close up of the turning gap that’s been left open.

This is an optional step but I’ve found it very helpful to press the seam allowance around the gap so when the mask is turned it’s easier to sew over.

Clip the curves or trim with pinking shears starting about 3/4-1" from the start of the stitching at the sides as shown. I am careful not to trim as much around the gap so there will be enough seam allowance to sew it closed later.

Turn the mask right sides out and press.

Make sure the seam allowance at the sides is tucked in evenly, there should be enough of an opening to insert your finger and help it lay flat if needed but it should turn out easily based on the stitching and clipping done before turning.

I’m using a wire that’s about 4" long. This extends out over the cheeks and prevents poking the nose. For the smallest mask, decrease to 3". Insert the nose wire through the turning gap and pin it into place along the top seam allowance (see next image for clarification). Begin stitching where my finger indicates, don’t bother to back tack just start sewing about 1/2" in from the side (a bit more if you are using a thicker tie like tshirt yarn but no more than 3/4"

**The stitching is done in one continuous line all the way around the mask, pivoting to go around the nose wire. The only back tack is done at the end where the end of the stitching meets the beginning.
Push the nose wire up against the seam allowance and hold it in place with pins as shown. Indicate where the wire starts and stops with the placement of the first and last pin.

When your stitching reaches the first pin indicating where the wire begins, with the needle in the down position, lift the presser foot and pivot to take a stitch or 2 along the edge of the wire. Less is more, stop as close to the bottom edge of the wire as possible. With the needle down, lift the presser foot and pivot again to stitch along the bottom of the wire. Repeat pivot steps at the end of the wire to sew up to the edge, pivot and continue edge stitching around the rest of the mask, back tack when you reach where you started.

Here’s a close up example of the stitching around the nose wire.

A variety of tools can be used to thread the elastic of ties into the side channel. I’ve found a small crochet hook the best. If all you have is a needle with a large enough eye that is sharp at the business end, simple push the eye end through the channel rather than the point.

If you’re catching on the seam allowance, gently push the side to open the top until you can see the tool you are using and visually guide it though.

If using a crochet hook, it’s helpful to angle the hook towards the side seam and avoid catching the seam allowance on the way out.

I’ve been cutting about 8" of elastic for each side (less for the small sizes) and leaving them unknotted so they can be fitted to the face of the wearer. Once knotted and pulled tight, trim the ends and pull the knot into the channel for security and comfort.
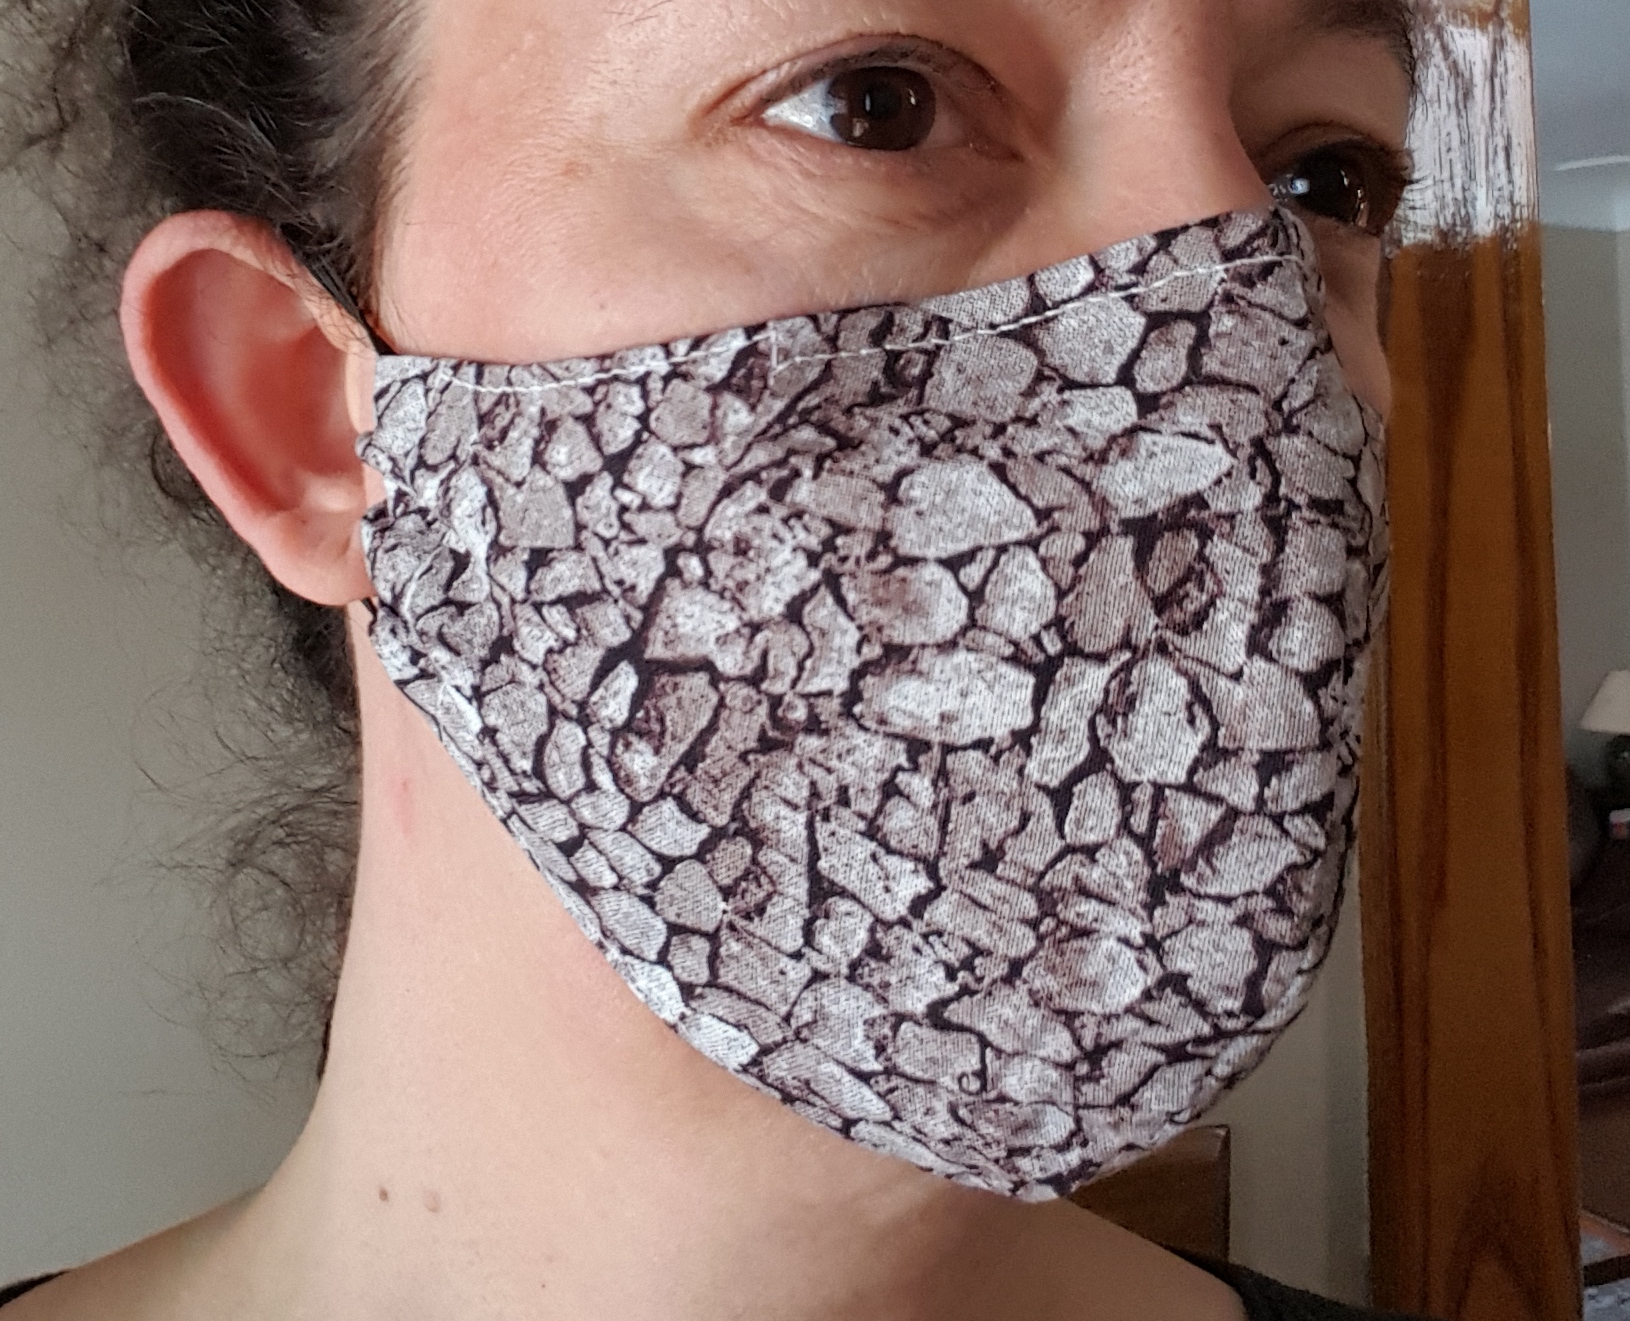
Large size

Medium size
Small/youth size


