Wow, thank you for sharing. How long did it take to make the last one?
1 Like
Truthfully, I don’t know how long it took to make the white/grey/yellow. At least a couple hours.
I’m currently working on one into which I have at least 8 hours: it’s a spiral shape, I spent a lot of time needle felting it to be very firm, and the embellishment has been time consuming. I’m not sure I’m going to wet felt this one at all, but I will be doing experiments with steam on test pieces this morning to see if steam and/or minimal surface wet felting is enough to bond the embellishment fibers to the very firm needle felted form. I want to disturb the embellishment as little as possible, but improve the durability of the piece as a whole.
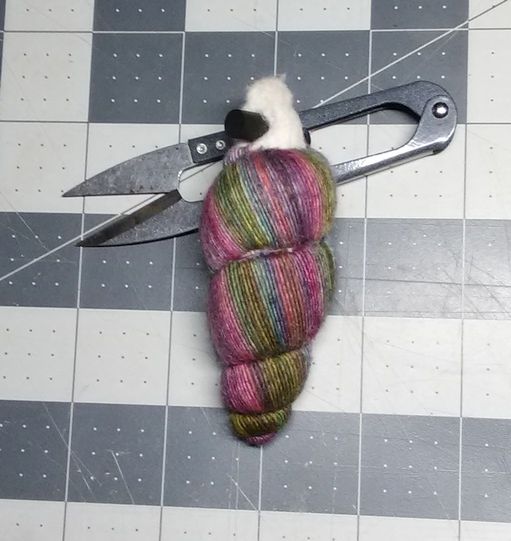
I need to finish embellishing the tip of the pod, but Tuesdays are grocery days! 
3 Likes
Before and after wet felting - 7g of fiber needle felted to very firm.
While there is less shrinkage the more fiber that is used and the pod/pendant is needle felted to very firm, once you get it into the hot water the fibers relax and a “firm” piece can feel quite squishy (technical term).
2 Likes
I confess I am confused about the material you are using, what is the beautiful rainbow thread on the shell shape? I thought at first embroidery floss but that can’t be it. Very fine wool yarn? How does it felt into the wool, I don’t understand this magic.
Your work is truly mysterious and I am utterly entranced.
That’s a Merino Lace weight yarn. They dyes on it are not as stable as other lace weight yarns I have tried. That seems to be true of “painted” yarns.
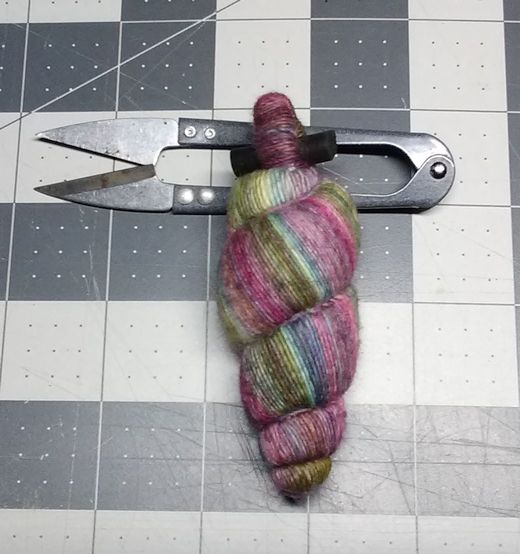
If you look back at the first image, the two left most pods both have this yarn. The left most pod wasn’t very firm and required a lot of wet felting to eliminate air and produce a durable pod. It’s considerably less vibrant than the pod next to it which was more firm when I wet felted it and required less time in hot water! I did the variable firmness between the two pods deliberately. It’s a matter of learning to control the medium.
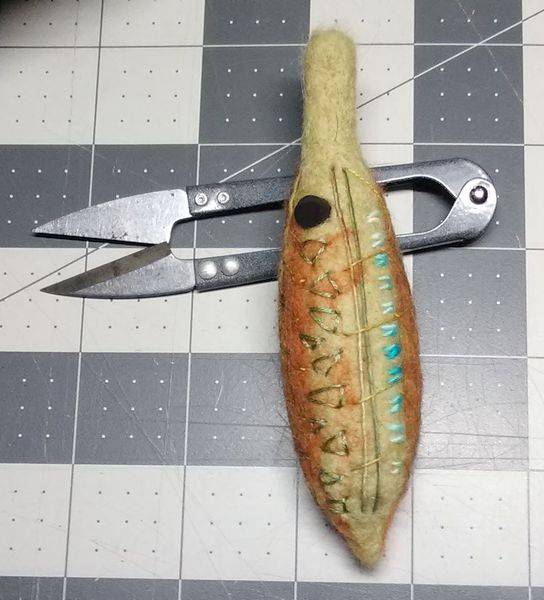
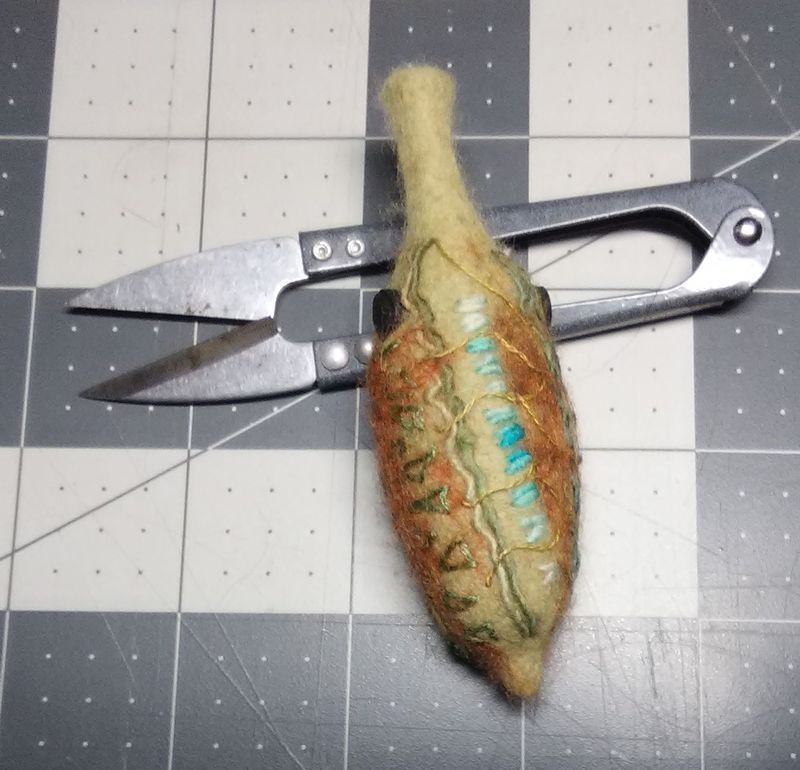
I’m not going to wet felt the last spiral pod that I decorated with this stuff. I spent so much time on it, more than I feel is worthwhile for the result. I did finish covering the top:
Hopefully, if it ever gets put to use, the strands won’t snag on something and ruin the whole effect.
2 Likes
It is simply incredible. Thank you so much for showing some of your process. I’d love to be able to actually peak over your shoulder as you are making, you are a magician & this is truly magical.
1 Like
Oh these are also so beautiful. The rainbow lace yarn looks very pretty and elegant too.
1 Like
Thank you, but I’m no magician. I’m just methodical, stubborn, patient, curious and observant or at least I think those are the qualities I bring to my work.
Decided that I would attempt to put together a whole necklace for that last pendant so started work on various bead. I also decided that this might be a good time to try again a technique I figured out from observing Lisa Klakulak’s work. If you don’t know who she is and you’re into fiber, check out her web site www.Strongfelt.com! I haven’t seen anyone else make cords this way, but it’s very kewl!
First you have to make prefelt. The longer you want your cords to be, the wider you need to make your prefelt. Let it dry.
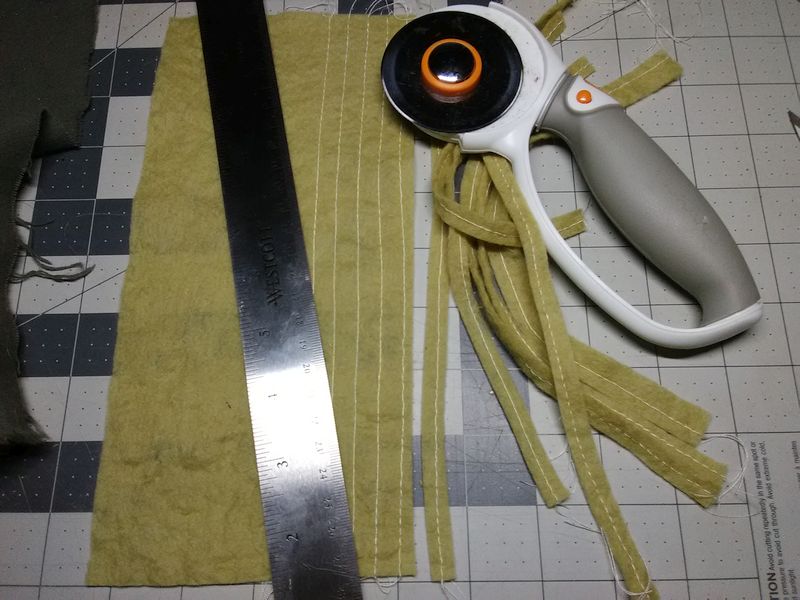
Sew basting stitches in rows and then cut the strips. Probably would be best to use thread that matches your fiber exactly or at the beginning of wet felting remove the basting stitches. Leaving them in probably adds additional strength to the cords and could actually be used as a design element depending on the thread used.
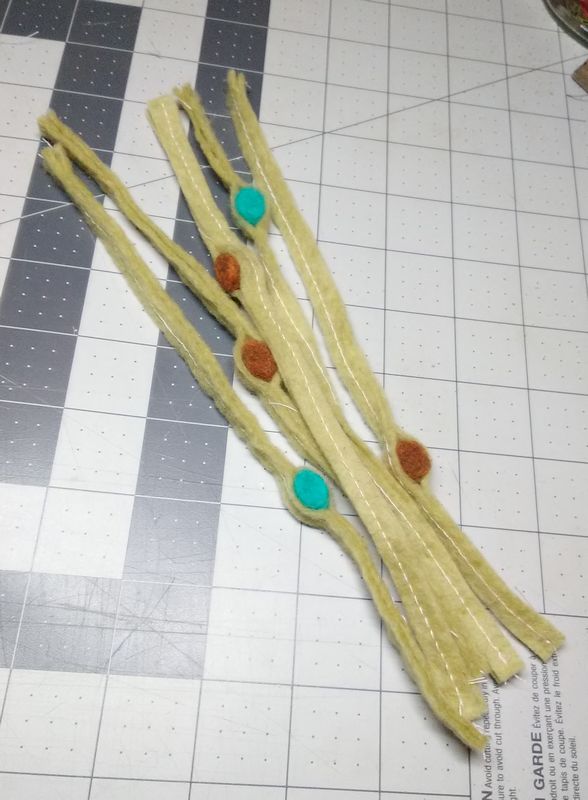
I wanted to put in color plugs to coordinate with the pendant I was working on. I placed them between two of the cord strips and used my felting needles to lightly secure the plugs in place and the layers together.
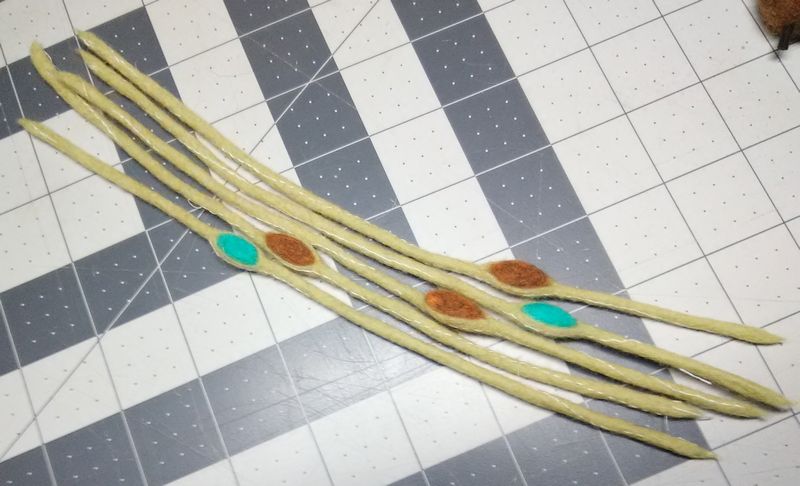
Wet felt. Because I put the color plugs in I spent a brief amount of time agitating that section of the cords to make certain they were bonded. I started wet felting being a bit gentle, but it was quickly apparent that the cords (being prefelt) would stand up to rigorous felting (actually fulling). It really takes very little time to finish them. Rinse well. Give it a soak in some clean water with a splash of vinegar to restore the PH. Squeeze out the excess water. Pose as desired. If I had wanted, I could have wrapped the cords around a rod and ended up with spiral cords.
Thicker cords can be produced by using thicker and/or wider prefelt strips. I have a sheet of commercially made prefelt that I bought specifically to try making cords out of it.
That was most of my day (not counting the half hour hunt to find out where my cats too my needle felted bird pin cushion. I did find it! It was not totally ruined and it still had all the needles (whew).
Pop them into the dehydrator until dry.
3 Likes
I really have no idea what makng prefelt means but I’m loving this glimpse into what you do!
Prefelt is a felted cloth that has not been excessively fullled which means the fibers in the prefelt will happily felt together with new fibers or, as with making cords this way, with themselves. “Fulling” is the use of water, soap and agitation to eliminate air and bind the fibers firmly together.
To make prefelt you lay out wisps of fiber in rows and continue to lay out fiber slightly over lapping the rows until you’ve covered the area you want: 6"x12" or 10"x10" or whatever you want/need. Once you have, as evenly as possible, laid out one complete layer, you start another layer perpendicular to the first. Depending on what you are making and the purpose for which you intend the prefelt, you may do additional layers. The more layers, the more thickness, the less shrinkage when wet felted and fulled.
When you get really good at this sort of thing you can predict the thickness of the prefelt and the thickness of the felt cloth when it is completely fulled.
I posted this particular method for making cords because I’ve never seen a tutorial for making felt cords that uses this method. I don’t know if Lisa K. originated the idea, but by looking closely at photos of her work I noticed that this is what she was doing and tried it myself. The basting stitch may not be necessary if you were using just one layer of prefelt to make cords. I haven’t actually tried that yet, but it should be fine since prefelt holds together well. The stitching I observed on Lisa’s work was probably to hold the two layers of prefelt together along with the color plugs.
Hope that makes sense.
1 Like
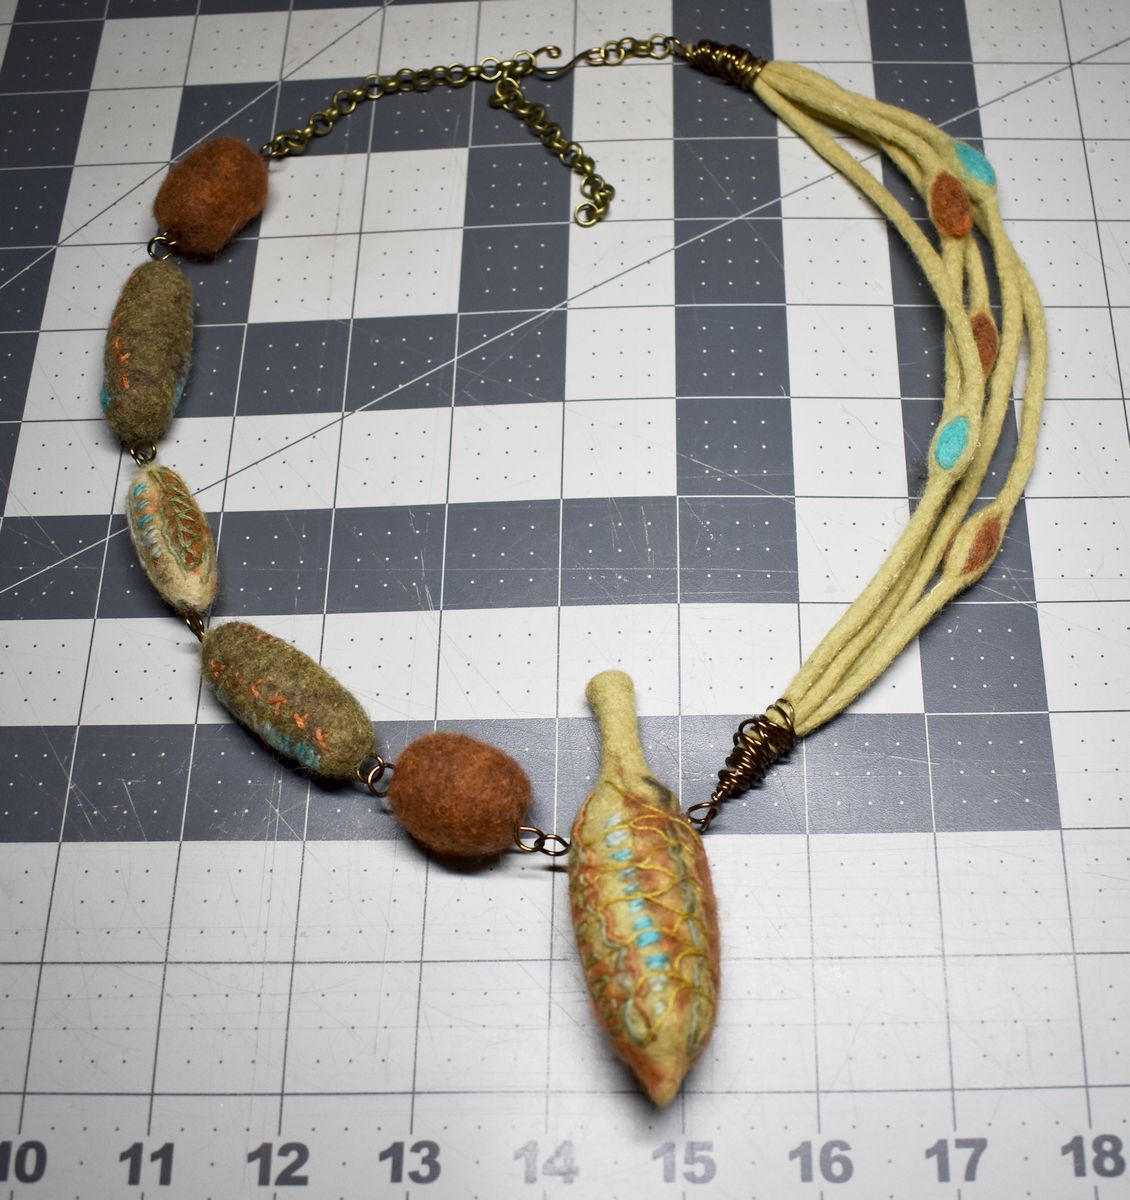
Finished it with wire and rolo chain.
I want to experiment more with pieces that are all fiber. The contrast between fiber and metal is nice, but I know I will learn more skills and new ways to look at such projects by doing some pieces that are totally fiber. 
2 Likes
It looks like cocoons and seedy reeds and the pod, oh it is magnificent!
1 Like
Today I wet felted a strip cut from the commercially made prefelt that I bought a while back. I didn’t do a basting stitch down the middle which might have been a good thing with this material. I did learn that I must not presoak the strip in hot water while I’m getting everything else ready. The commercially made prefelt is more fragile (although thicker) than the prefelt I make so it broke and stretched as I was picking it up to put it on my ribbed tray to full.
The part that broke off I wet fellted/fulled to one end of the stretched strip since I wanted to see how well the two pieces would felt together. Layers is one way to change the thickness of the resulting cord. Even with my mistakes today, I got an interesting and useful cord.
I want to try cutting a wider strip and wet felt/full that and see the results.
I am loving the peek into how this magic is done! Thank you!
Beautiful work - I LOVE those cords!
1 Like