Simplified fitted mask pattern - UPDATED

UPDATE!!! Thank you all for your feedback with this tutorial, I’ve been able to tweak the pattern quite a bit and have come up with something even better. Instead of making this version, please go here for the refined pattern and tutorial. It is very quick and easy to make and I think it fits the best out of all the patterns I’ve tried so far.


I made a mask for a neighbour using the HK pattern which is fine but I felt like it could be made more simple so I tweaked it a bit. This pattern takes only 2 pieces of fabric and requires just one line of external stitching to finish, 5 lines of stitching in total. I used white thread so it’s visible but feel free to match the colour to your fabric, lol.

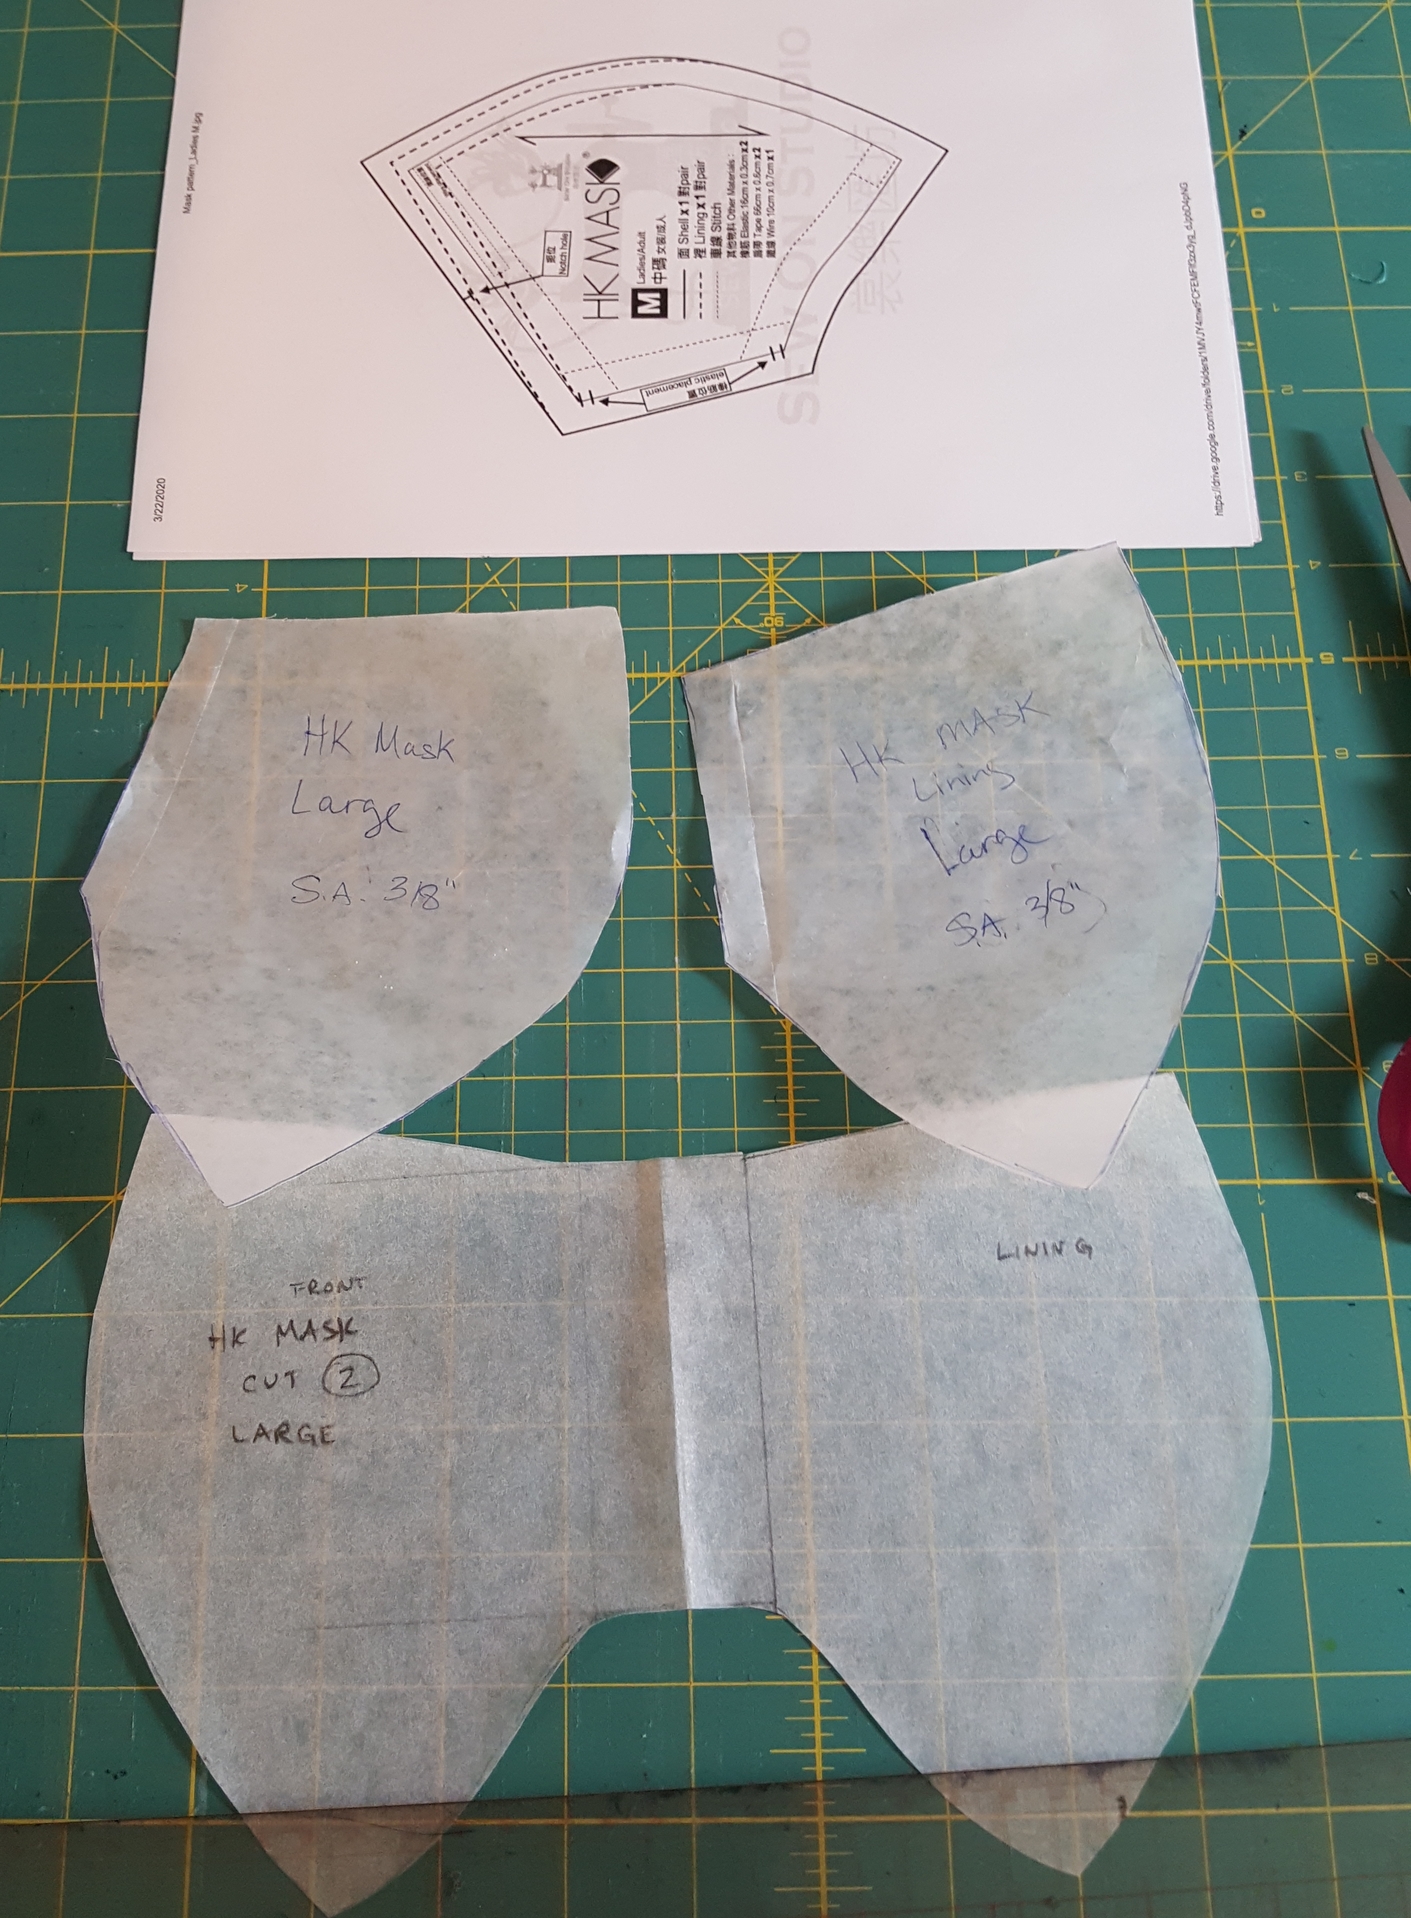
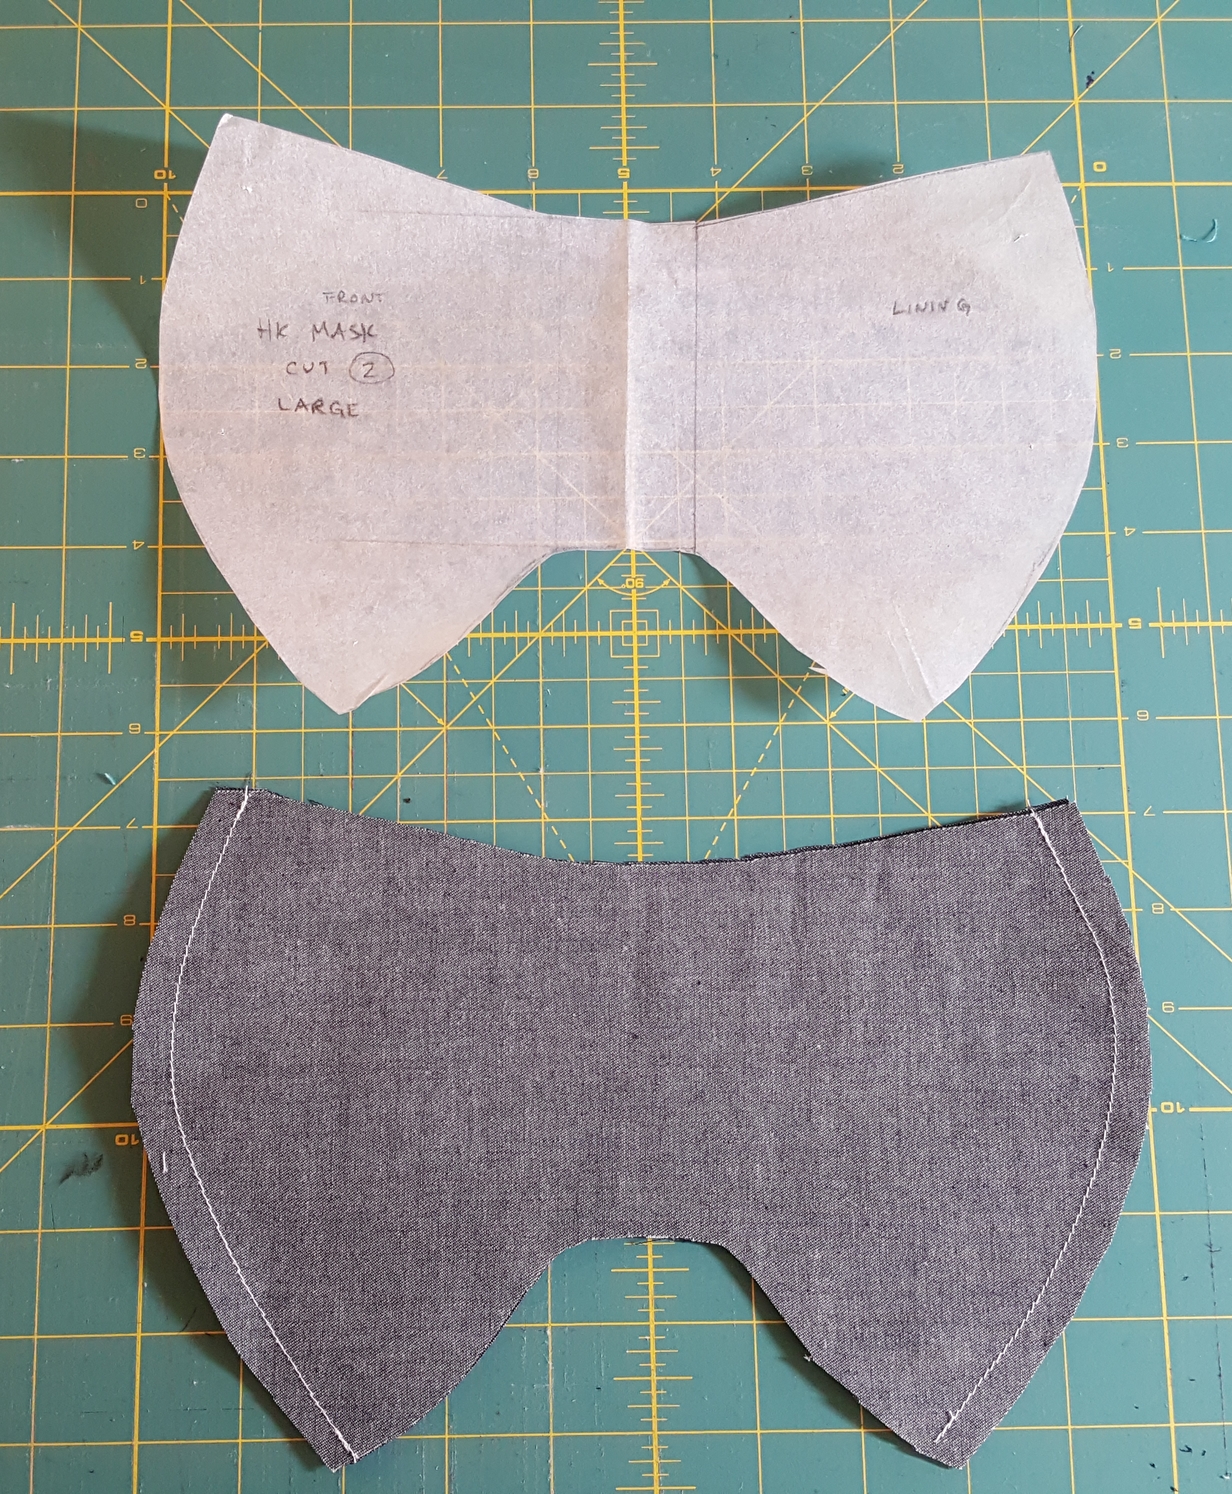
Starting with the print out in whichever size you want to use, trace both the outer piece and the inner lining piece. I taped them to my cutting mat curved sides facing out with a 1.5" space between them, then I traced this new pattern onto a fresh piece of tracing paper.
20200416_201748
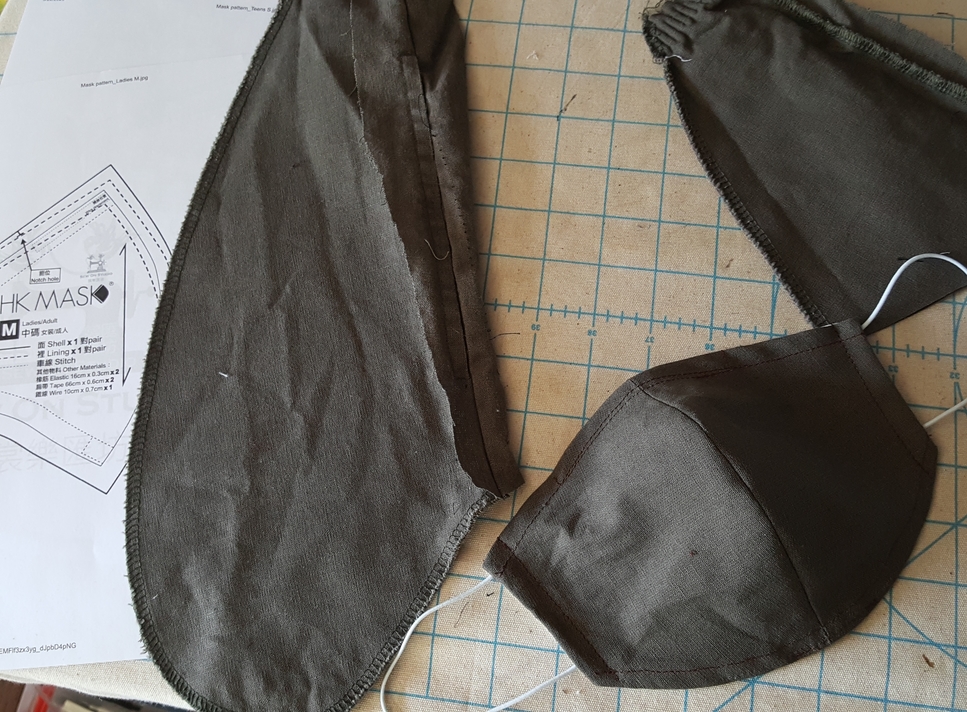
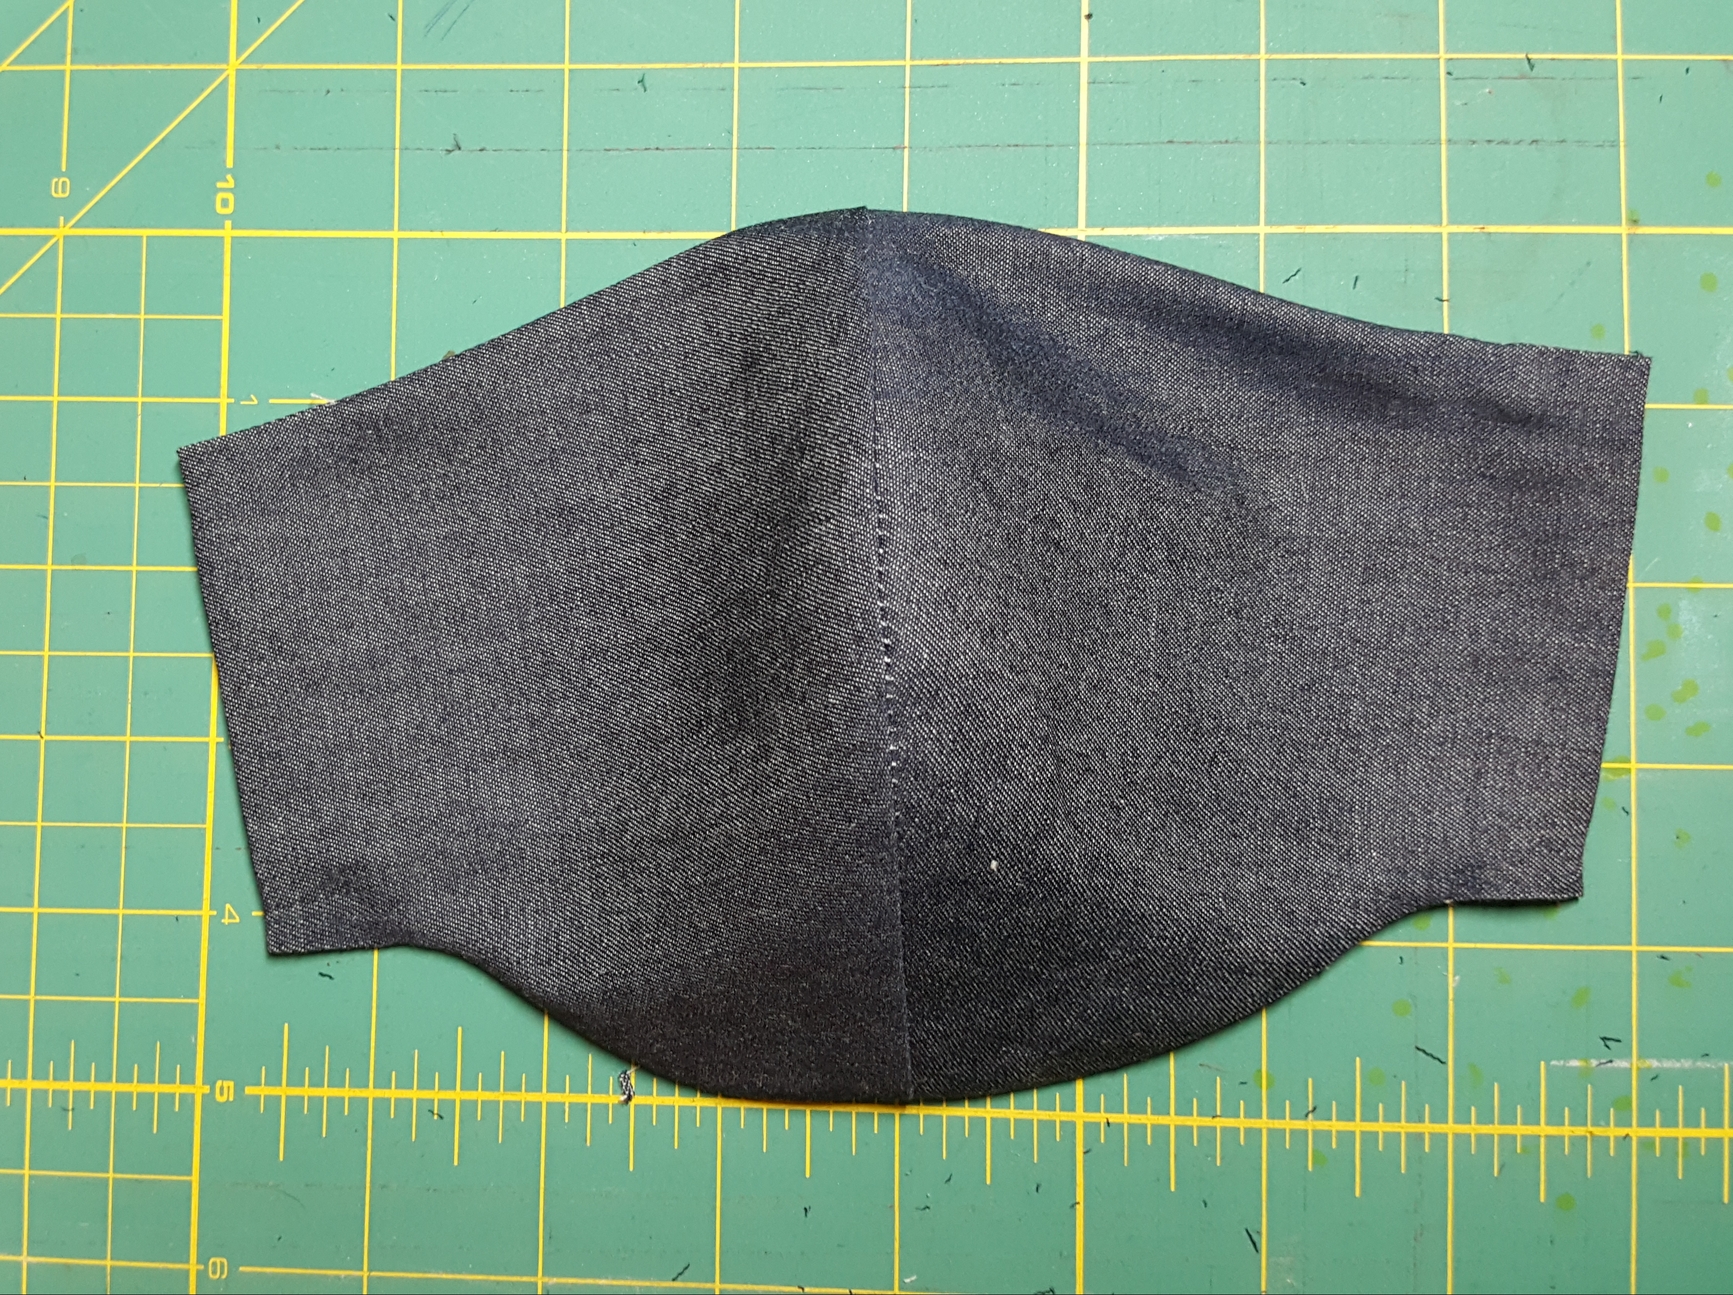
Fold fabric wrong sides together, cut out 2, stitch along the curved edges with a 3/8" seam allowance. (I’m not actually using denim, it’s a thinner denim-look twill).
20200416_201720
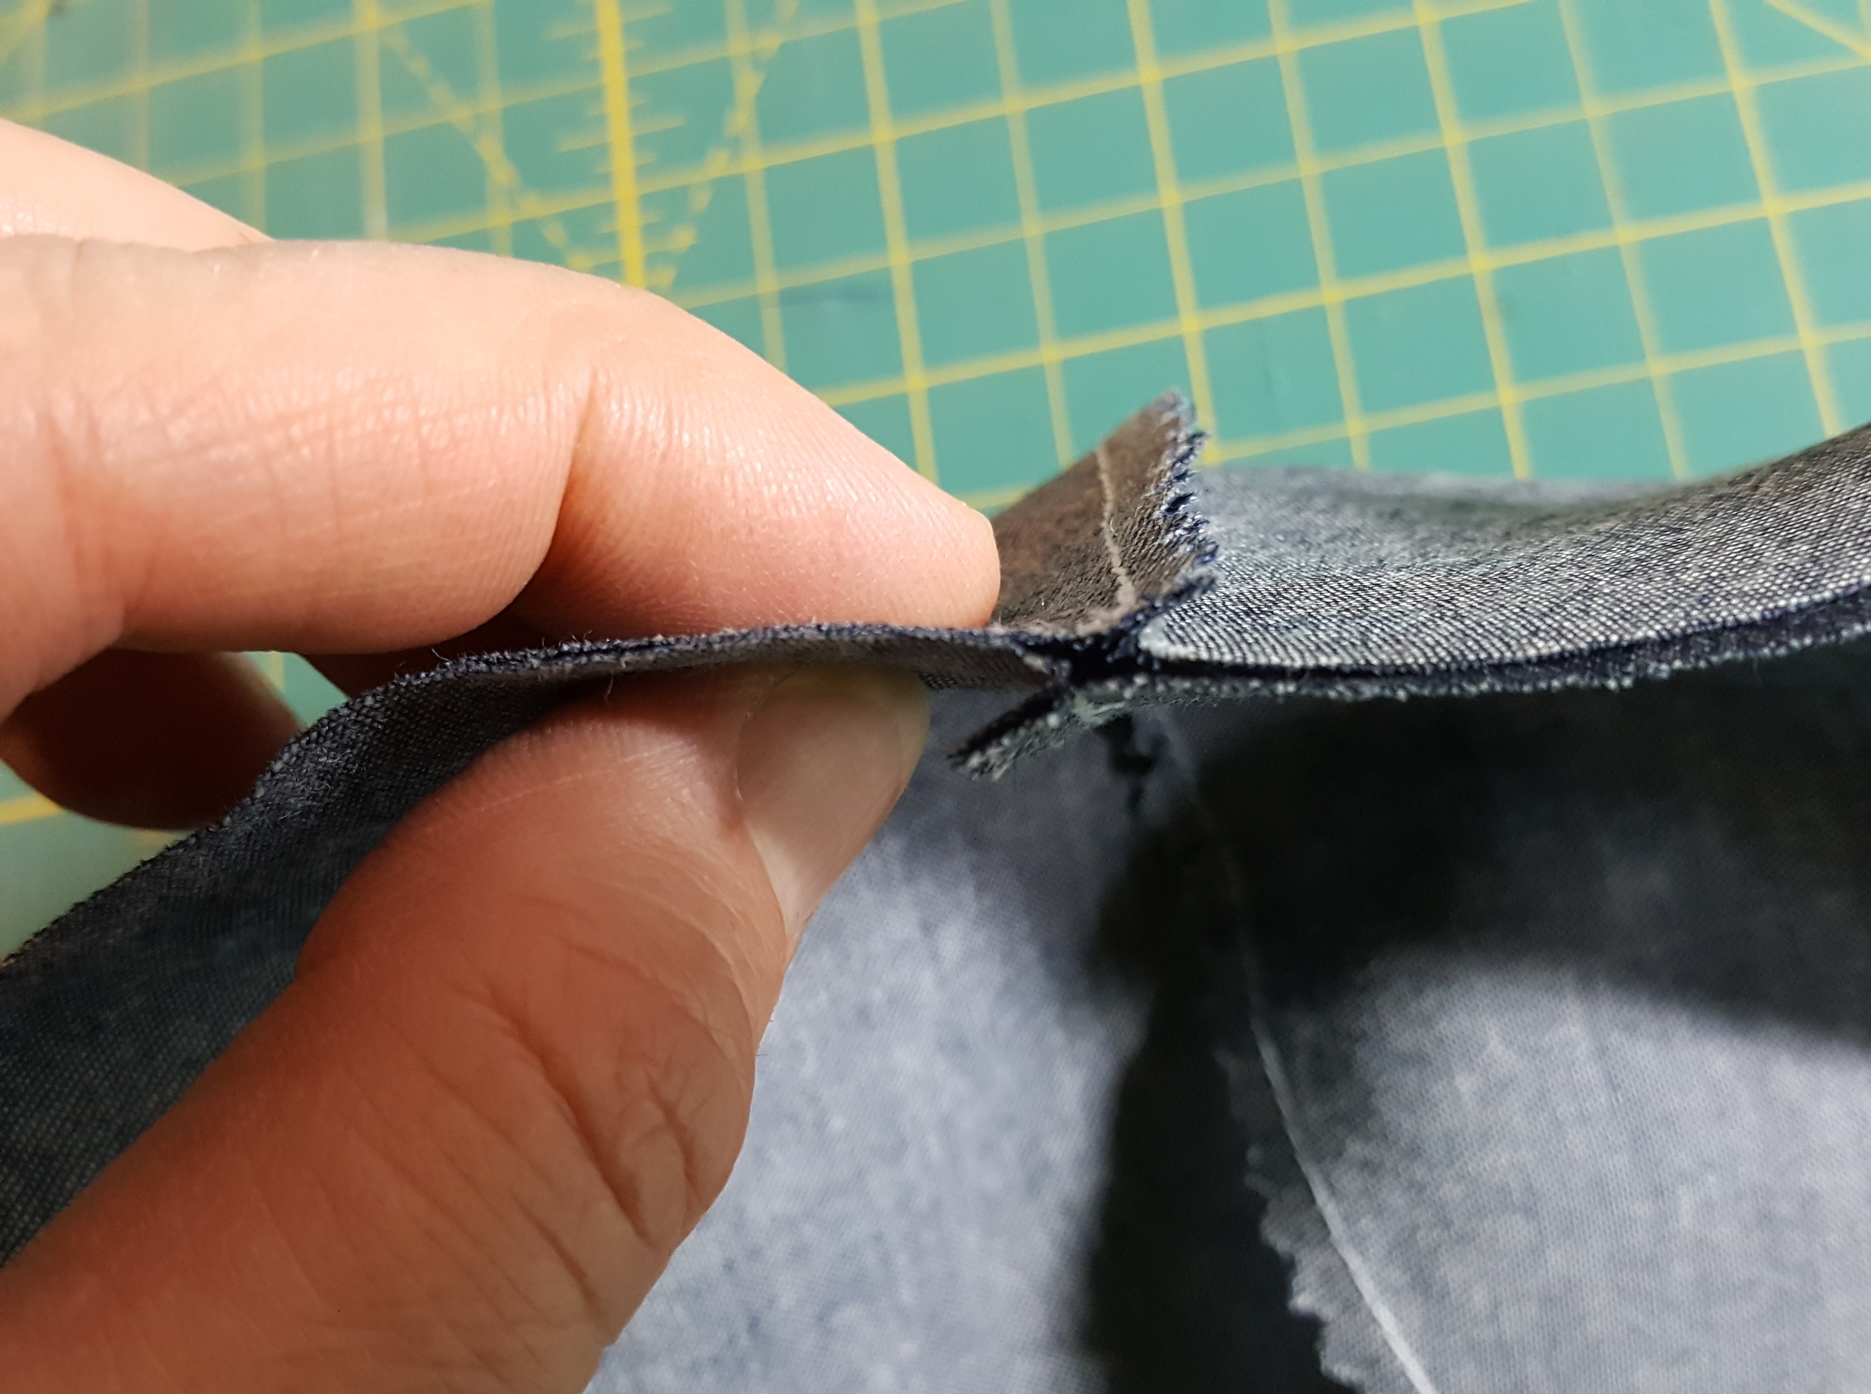
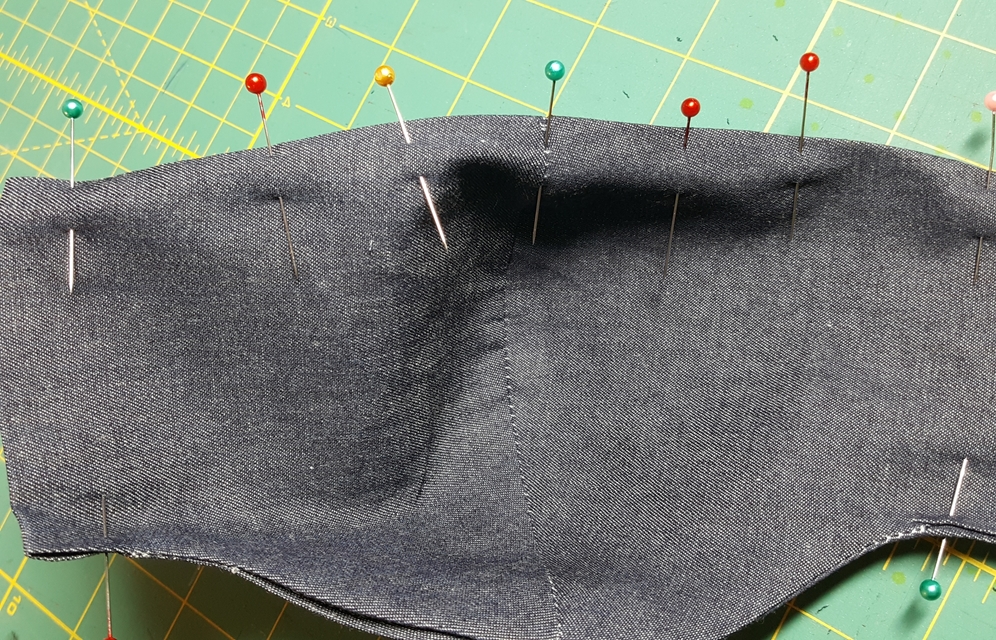
Now I ironed the seam allowances to opposite sides and followed @TheMistressT’s great idea to use pinking shears to trim them along the curved edge (or you can clip the curve, whichever you prefer). Fold the mask front pieces against back pieces and line up edges as shown.
20200416_201646
Stitch from 1" in from the edge to the same distance on the other side, repeat top and bottom leaving a 2" gap for turning.
20200416_201532
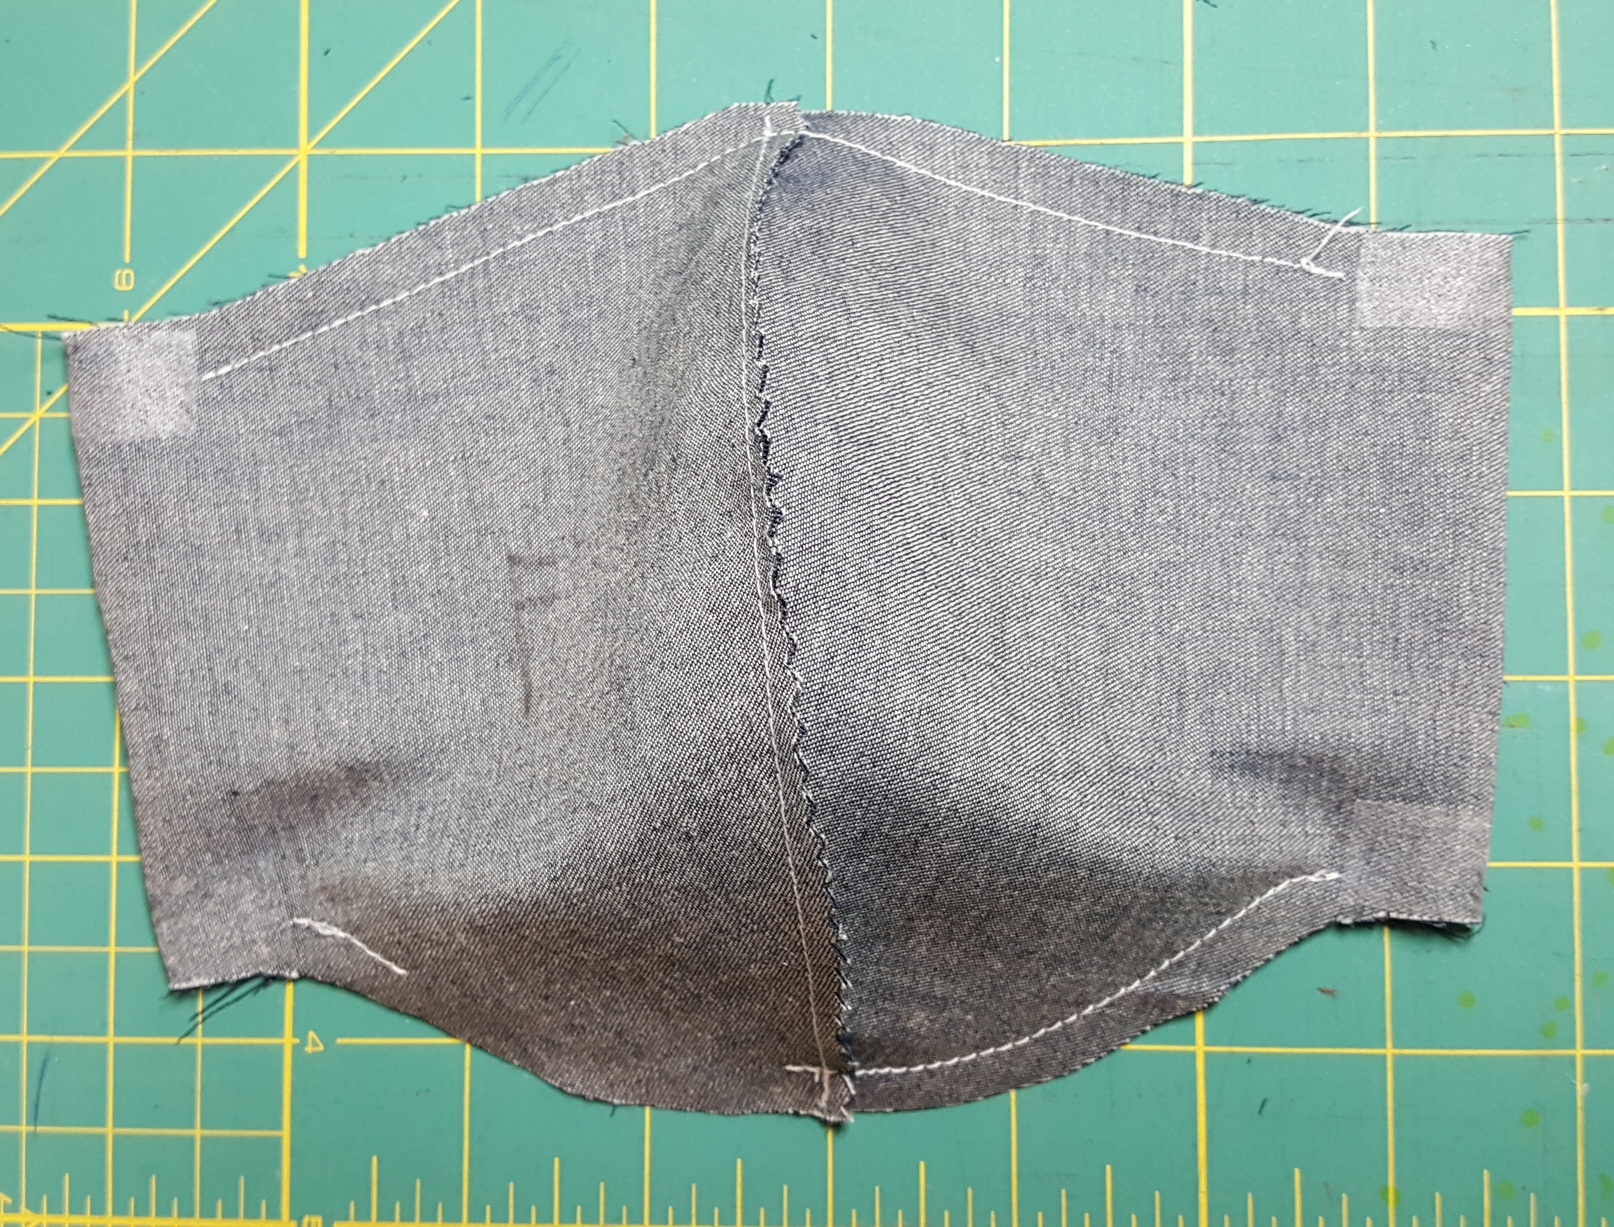
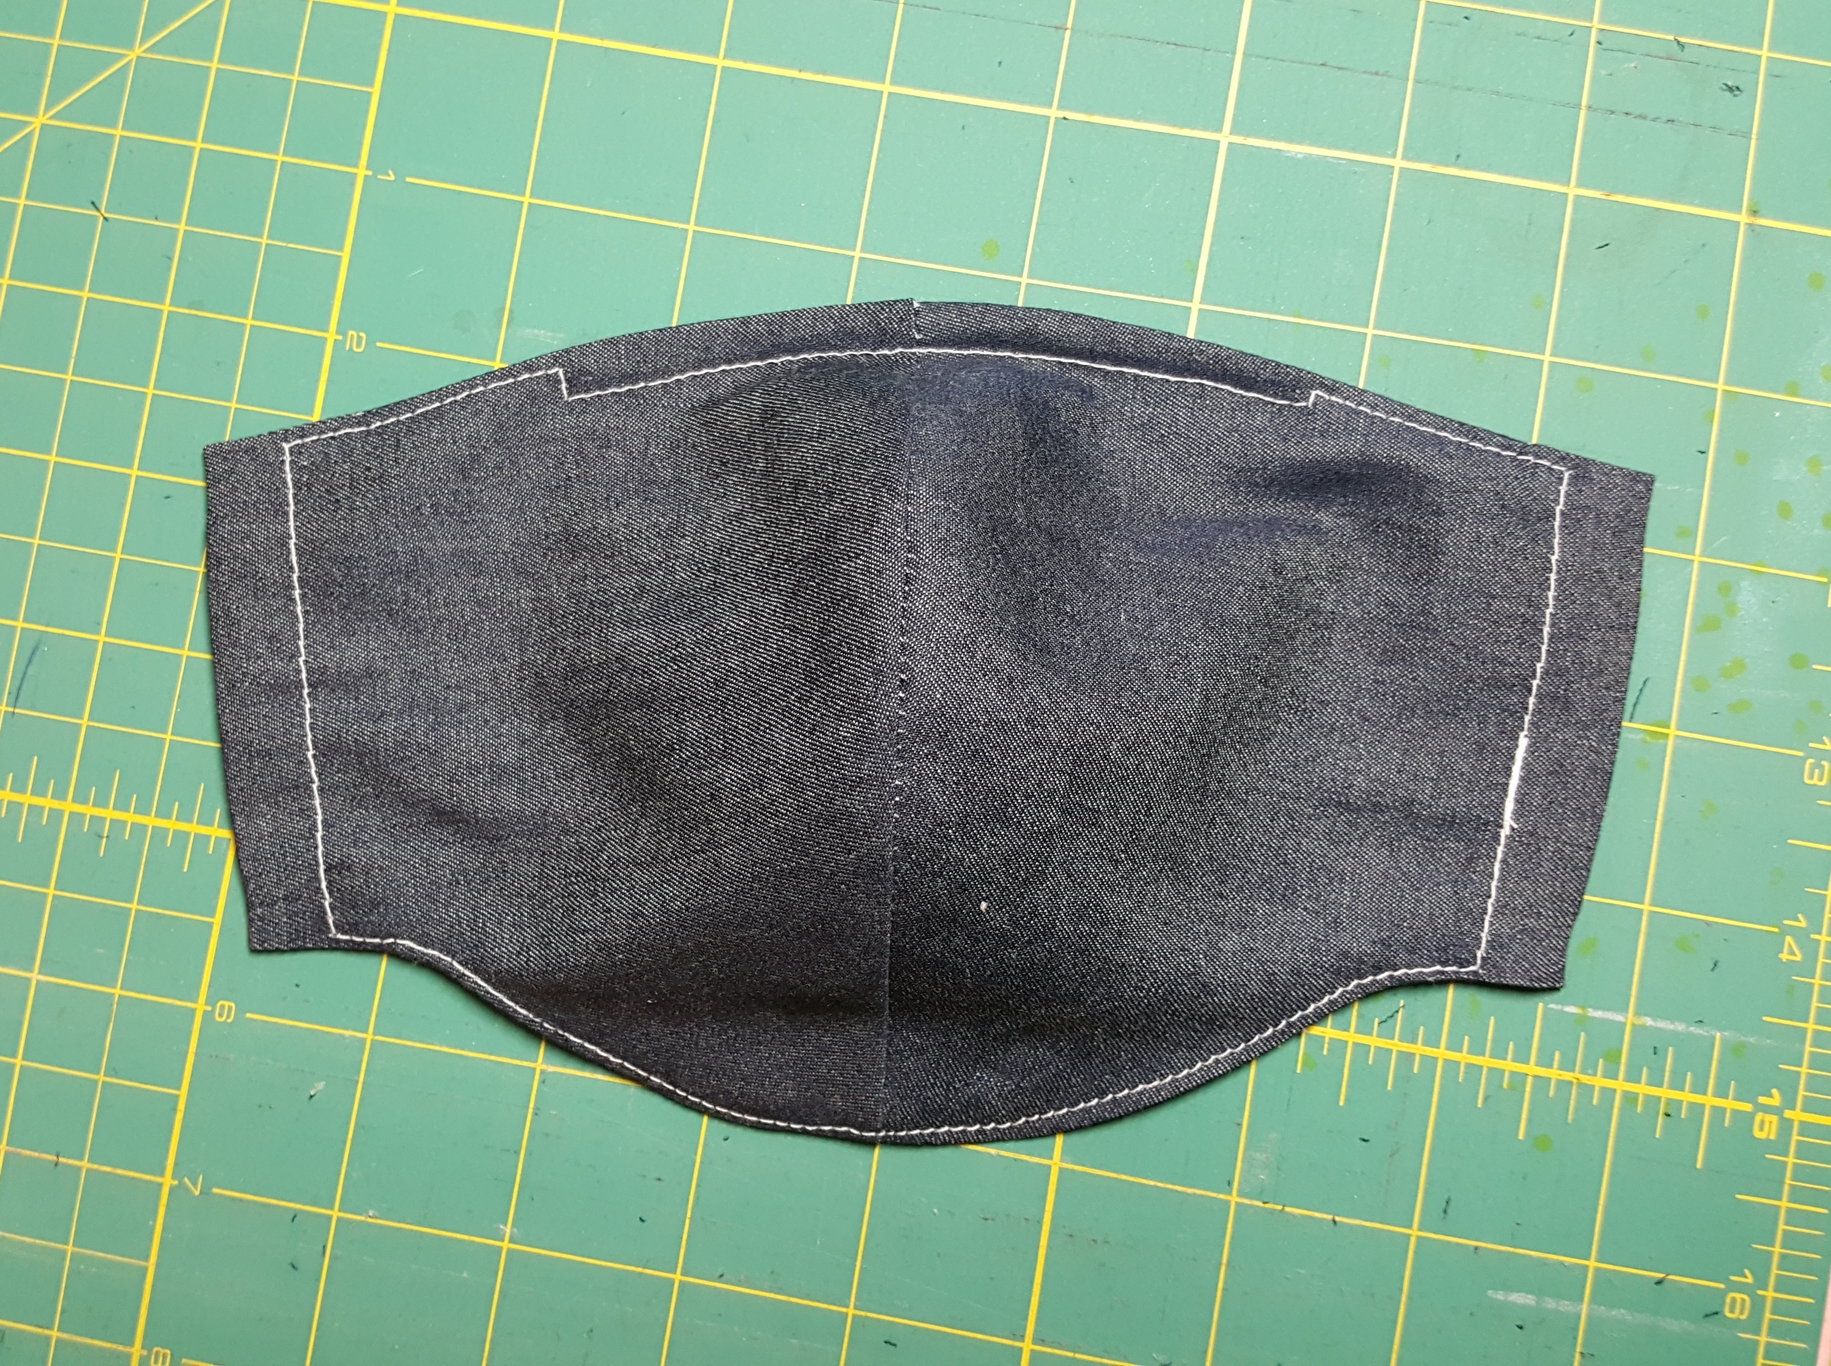
Again, I trimmed the curved seam allowances with pinking shears but you may clip the curves instead if you wish. If using pinking shears, only trim to within 1/4" of the stitched line. Clip the curve at that point, fold the seam allowance over as shown and press flat (I used a tiny piece of fusible material to keep the seam allowance in place but found it isn’t necessary. You can choose this option or a dot of fabric glue if you want to)
20200416_201443
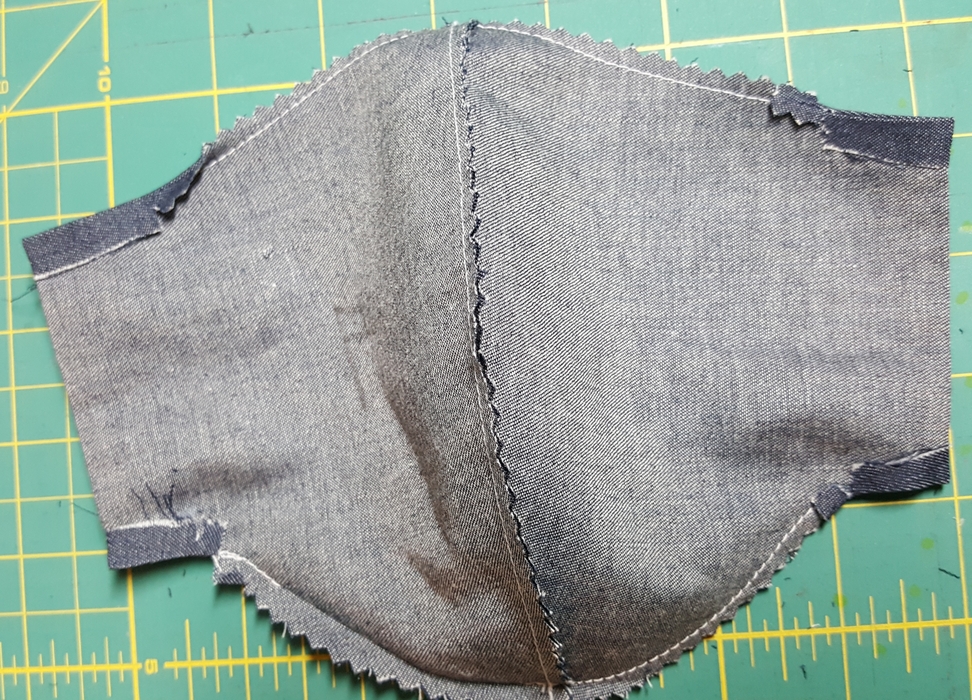
Turn right side out through the gap in the stitching and press all the edges flat taking care with the seam allowance along the gap and the corners, if they poke out use a skewer to push them back inside and press them well.
20200416_201423
If you want to insert a nose wire, this is the time. I have it pinned into place at the very top of the mask. If you are using a piece of wire you cut yourself, curl the ends around with pliers to keep them from being sharp enough to poke through the fabric.
20200416_201406
Sew from 1/2" from the corner as shown, it’s not necessary to make a separate sewing line for the wire, simple sew around it like I have here. As long as you are edge stitching close enough to the actual edge of the mask, which should be easy with so few layers to get through, the wire should be quite secure. (the corner seam allowances are now stitched very securely in place and should not poke out, just take care when threading the cord through at the end)
20200416_201344
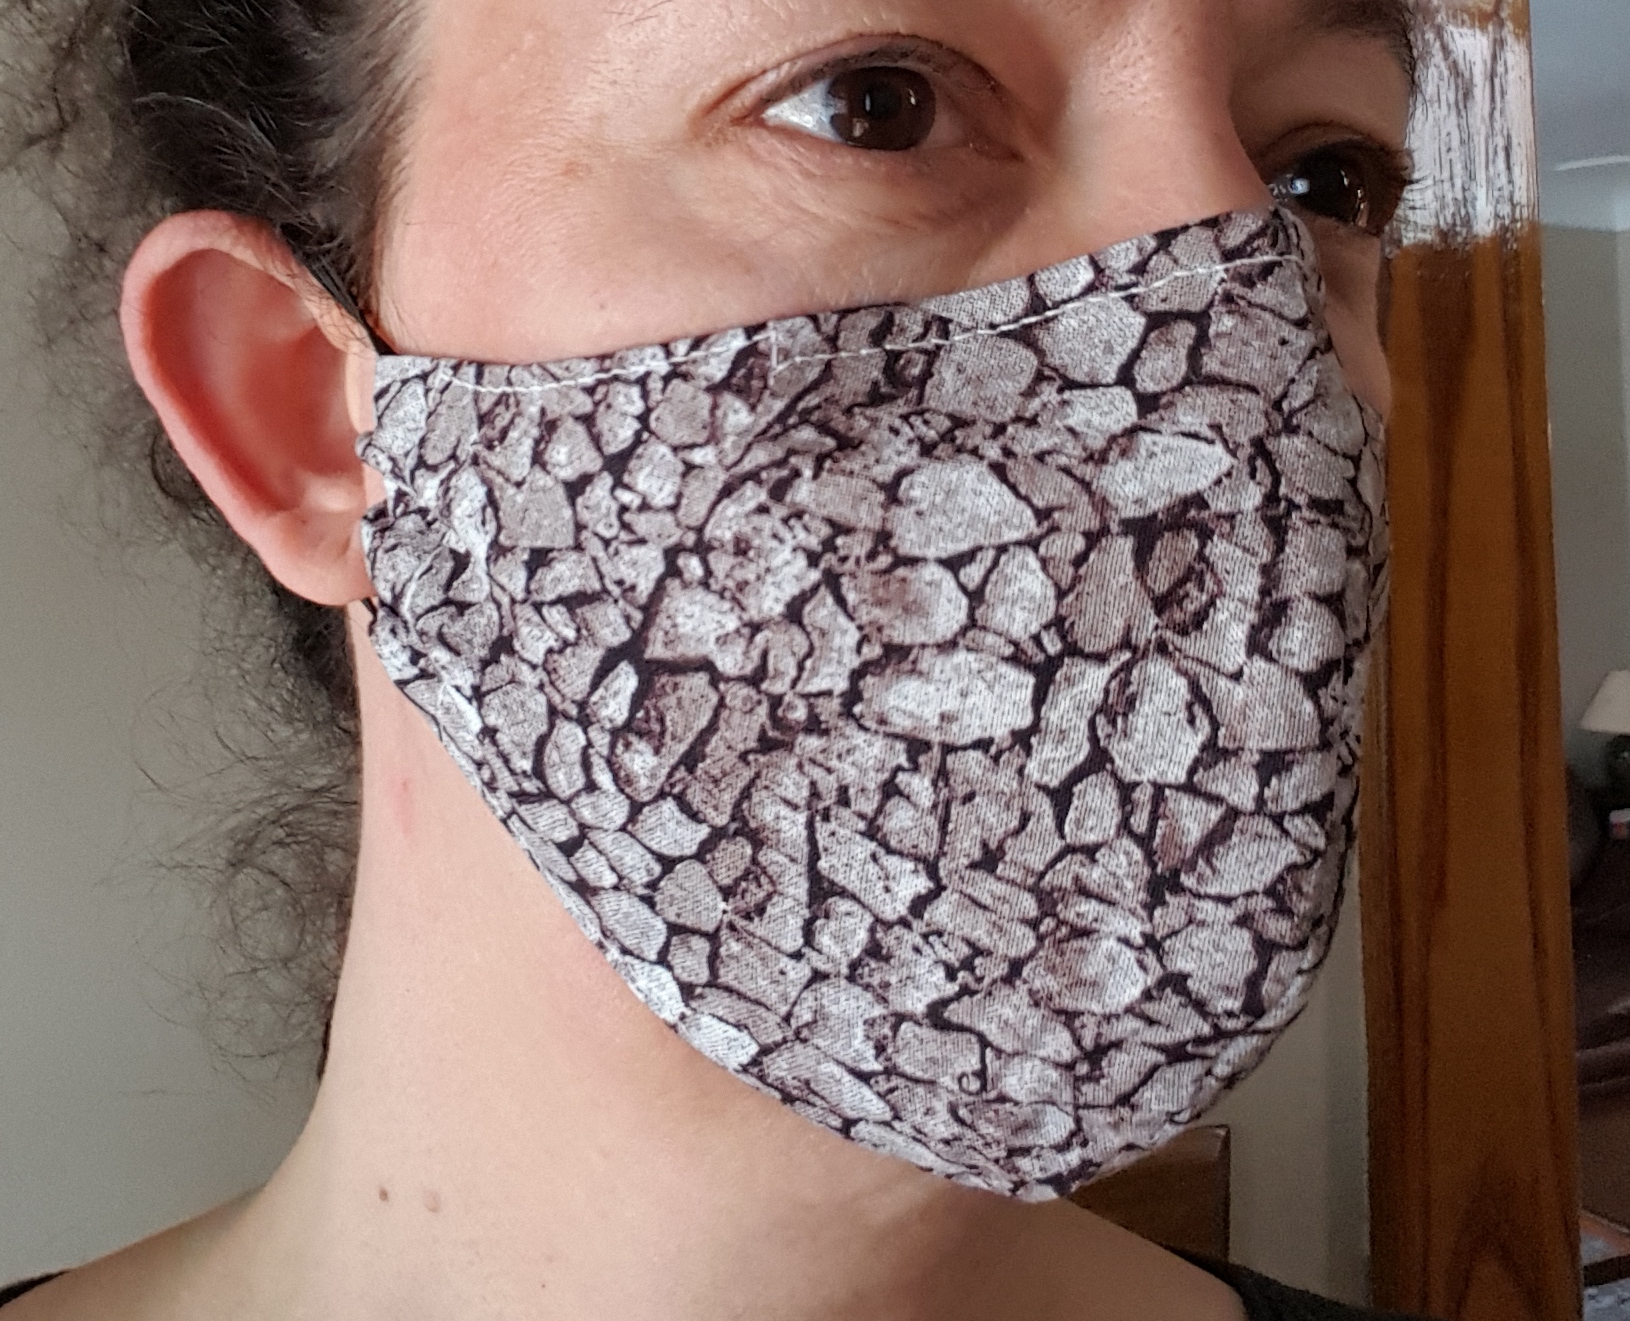
Now you can use a loop of elastic on each side for behind the ear ties or you can insert a piece of ribbon or bias as shown. I cut a piece of tshirt yarn. I like this option because it can be tied securely and keep the mask tight to the face without being too constricting. The edges can be easily gathered to fit any shape face because they are on a fold of a single piece of fabric rather than multiple layers of fabric and bias binding
20200416_201329
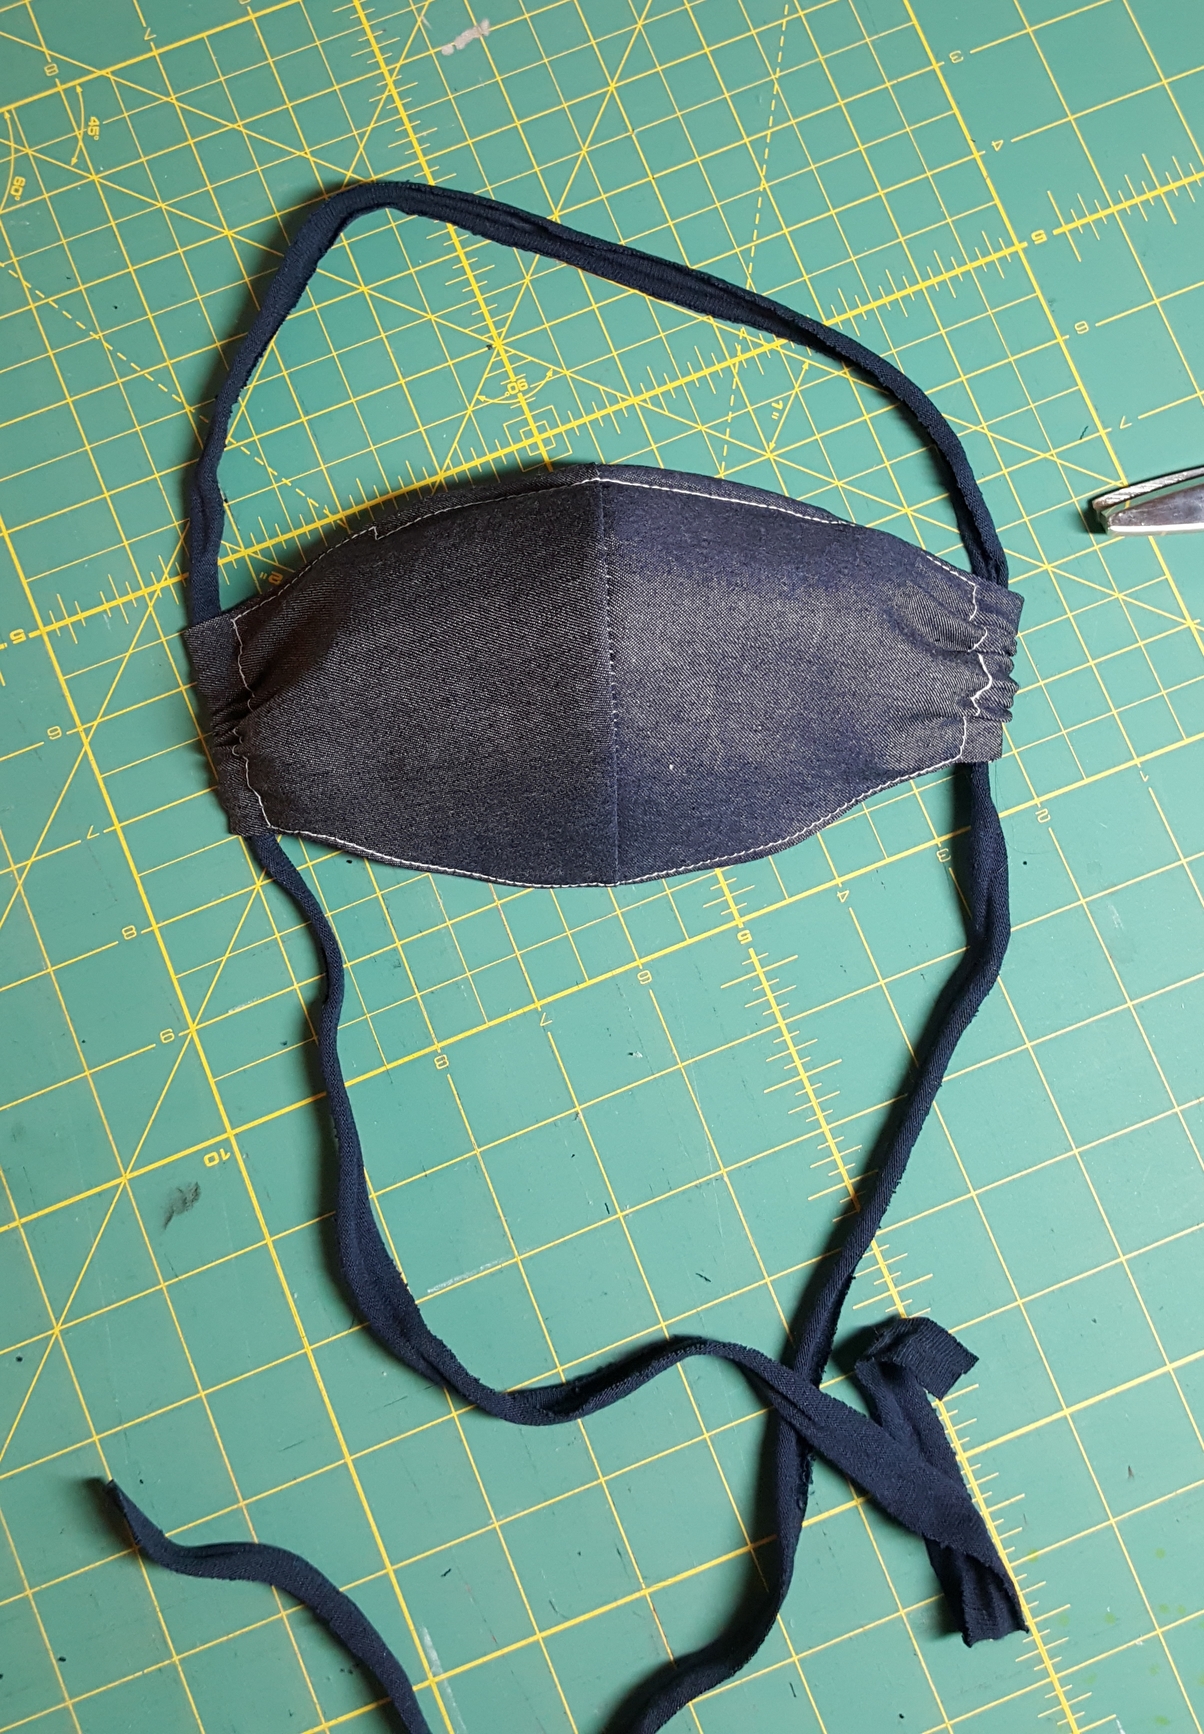
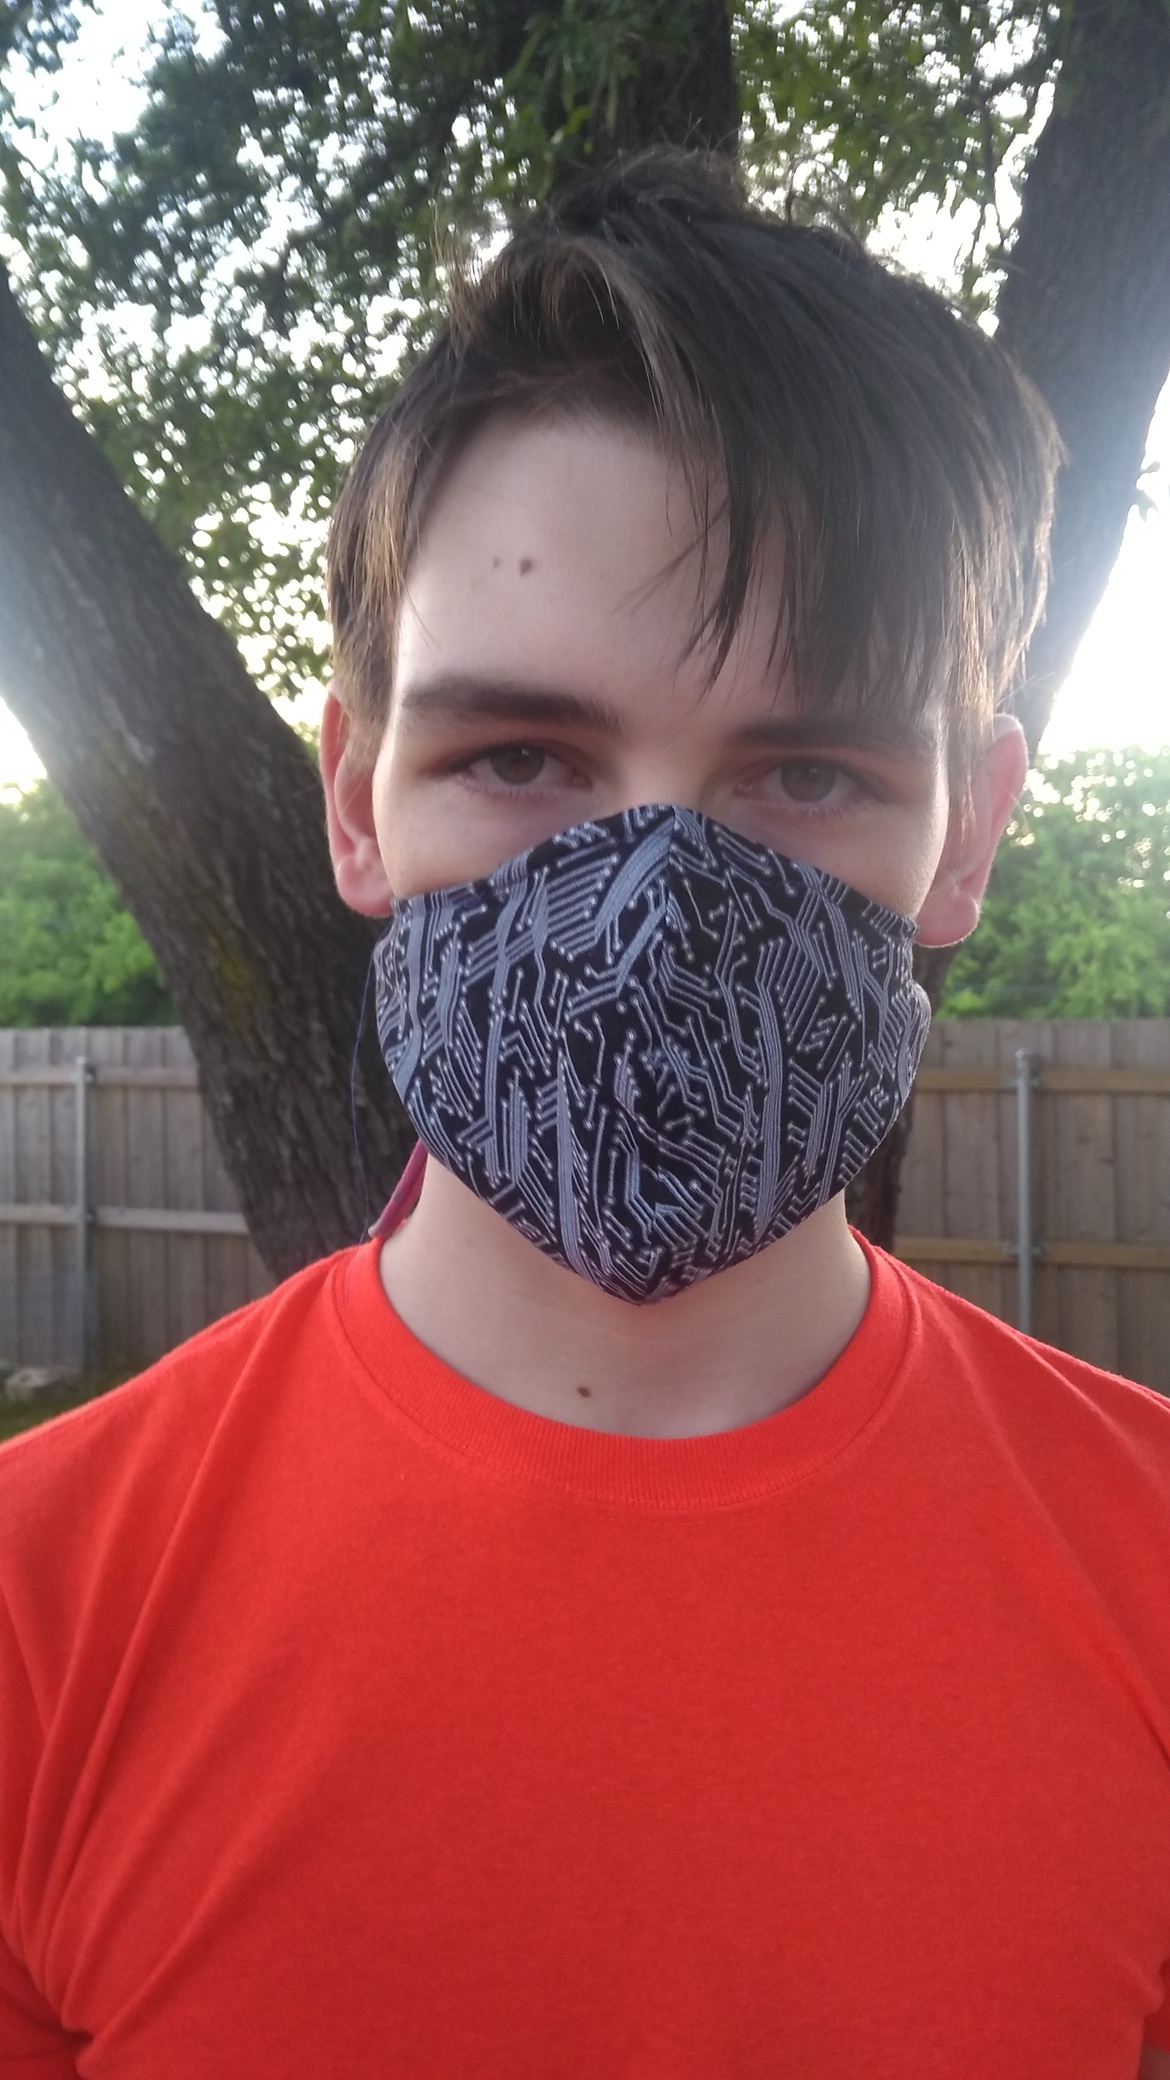
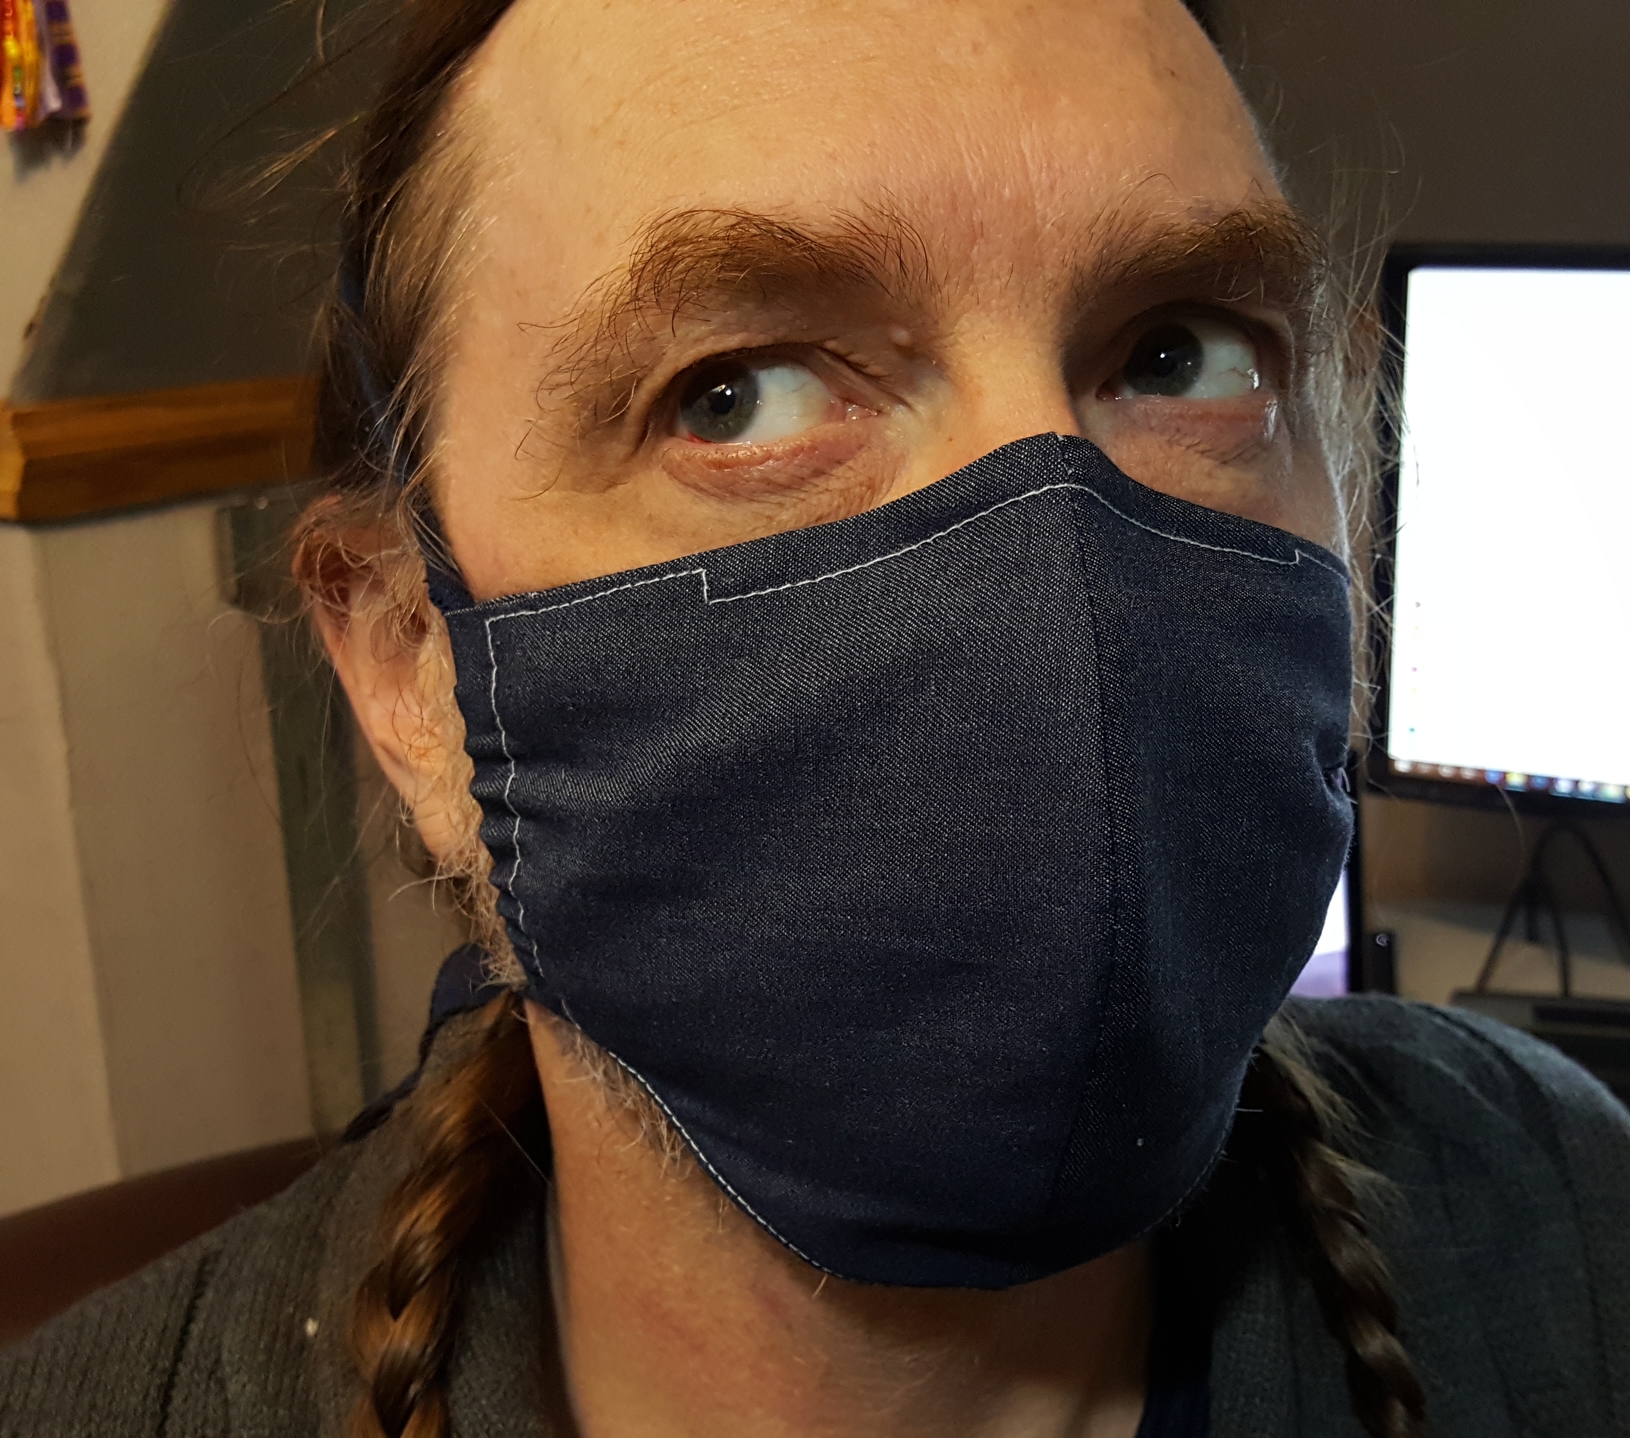
The man said it fit well and was comfortable and also secure.
20200416_201246

I did not include the option for a removable filter for this mask because it’s curved and paper towels etc are not so they just don’t fit very well at all. If another layer is desired, iron some fusible interfacing onto the front pieces, ending where the original pattern piece did (before the 1.5" that was added). That adds another layer of protection that will keep the same shape as the mask and doesn’t need to be fiddled with. Most of us are wearing these things out for grocery shopping though so another layer is not really needed. This is just about reminding us to keep hands off faces and to keep any moisture in our own areas.

ETA this article with info from the CDC regarding filter stats basically says 2 layers of fabric are 74% effective (roughly the equivalent of a surgical mask). Even better if you add a layer of tshirt fabric to 2 layers of tightly woven cotton.

19 Likes

I really like how you incorporated the nose wire in with the stitching…I found that part cumbersome to go back and make two stitchings along the ends…I see that you extended the wire as well so that it can be clamped on the nose and yet flair out over the cheeks so as not to pinch down the nose, a complaint I got.

The shape is good and reducing the number of cuts is also much more efficient…less sewing of the elastic insert edges as well!! I hated that part…I am not sure about the finishing of the edges…I don’t want to stop to use fusing or glue…trying to see how maybe it can be tweaked a bit to be sewn…

I will give it a try tomorrow when I start a fresh batch of masks.

1 Like

This turned out great! Great innovations!

1 Like

I look forward to seeing what you think of it, thanks for doing that.
I feel like I could replace that edge fold with a piece of bias but that adds more supplies, cutting, and steps rather than reducing. The trick it so clip at just the right juncture so the seam allowance folds down easily. Then, once it’s well pressed, it stays in place for turning. The clip is at about 1" in from the edge but the finishing edge stitching lands at 1/2" so catches it and that’s what keeps it secure for the duration. The fusing stuff was just to make sure it worked this first time but I really did find it superfluous.
And yes, the nose wire, it has to be long enough so it doesn’t poke the face. I found a shorter wire did that to me and it’s all I could think about when I had the mask on!

Thanks for sharing this new idea! I’m going to try it too.

1 Like

look at the pattern that @GMPNQ posted on your suggestions thread…I was thinking that to save elastic and time, just to enclose the elastic in the ends and sew them shut…no tunnel for the elastic needed…I wonder if a trimmer fit around the face would be all to fit it more closely…

1 Like

Ooh thst IS much simpler! Great job!

1 Like

I really like the simplicity of this, especially after cutting four pieces, clipping, pinning, etc. I’m going to try it out tomorrow, thank you.

2 Likes

Nice job of simplifying the pattern!

1 Like

Excellent. I love how you’ve collaborated on this design. We’re still at home and so not wearing masks in public-yet. I’d say it’ll come once restrictions start to get relaxed. I’ve only made single use paper ones so far, but if I need to make fabric ones, I’ll definitely use this pattern and tutorial… Well done wonderful woman :clap::clap:

1 Like

You are SEW talented. Also, mine do NOT look like this. I love it’s adjustable, and does not require elastic! This is brilliant, my friend!

:heartbeat:

1 Like

I have done this, with a variant of the HK mask. The elastic is stitched right into the side seam, it’s not adjustable unless you tie a knot in the cord to shorten it or add one of those behind the head extenders.


This was constructed with the recommended opening for an optional piece of filter material. They recommend a piece of paper towel, etc. See, the curved shape, how do you stick a flat piece of anything in there? Well, you don’t. It bunches and ends up pushing the lining fabric against the face which is uncomfortable and changes the fit so the mask is no longer securely against the face, which is the entire point of a fitted mask in the first place. This was the experiment that decided me against making any fitted mask with an optional filter opening.

2 Likes

@Magpie
Marc and I want to finally jump on the bandwagon and start to make some masks, following your tutorial.
I printed the pattern in various sizes from the HK website.
I noticed that it has a bar saying ‘10 centimeters’ that is actually 7.3 centimeters long.
So my question: did you enlarge the pattern before your printed it?

2 Likes

I printed in actual size, there should be a function for that on your computer?

We’ve run out of ink and paper so I have been copying images onto the computer then putting them on the screen in the correct size and tracing onto tissue.

I made the medium sized mask today but I tweaked the pattern again a small bit and tried with around the ear elastic. Because the side is only 2 layers thick it still gathers a bit with this tie which is great as it helps fit more snugly to the face. This one will be for a friend who is about my size.

3 Likes

omg–it is near perfect!!!

2 Likes

Can I upload a PDF here? I am going to see if I can figure that out to post the pattern. I did a bit of final tweaking and you are right, it’s a very good fit. Very comfortable though both my kids complained they couldn’t breathe with it on. Come on, kids. This is only 2 layers of quilting cotton! When it’s finally safe to venture out, we are all going to be advised to wear these things all the time. Better get used to it.

1 Like

I used quilting cotton as the outside and a poly blend sheet for the lining…I wore the mask for over two hours while watching Phantom of the Opera…I barely noticed it was on, so kids, get some exercise and improve your lung capacity! ha

2 Likes

Thank you so much for the simplified pattern.
I used your technique and modified craftpassion.com facemask pattern to suit it.


Happy Teen was the result!
Other masks irritated his skin, but reducing the bulk with your technique fixed that!
Thanks again!

3 Likes

Excellent! I am working on further refining the pattern and steps but really, the idea could be used for lots of patterns that are out there. That bulky side seam is not necessary at all, I can’t see how it’s comfortable for anybody’s face.

2 Likes

Bulky side seams also don’t hold as tight. Seeing that we are using this for pollen as well, a good hold means less sneezing later!

I was playing with adding a buttonhole to the inner layer for those that want a removable filter not touching their face. My machine has a buttonhole feature, so it shouldn’t be too hard. :thinking:

2 Likes