Last fall, when my parents came to visit me in Japan, we went to a deco sushi lesson and learned how to make two types of sushi rolls that make gorgeous pictures when you slice them. Our teacher gave us instructions to take home for the two types we made, and today we tried making them at home for the first time! We couldn’t find all the same ingredients we had access to in Japan, but we did our best, and for a first attempt without a teacher, I thought we did pretty well! So far we’ve only done one design, the plum blossom, but we’re hoping to try the other design tonight.
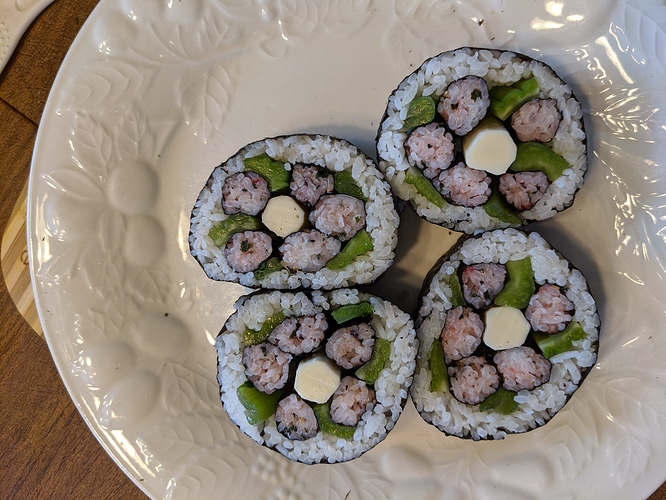
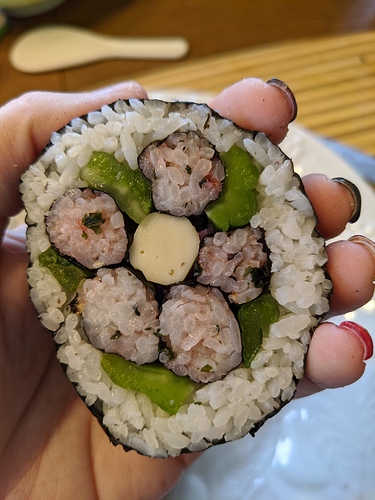
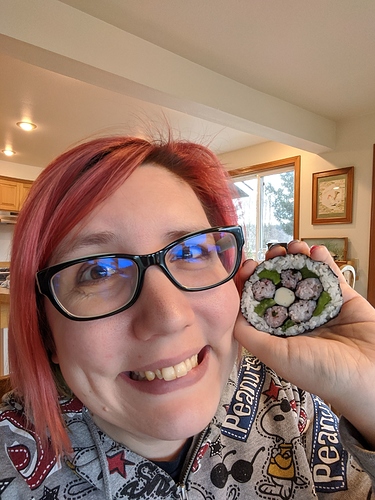
Here are my plum blossoms!
Here’s a rough rundown of what we used (amounts are per serving):
-200g sushi rice*
-ume shiso flavored furikake (or whatever you like to turn some of your rice pink; in Japan we used finely minced cod that was dyed pink; you could probably also use crushed smoked salmon?)
-2 sheets of nori
-1 stick string cheese
-5 strips of pickled takana (this was the best we could find, but in Japan we used pickle nozawana, or rape greens, which had a much better shape. We were thinking pickles of young asparagus or green beans might work too, with the nice rounder shape?)
You’ll also want bamboo sushi rolling mats.
*To prepare sushi rice, mix 2 Tbsp sushi vinegar/300g cooked sticky rice, while rice is still hot. If you can, make the sushi rice several hours in advance so it can cool to room temperature WITHOUT going in the fridge; just cover it with a bit of cheesecloth while it cools.
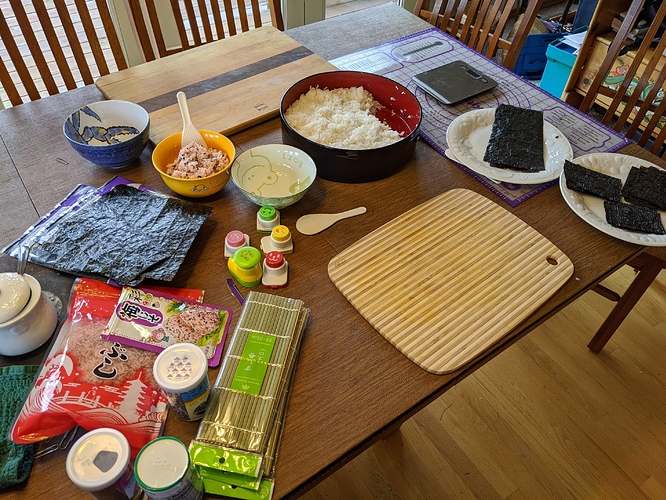
Here’s our table as we were setting up (there’s a lot of stuff pictured here that we didn’t use for this recipe).
Once you have all your ingredients laid out, you’ll also want a finger bowl for wetting your hands. The rice will be much easier to handle with wet fingers!
First, take some kitchen scissors and cut both sheets of nori in half lengthwise (the hot dog way!). Set two of these halves away (you actually won’t use one of them), and cut the other two halves into three equal pieces each (hamburger way, if that works for thirds; you aren’t making super skinny strips). So you should have six small pieces, one long piece, and one extra long piece you won’t need.
Mix whatever your pink coloring is with 100g of your sushi rice, and divide that into 5 equal sized balls. The remaining 100g of rice can stay white and wait a bit for now.
Take one of the small pieces of nori and spread one of the pink balls of rice in a log shape along one short edge of the nori. The rice will be much easier to handle if you wet your fingers first. Then wet the opposite end of the nori to help glue it closed, and roll with the sushi roller. Repeat this four more times, until you have five pink rolls.
Trim your string cheese until it’s about the length and thickness of one of the pink rolls. Put three pink rolls in your hand, place the string cheese on top, and put the last two rolls on top, and squeeze into a flower shape, then set aside.
Squish a few grains of rice into “glue” to attach the last small piece of nori to one end of the long piece, just to make it that much longer. After this is done, take the white rice and spread it evenly all along the longer piece right up to the edges, except leaving 6cm of blank nori at one of the smaller ends.
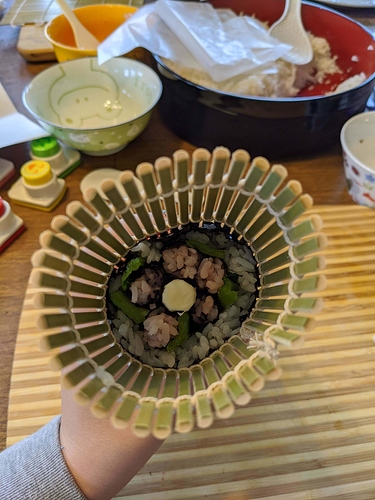
Next is the tricky part, especially if you don’t have the right shape of pickles. Arrange the pickles so that there’s one in between each petal, and then place the whole flower design in the center of your white rice. Use the roller to close one side of the long nori (the side full to the end with rice) up around the flower and press. Then make rice “glue” on the edge of the blank end, and use the roller to bring it up around and seal. Roll a bit more if necessary to get a nice round shape.
Then, wet a knife blade, and slice in half, then each half again, so you have four slices of sushi from your roll. You’ll want to wet the blade before each slice so that the cross-section stays clean.
Hmmm, I hope this is all clear! If not, I can try to take more step-by-step photos next time!
 I bet it taste good! I’ve been wanting to try to make sushi rolls for a while. My mom and I made rice balls also called Onigiri, filled with beef, honey pork, and ginger tofu. We tried spicy mayo tuna but the tuna was too watery and made the rice fall apart. It was a fun experience and I hope to try more foods!