Update!
I made several pairs for myself and others, and refined the techniqe. Tutorial has been edited with the changes.
I worked out this technique years ago, to make elbow length gloves for a costume.
I’m making some now for when I have to handle mail and packages.
use Tee shirt or other stretchy knit material. My sample is from the remnants of a nightshirt I cut up for a different project.
Make a test glove first and adjust if needed.
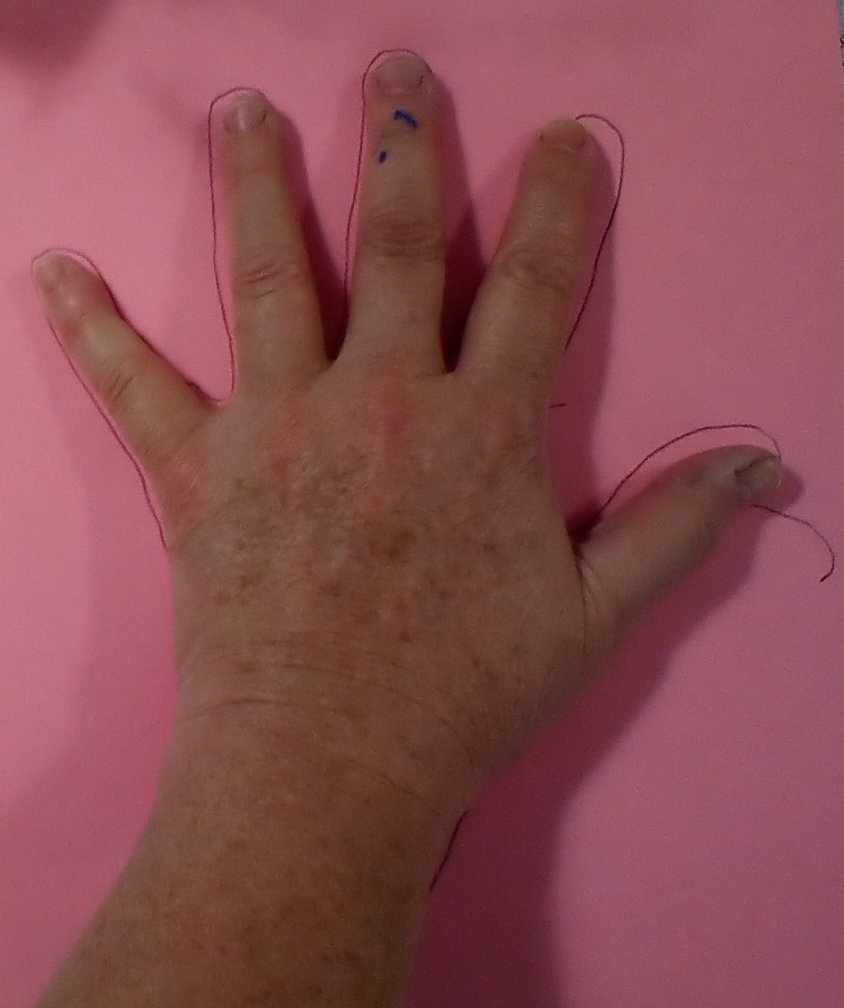
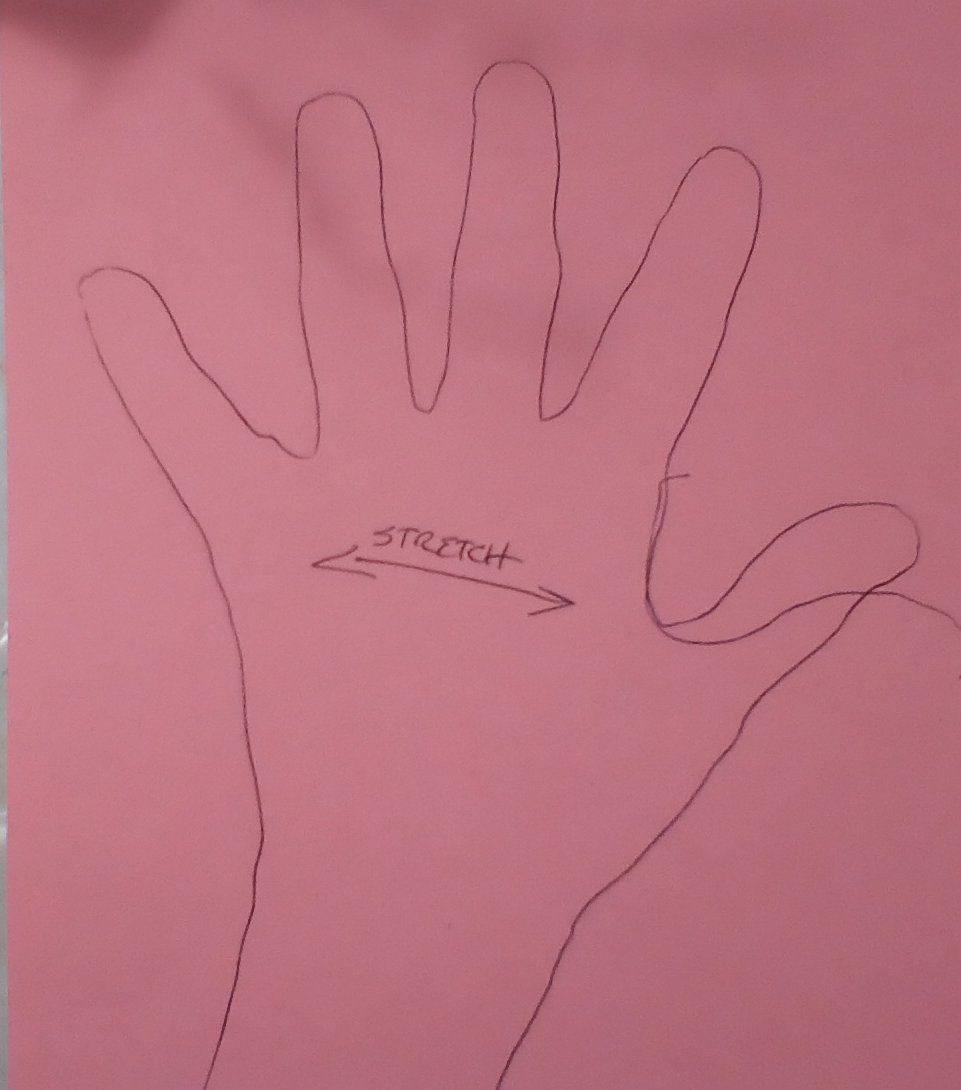
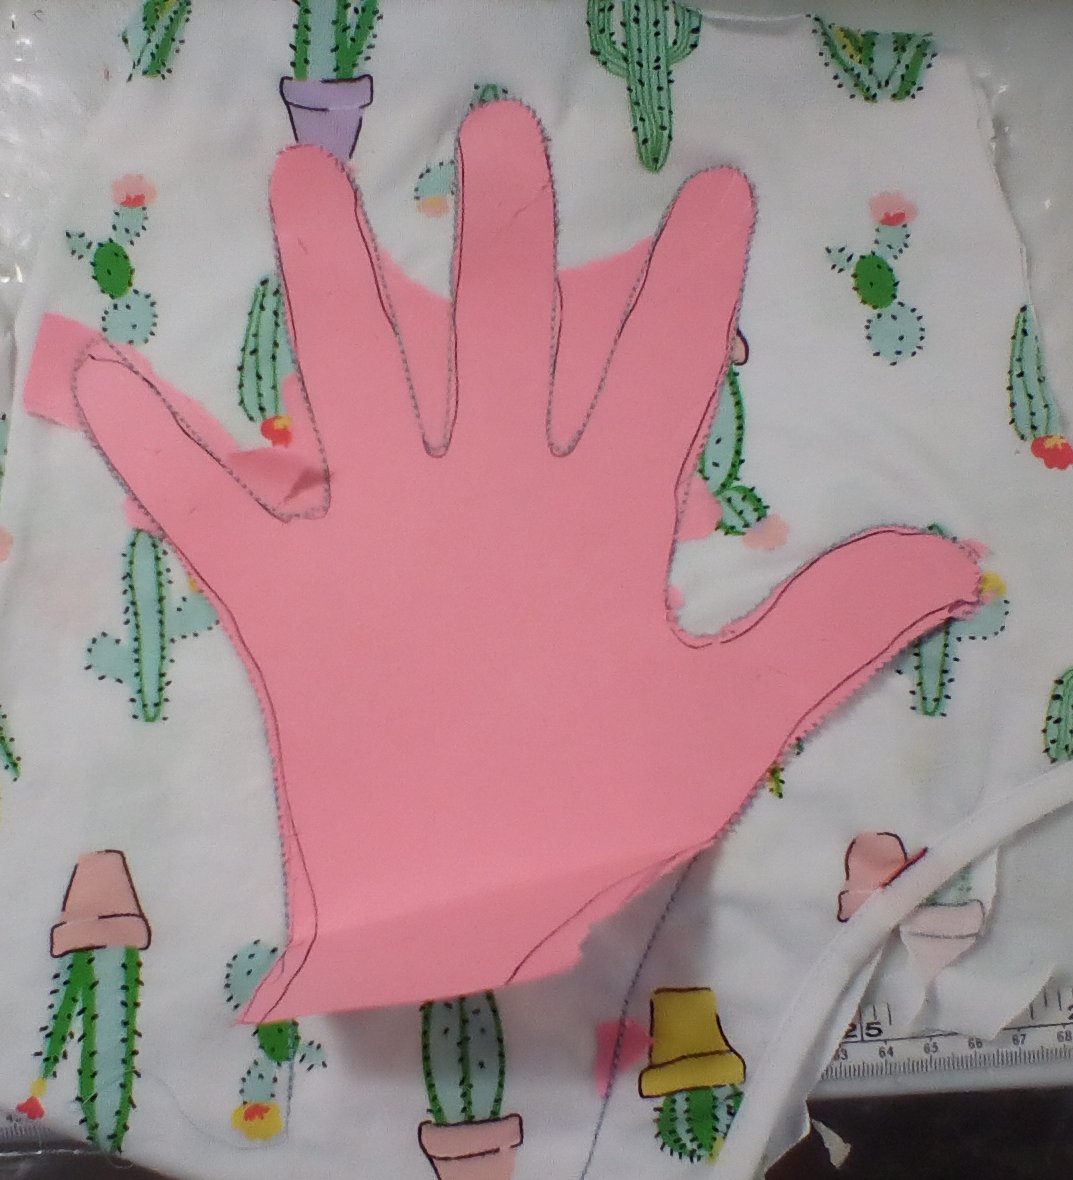
- Make a pattern. Put your hand down flat on a sheet of paper (I used construction paper because it was handy. Computer paper or junk mail works well. Magazine pages are my new favorite!), with fingers spread wide. Don’t spread your thumb out all the way, but keep it well separated. Trace around your whole hand. Add about 1/4" to the width and length of each finger, and add 1/2" on each side of the wrist.
Cut this out and use as a pattern to trace each glove. on a sheet of paper. The paper acts as a stabilizer and makes it easier to sew.
Make one test glove, adjust the pattern as needed. If you’re making several gloves, make a pattern out of cardboard for easy tracing.
 c
c
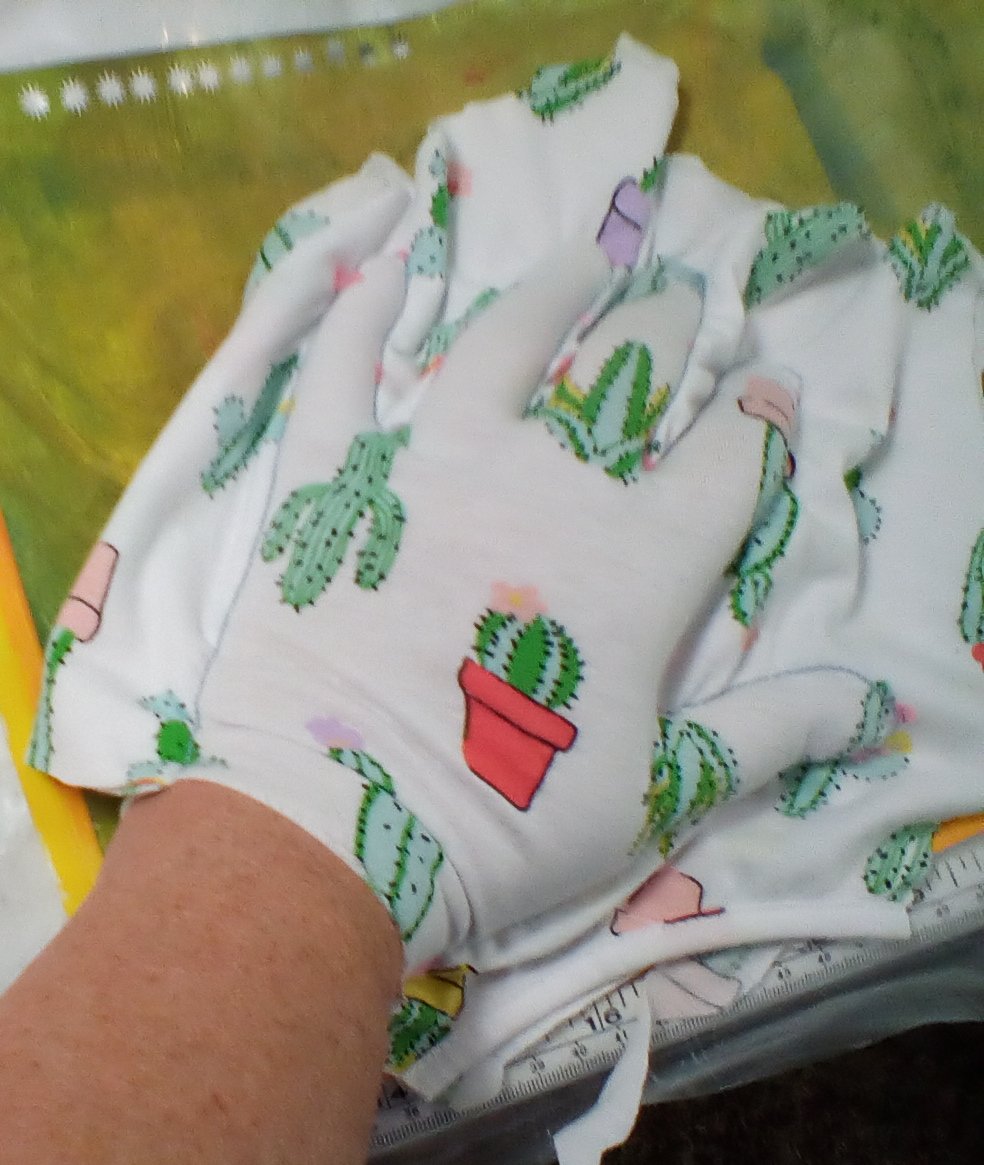
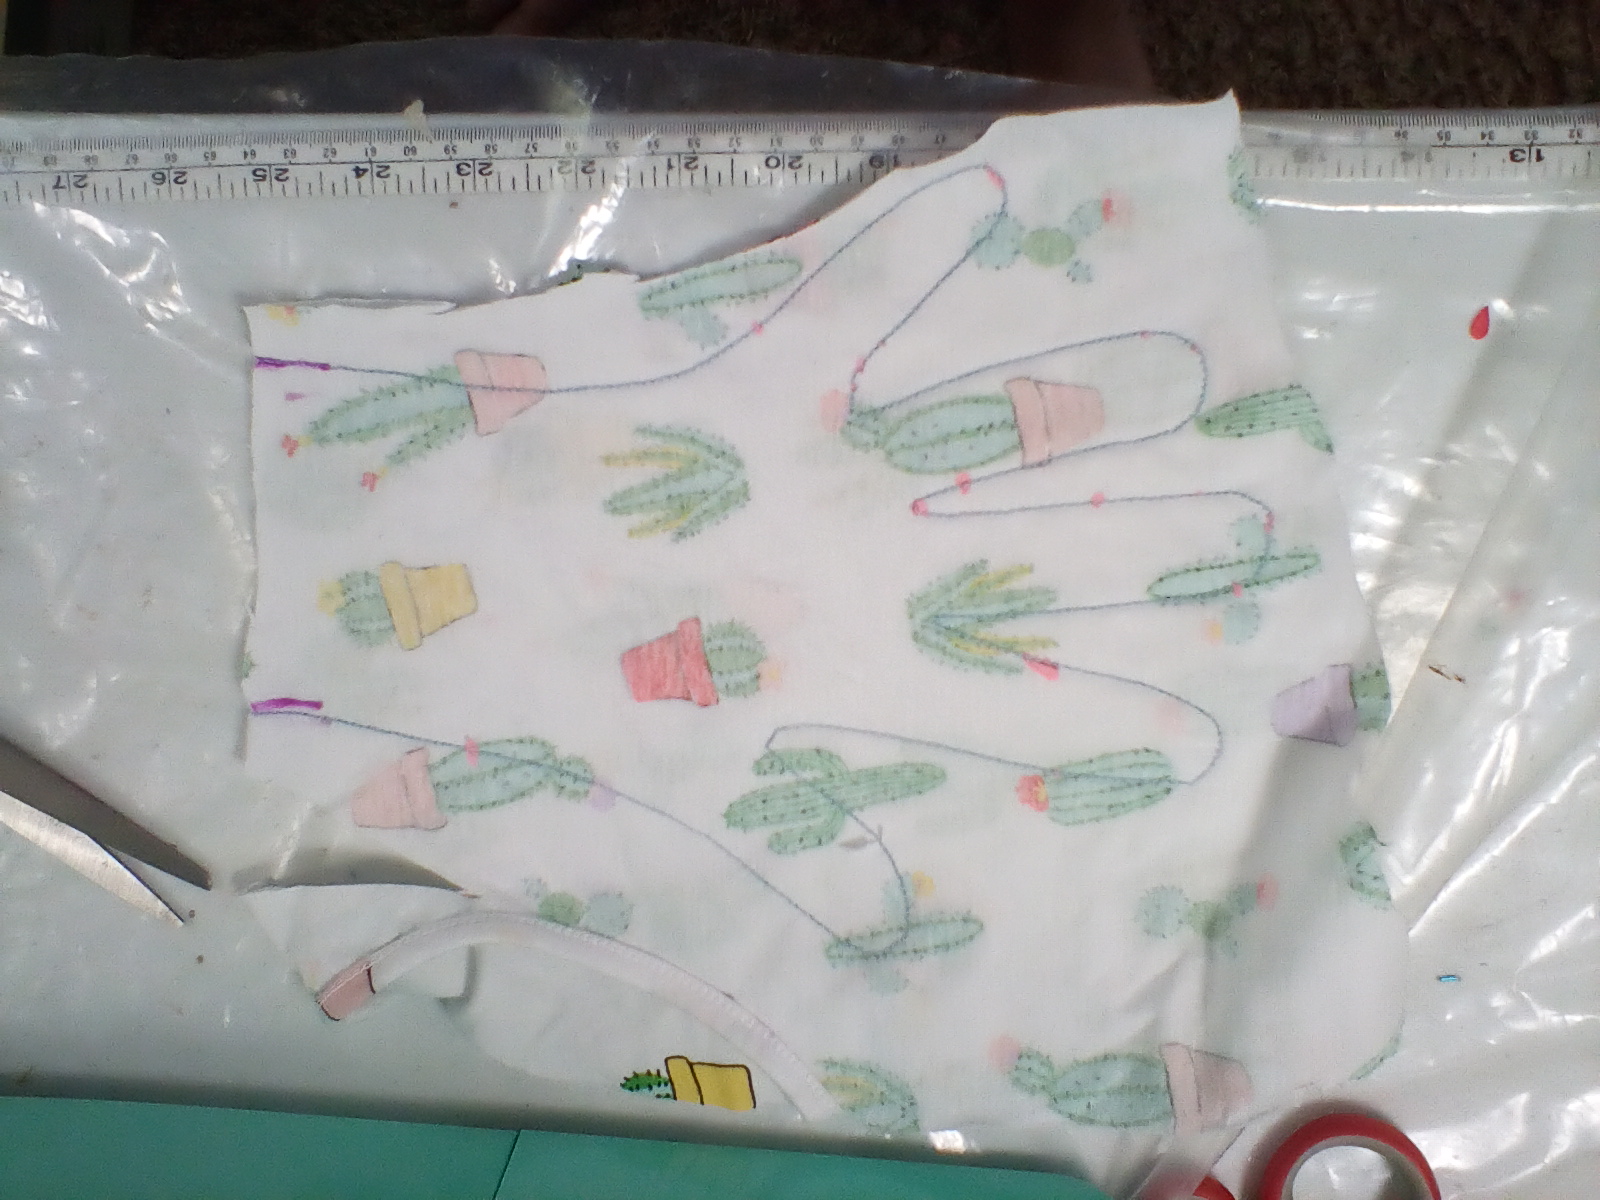
- Cut off excess paper, but not between the fingers. Place on two layers of knit fabric, right sides together (oops, I did my first glove wrong sides together, so some pix might show that. Please ignore my mistake.). The most stretchy direction of the fabric should go across the palm and fingers.
If recycling clothes for this project, try to place the wrist edge a hemmed edge for a nice finish.
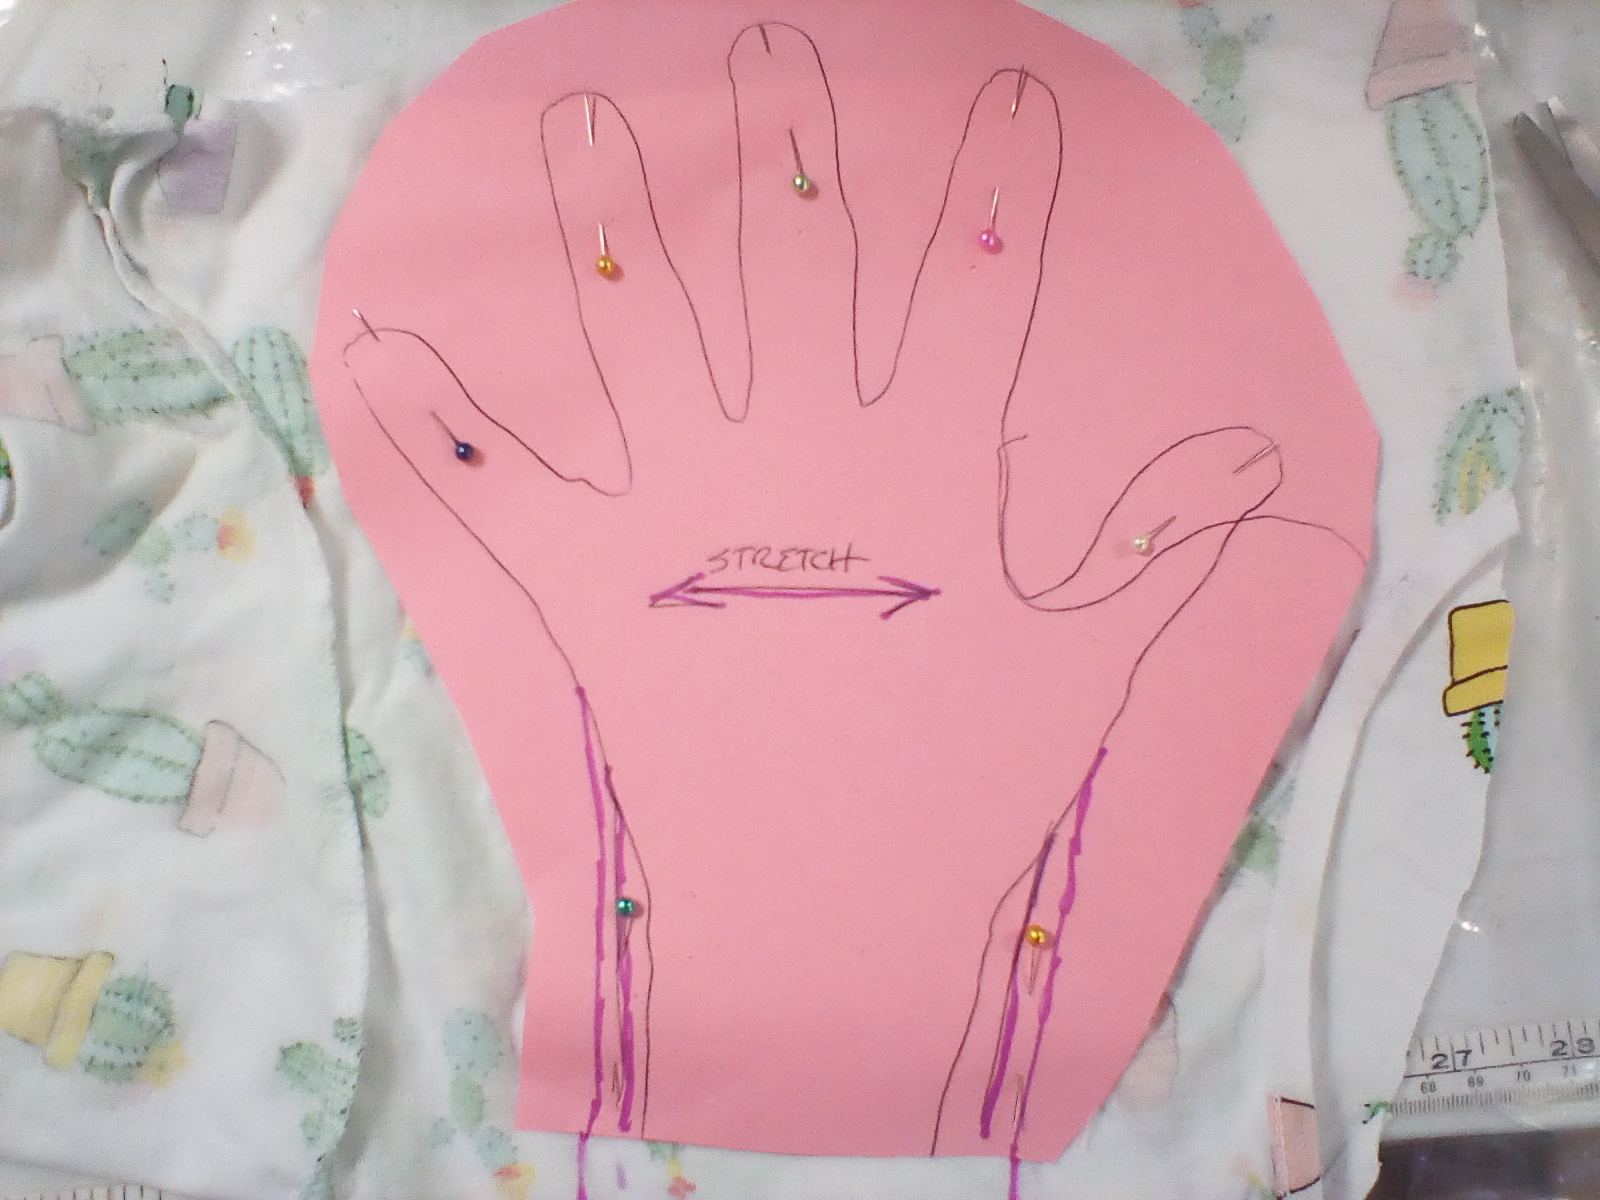
- Use a stretch stitch to sew just outside the line.
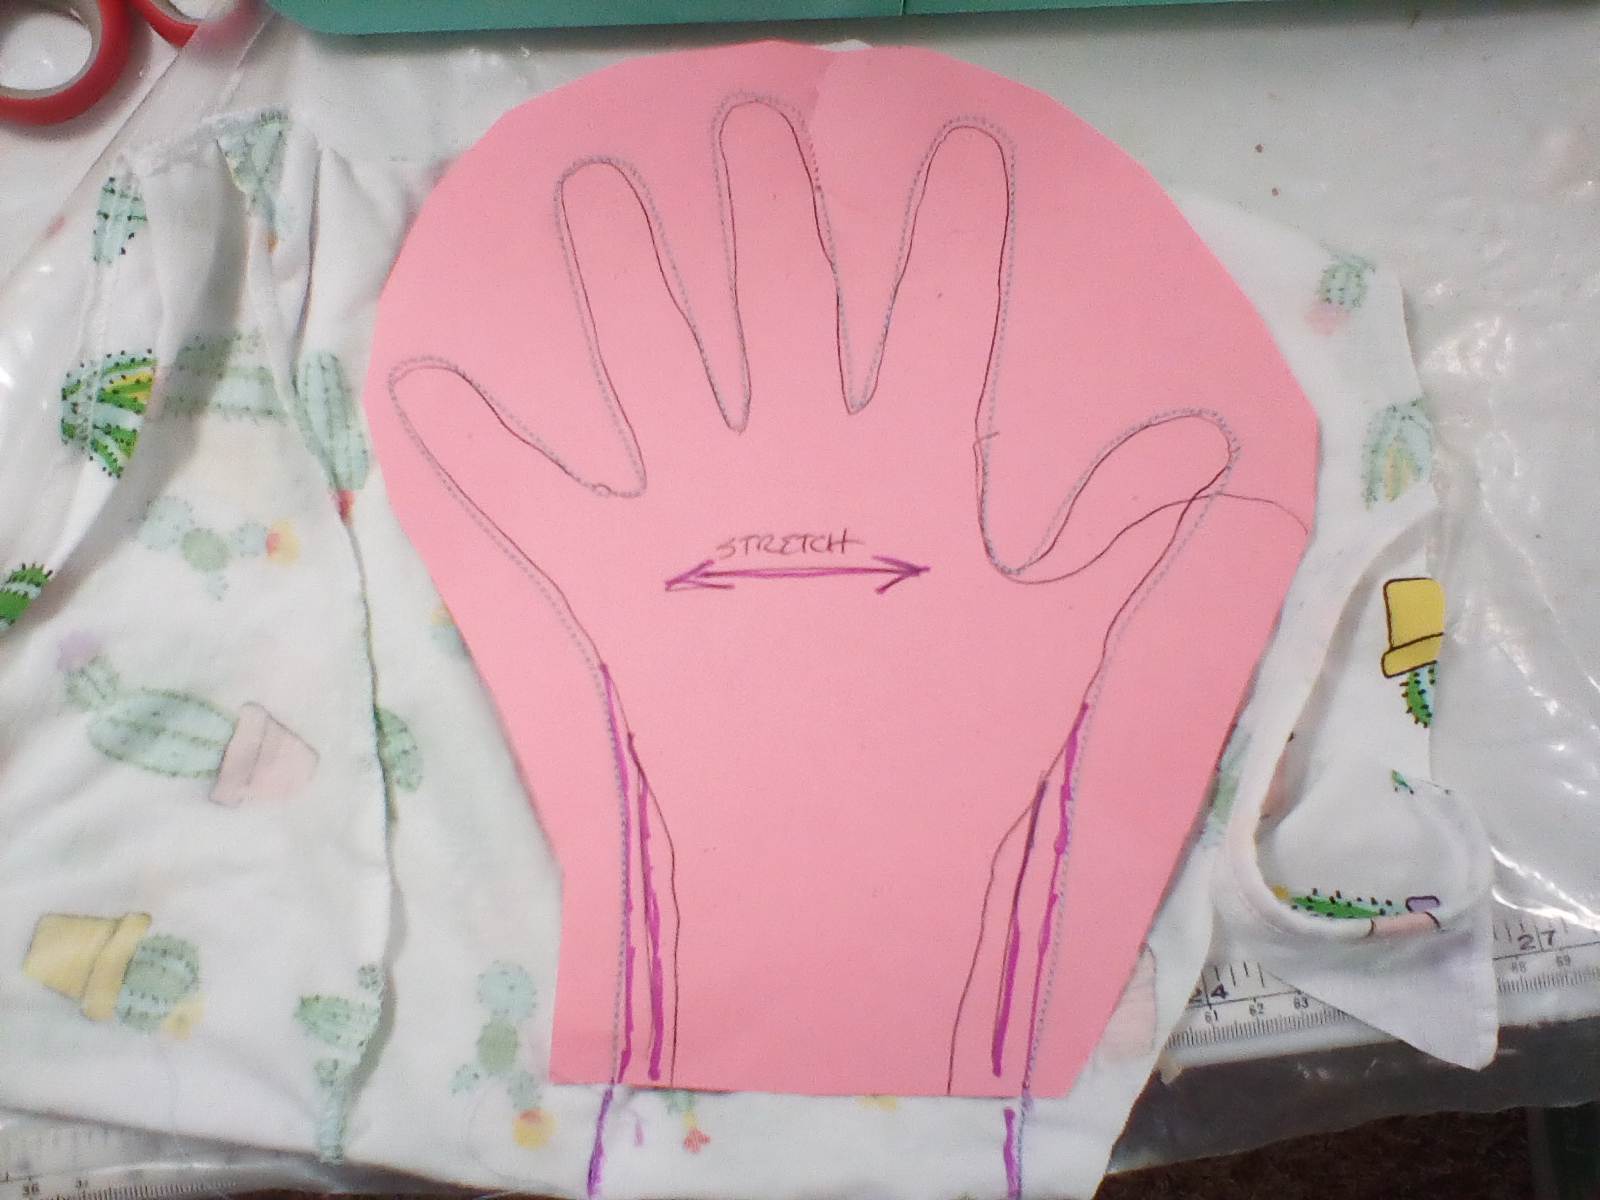
- Tear off paper.
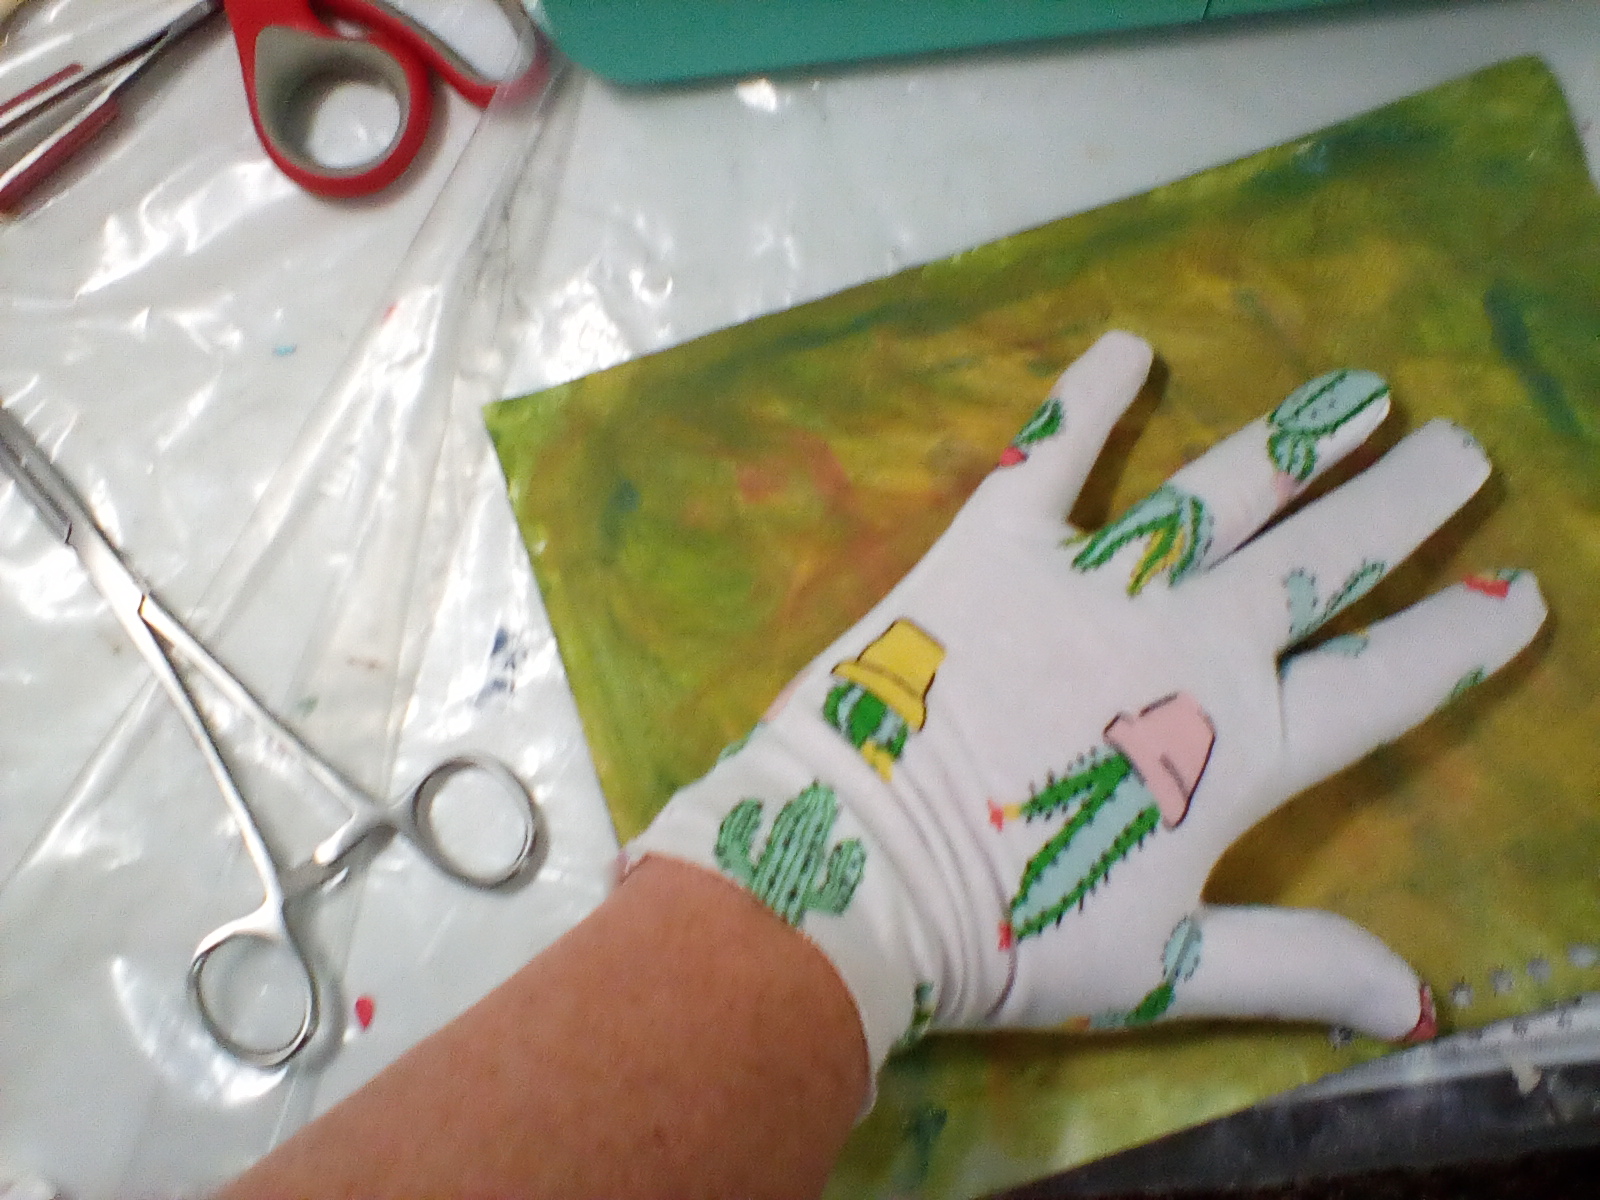
Try on glove. Use it to scare the cat. I wish I had a cat. Back to work.
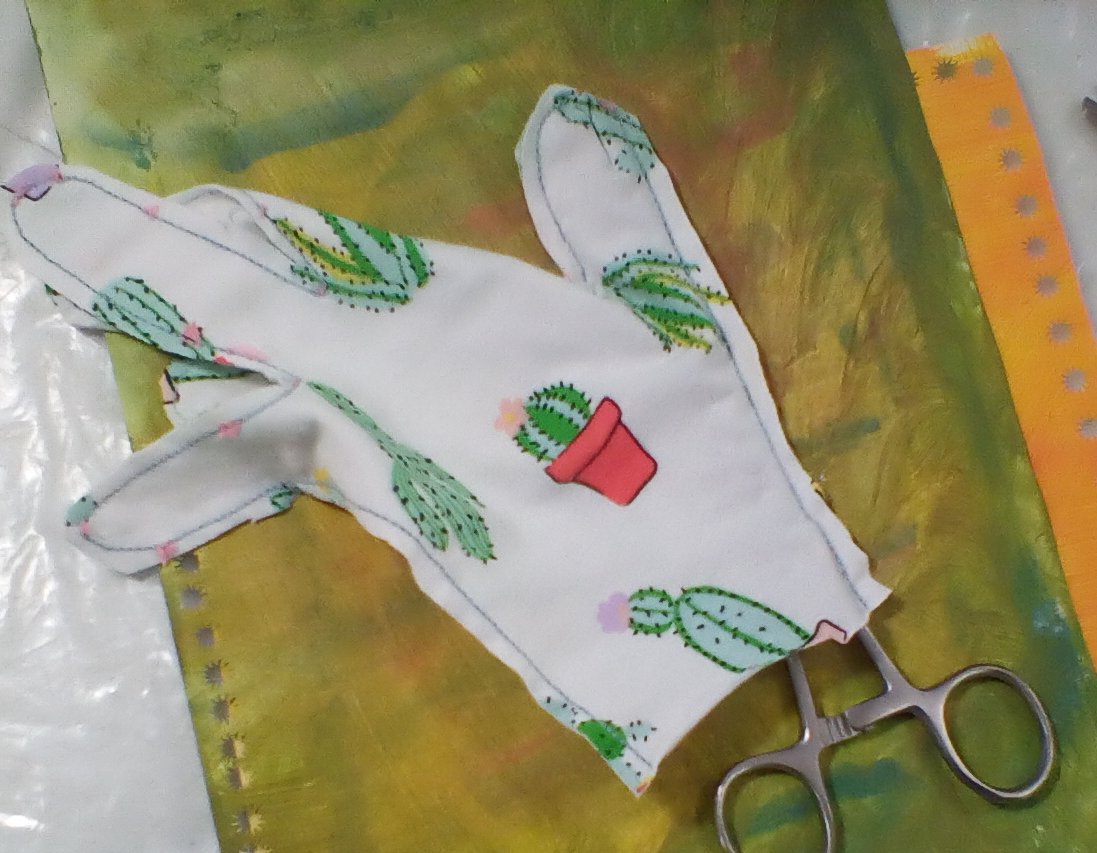
- Trim off seam allowance to 1/4" . If you accidentally snip through a seam, just restitch it.
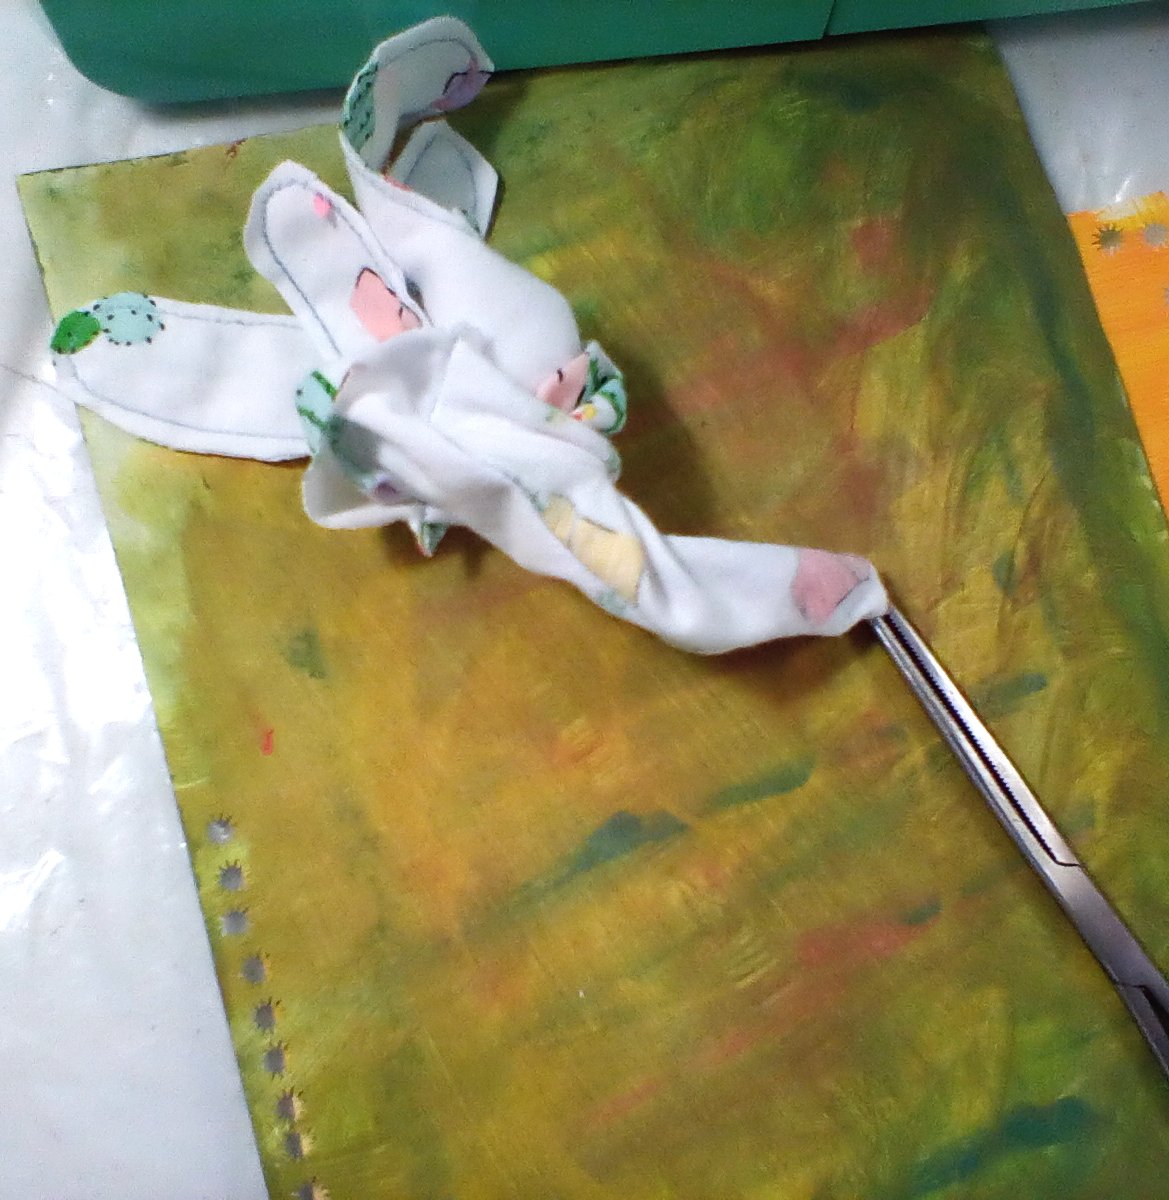
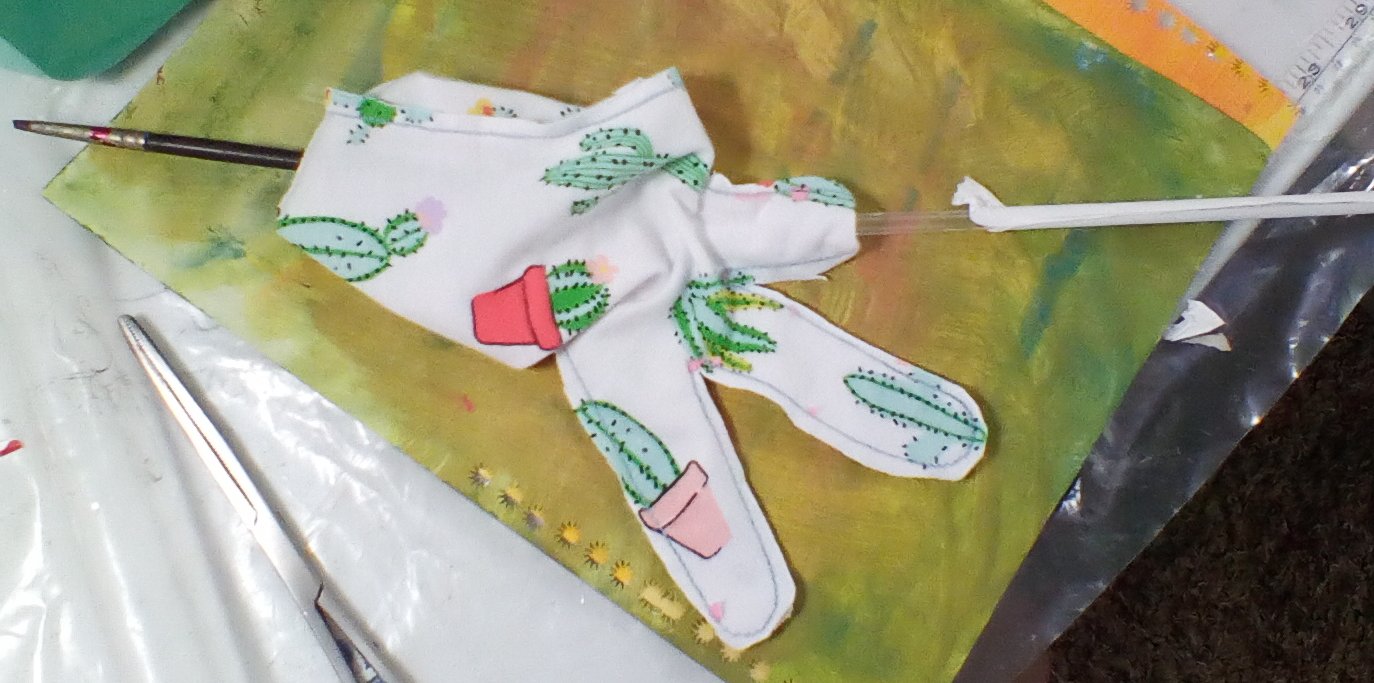
- Turn right side out: stick hemostats inside one finger, use them to grab the tip of the finger and pull it into the palm. Repeat for all fingers and thumb, then turn the glove right side out.
Hemostats look like this:

If you don’t have hemostats, what’s wrong with you? Just kidding. Stick the end of a paintbrush or knitting needle into a finger, and slide a straw or tube over it on the outside. Push the tube into the finger to turn it.
-
Put the glove on. Make any changes to your master pattern. I made the wrist longer on mine.
Try the glove on EACH hand; most of us are slightly larger on one side. -
Optional: hem the raw edge of the wrist if you didn’t cut it on a finished edge.
Make more gloves!
