I’ve only made about a couple dozen. I used this pattern and I like the result, but they were labor intensive. Not so bad for making them just for a few friends and family, but certainly too much fiddly stuff for mass production, in my opinion. The fiddly stuff was about pressing between steps, cutting curves, and top stitching. Of course, those were the same things that make the mask good in my opinion. After the first few I considered cutting them pinking shears to avoid the curve cutting, since the seams are small, but in my case that would mean I couldn’t cut as many at one time and cutting was one of the most time consuming parts. I did learn that once I got the hang of them, there was a significant economy-of-scale by making several at a time - however I had to balance that with the fact sitting at my machine for so long really jacked up my knee/hip/back.
They do have two layers and the original instructions had them sewn together on the ends. I left them open - adding a quick, easy hem - so whoever wore them could add a filter if they wanted.
I am not going out more than a couple times/week and then only wearing the mask for 30 mins max at a time, so I haven’t had issues with discomfort or damage from the elastic. I think people in my situation - which is a lot of people - could worry a little less about all the comfort issues and just wear their damn masks. I’m looking at you, 60% of people I see at when I go out!
1 Like
AIMR
(Linda -2026 time to regroup and renew :us:)
22
This is the pattern I settled on as my favorite. I lay several fabrics together and cut them with my rotary. I do the same for the lining. I chain piece all the center curves and then take a break in front of the tv to clip the curves. I then iron and topstitch the curves then back to tv to pin them together. I find doing them in batches of about 10 or so works well for me.
I stopped doing the pocket because the “filter” just bunched up and nobody was using it…it is still my favorite and I have made over 100 so far.
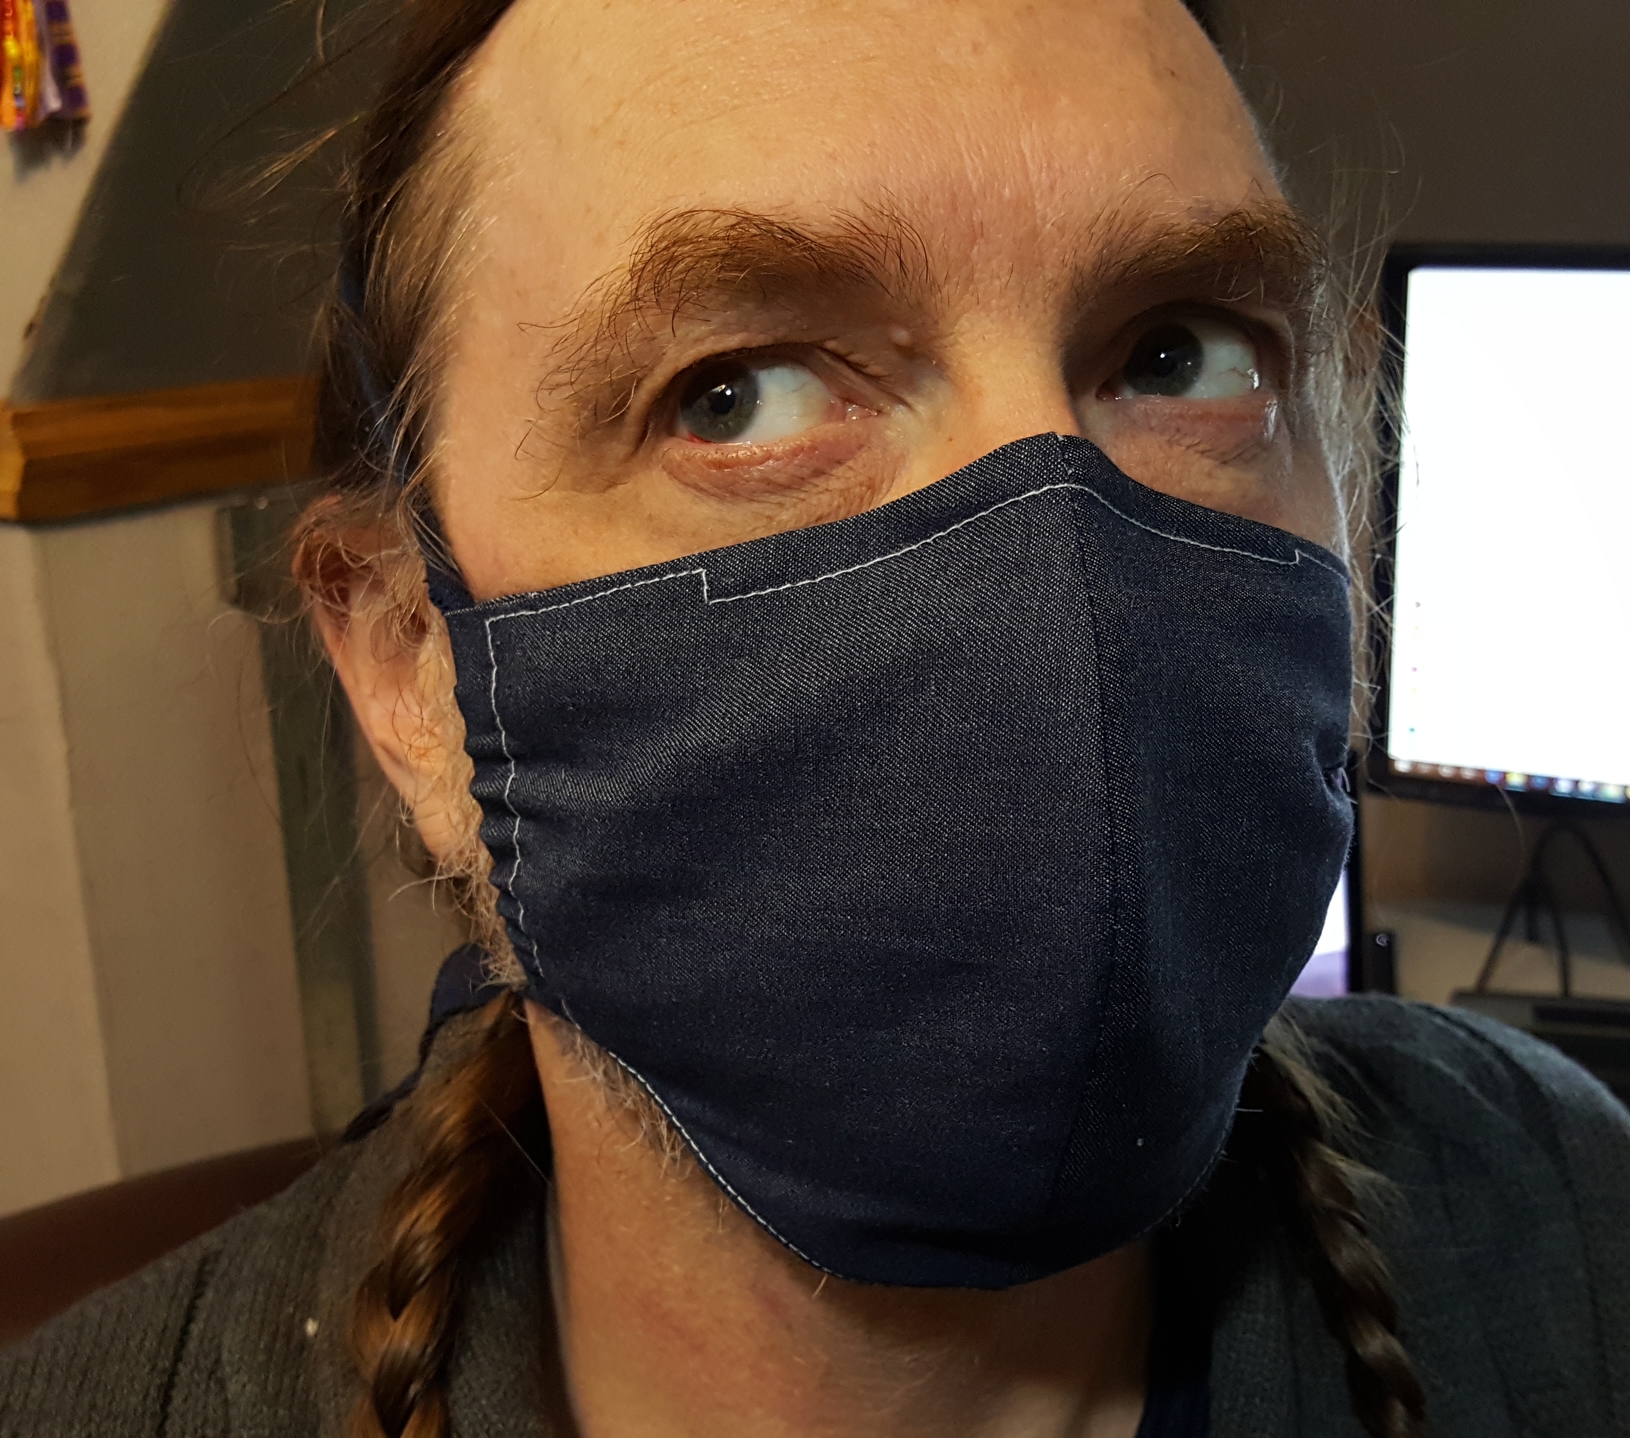
Thanks for the review. I think it would be very quick and easy to trim away the curved bits with pinking shears after sewing them together, that’s genius! That could make for messy top stitching though. If you are not leaving a pocket, the top stitching could be done at the end on top of both the outside and the inside layers. In fact, that might help the bunching at the nose I see in some of the photos. And it cuts out a step.
Did you follow all the steps in the video tutorial? It seemed way too extra to me. Cutting each piece out individually rather than 2 at once, using a top stitching foot, double sewing the edge folds of the liner, that bias nose wire piece (that makes that edge 8 layers of fabric plus stitching plus a wire, no wonder people are finding that uncomfortable! Easier just to stitch a wire between the layers instead).
And finger pressing is fine if you’re only making one, otherwise the iron is MUCH faster!
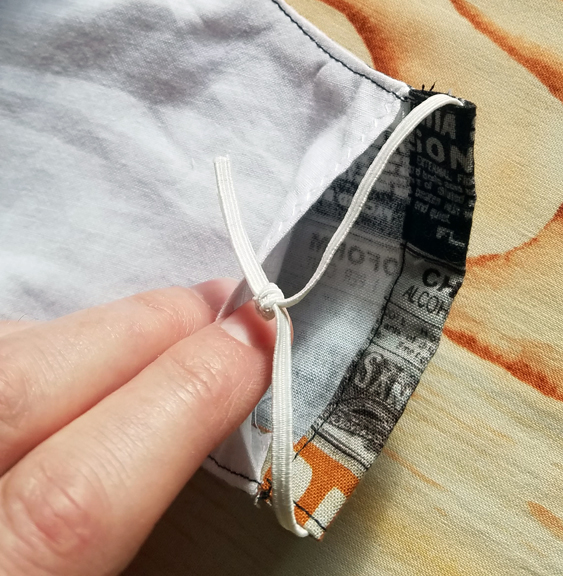
I did like the shoe lace idea, that leaves only one tie behind the head. On other types with a behind-the-head tie, most also include ear elastic. That’s also the case with this one as she intends a paper mask be inserted inside. It could be added anyhow, or instead of (cut lining and front sides to match, sew together with elastic inserted, leave a space at the bottom of mask to turn right side out).
I think for a filter, it would be just as effective to simply add a layer of non-woven fusible interfacing. That is there just as an additional layer, right? It’s not like the inside is the part that gets particularly contaminated and needs to be disposed of.
I did not even watch the video. I cut 4 pieces at once, because I don’t trust my rotary cutting skills! So I just traced the pattern on the top piece and cut 4 at a time (two mask’s worth). The issue with top stitching through both layers at once is that you’re then creating a bunch of tiny holes - but not too tiny for viruses - that go straight through to the wearer. And a path made of thread for the carrier moisture to travel down, I suppose. I did take the time to press the seam of the front so it would be in the opposite direction of the seem of the lining to create less thickness across the nose. I use just my one standard foot and I added no wire. I just made a little seam on the original pattern for the filter “pocket” and didn’t even look at the other one, to be candid.
I imagine the interfacing woudl work fine and dandy. I didn’t include it in my originals, because at the time I read recommendations against that because it could make them them more uncomfortable to wear (hotter, less air flow). Of course, that was before it was reccommended for everyone every time we are out in public and it just didn’t occur to me to switch it up. I figure with access to the space between the layers people could make their own decisions - I didn’t want to take an option away from anyone. It was just a tiny bit more effort to finish that seam which I ended up doing with a zigzag so that I wasn’t double folding. All that said, I have only made these for people who are able to shelter in place and who rarely have/get to go out and then not for long and who, to my knowledge, don’t have any special sensitivity issues. Just wearing a properly fitted bra is more uncomfortable than these and every boob-haver I made these for doesn’t think twice about doing that all day (at least outside the house!). If I were making these for essential workers, I’d care a lot more about the details of fit and comfort.
2 Likes
AIMR
(Linda -2026 time to regroup and renew :us:)
25
I agree that if I were making these for people who were in essential services, I would take a lot more care. I also was careful in making sure the center seam was pressed and top stitched in opposite directions to reduce the bulk.
Here is my thinking of why I did not do the topstitching through both layers of the center seam…when I put the mask on, and wore it for about 5 minutes, I realized that when you inhaled, you were actually only making the one layer move with your breath. The outside layer seemed to stay in place, creating a mini air pocket between the layers, much like a insulated window. My thinking was that it made it easier to breathe and maybe created more of a barrier of air to trap pollutants, etc. It seemed harder to breathe comfortably when the two layers were too tightly held together. Does that make sense?
I LOVE the look of this pattern. But I’m going to be honest. I tried watching the video and following it and I was totally lost. I was lucky enough to have someone make me two ones that have a similar shape and they’re really great but I have no idea how to “dumb it down” enough for me. lol I’m overwhelmed with the steps and all the fiddly details.
Oh, yes, @AIMR, I noticed that single layer movement, too, but didn’t think about the rest of what that means. Good thinking! That also means that both layers can stay dry or dry out faster which is for sure a benefit for protection. I imagine if just the outside layer is interfaced it would be as effective of protection, but have less impact on comfort.
I want to add that I chose my pattern at least a year ago and for the purposes of being less wasteful. Instead of tossing a dust mask after X hours of use while woodworking or during pine pollen season, I would wear one of these. For my personal mental health, I decided to go with one I already had picked out rather than do a lot of searching.
1 Like
AIMR
(Linda -2026 time to regroup and renew :us:)
28
I have allergies to pollen so I was also looking to make a fabric list when I moved back to the South. My allergies were not bothering me for most of my 20 years in PA, but within a month into spring down here, it was horrible!
Who knew that so many of us would become mask making experts…and that our sewing skills would be put to such use…I have been feeling sort of like Betsy Ross, sewing for our country!
It is sure heartwarming to see people bringing their time and skills to help! It’s a real shame that these tasks fall to the citizenry when it could be that systems be in place to cover us in these situations.
ANYYYYWAAAAAY, the place I grew up in is literally one of the worst places on the planet for seasonal allergies between all the pollens, molds, etc. I never had any problems until I moved away from there to a pine forest. Turns out I’m allergic to pine pollen! Now I’ll be all ready to go when the season comes!
You girls are awesome. That is exactly the sort of detailed info I was hoping for. Of course, that makes perfect sense about the inside layer moving with breath while the outside layer doesn’t. I wonder though if adding fusible interfacing to the lining would keep it from moving at all. That’s the part of mask wearing I dislike the most, having my face pressed up against the fabric. I know, to work best they need to be tight and they are not meant to be comfortable but I’m not a care giver so I can wear them in a more relaxed fashion.
Since the fabric is made of thread and full of holes, I don’t think the stitching line provides more entry points than not.
@PhoenixFireDesigns that tutorial was overly complex in my opinion. There are simpler masks that will be just as effective.
After looking through lots of tutorials I opted for the fitted mask. The tutorial I found includes both versions of a mask, fitted or pleated.
I wanted to make one with elastics because I thought it would be easier for the kiddos to put them on themselves and the straps wouldn’t slip out of position that easily. Also I was looking for a mask without wire.
For the lining I used molton cotton which is like a cotton fleece which we usually use to line the cradle. It’s super soft and absorbs liquids very well.
It took me about ten minutes to finish one mask, including cutting. Most of the tutorials for a pleated mask I’ve found include a lot of ironing and to be honest that’s something I find really annoying and time consuming - I’m so lazy Just kidding, I just don’t like it for quick projects.
I’ll make more of these masks but I want to try to insert a wire (or a pleated mask) because my sunglasses always fog up when I wear the mask.
I really like this pattern! It was EASY. She has a ton of sizes for the pattern but I used the adult medium and it fits really well. It can be made from cotton cut on the bias or a tshirt. It’s also really comfortable in comparison to the ones with elastic.
I did find a pattern for ear savers that can be made for the ones with elastic. This pattern is for an embroidery machine but could very easily be done with a regular machine or as a no sew
I have been seeing those on pinterest, they look interesting and like they can be laundered.
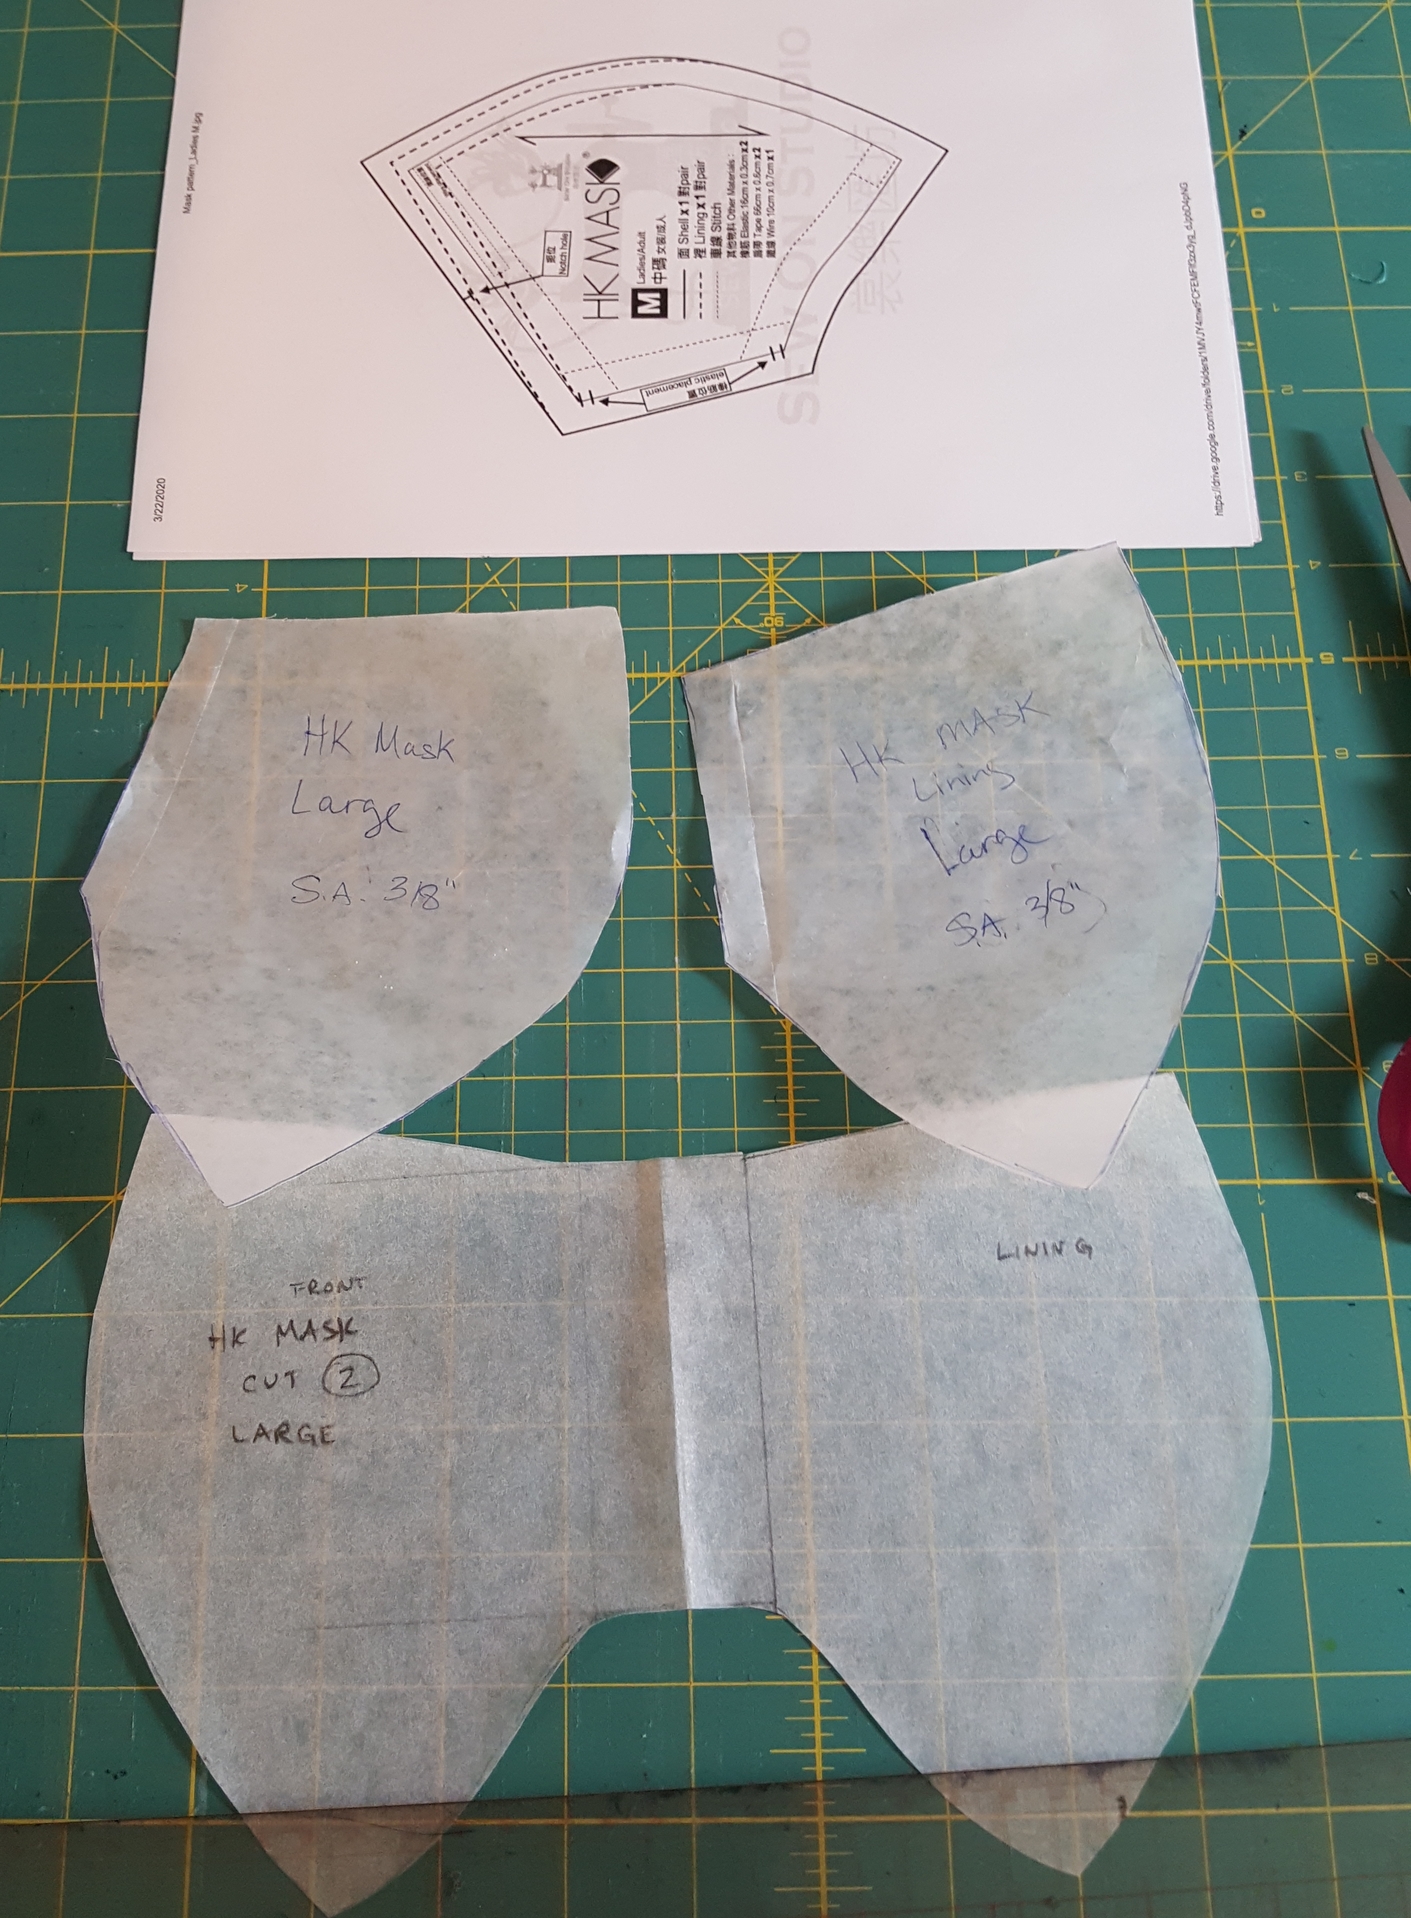
I’ve tweaked the HK pattern which is very similar to the one you have been using @AIMR and @TheMistressT, but simplified.
This is the HK mask pattern which I’ve altered by adding to the outer edges and creating a 2 piece pattern, rather than 4. The stitching is greatly reduced as well. Here’s the longer post explaining how I did it, I hope someone will give it a try and let me know how it goes. I will have fun tweaking it to incorporate any suggestions.
I’ve not tried it yet, so cant comment on the pattern, but I’ve got this one to try Beebe Healthcare pattern
It was designed by a nurse and is quite similar to other HK type masks, but cut on a fold to avoid the stitch line down the centre.
I am aim to try it out later, so I’ll let you know what I think when I’ve done it.
1 Like
AIMR
(Linda -2026 time to regroup and renew :us:)
41
This pattern is exactly the modification I needed to save on elastic and finish the ends…@magpie…check out how she does the ends…you could modify your pattern by simply leaving the ends open and fold them in and encase the ties or elastic and topstitch…the sides would have to be smaller as you would lose the gathering abilities of the elastic when strung through…
 Now I’ll be all ready to go when the season comes!
 Just kidding, I just don’t like it for quick projects.