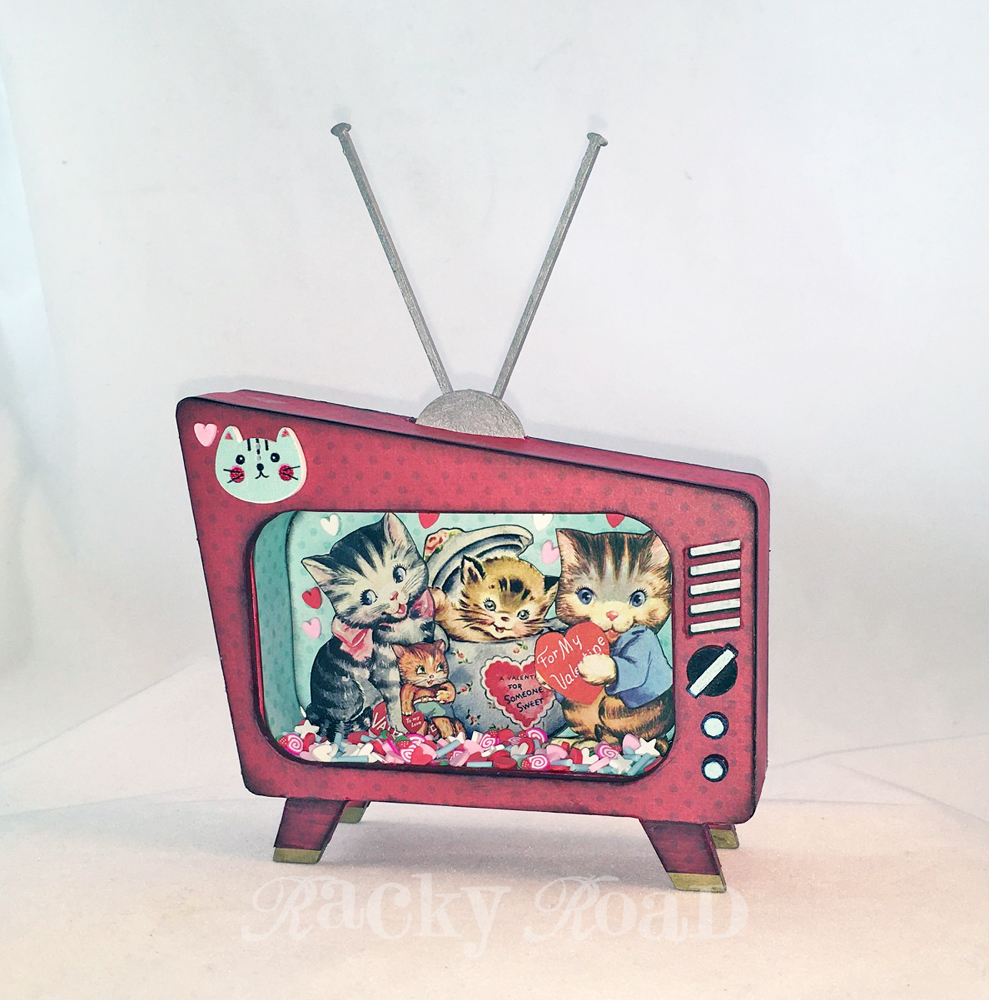
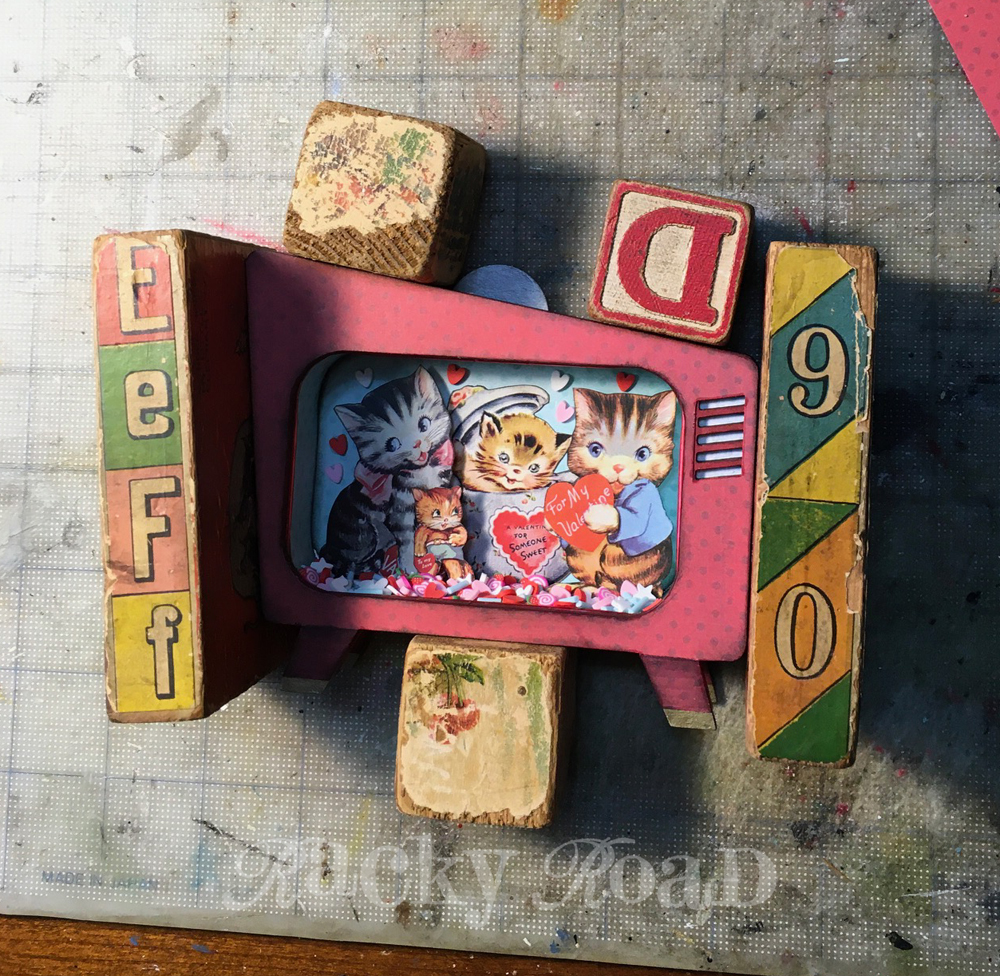
It’s February, and who’s ready for some valentines? I am! Let’s tune in to KCTV (KittyCat TV, of course) for some good old-fashioned Valentine’s Day fun. I love the vintage charm of these cheerful kittens; they remind me of my elementary school days, and valentines from my classmates. I got those images and the rest of the supplies to make this project from Alpha Stamps.
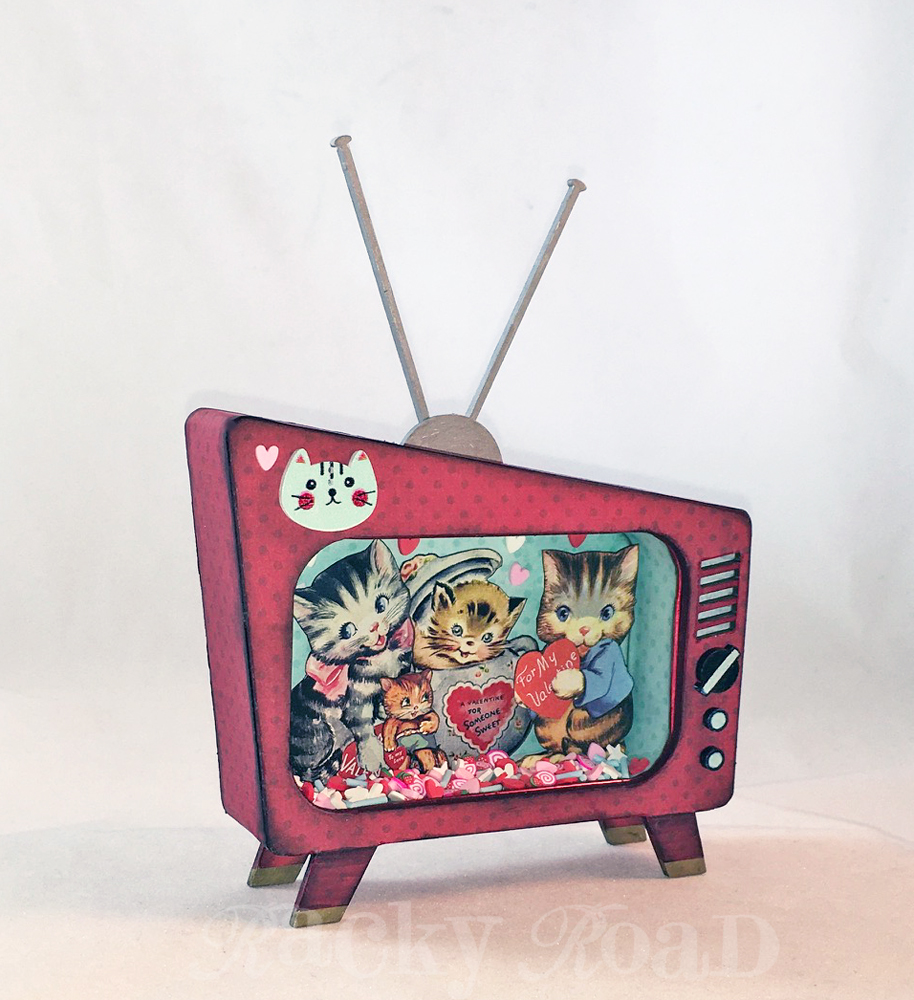
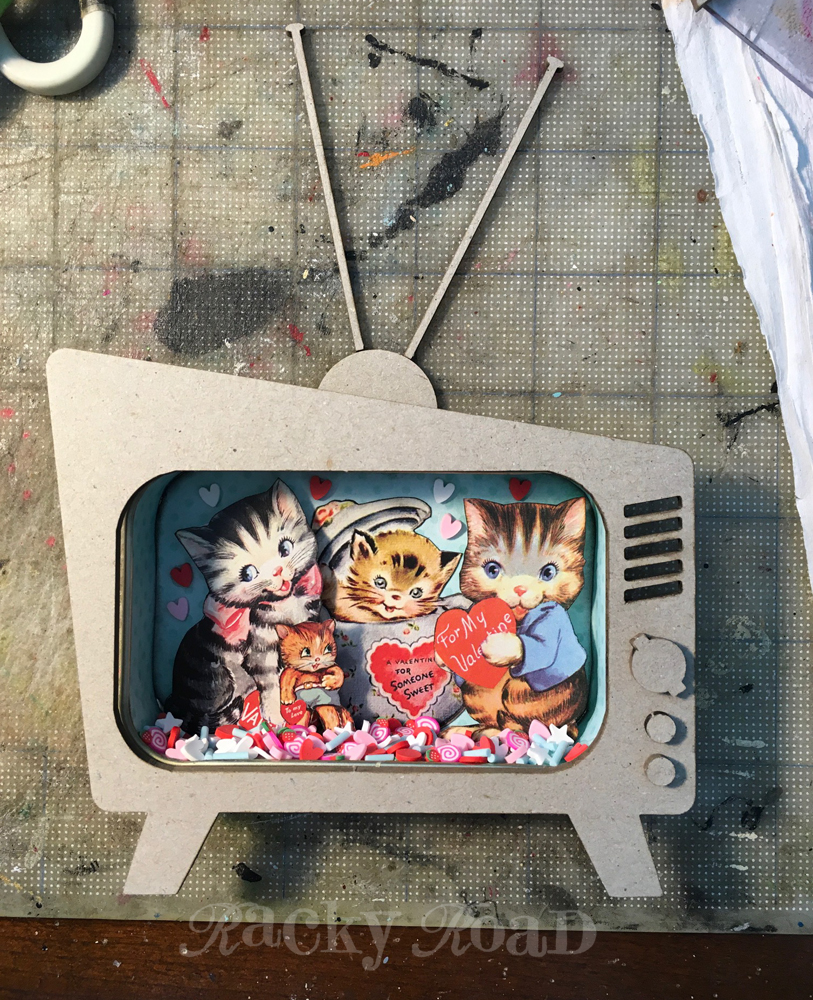
The new retro tv, designed for use with Altoids tins, is perfect for this sweet kitty scene. And these cats know how to celebrate! Some happy sprinkles make this Valentine’s party extra festive. I pulled a few hearts out of the sprinkles for little dimensional accents behind the kitten’s heads, and on the front of the television.
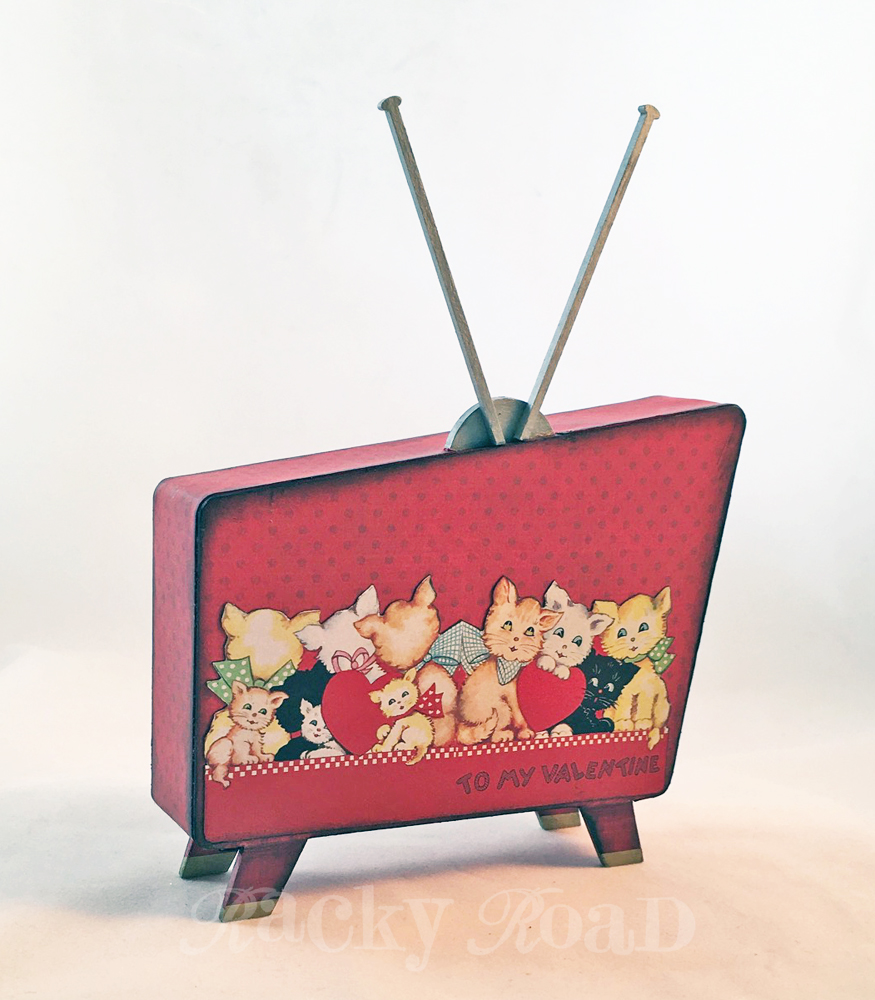
Even the back of the tv is full of feline love.
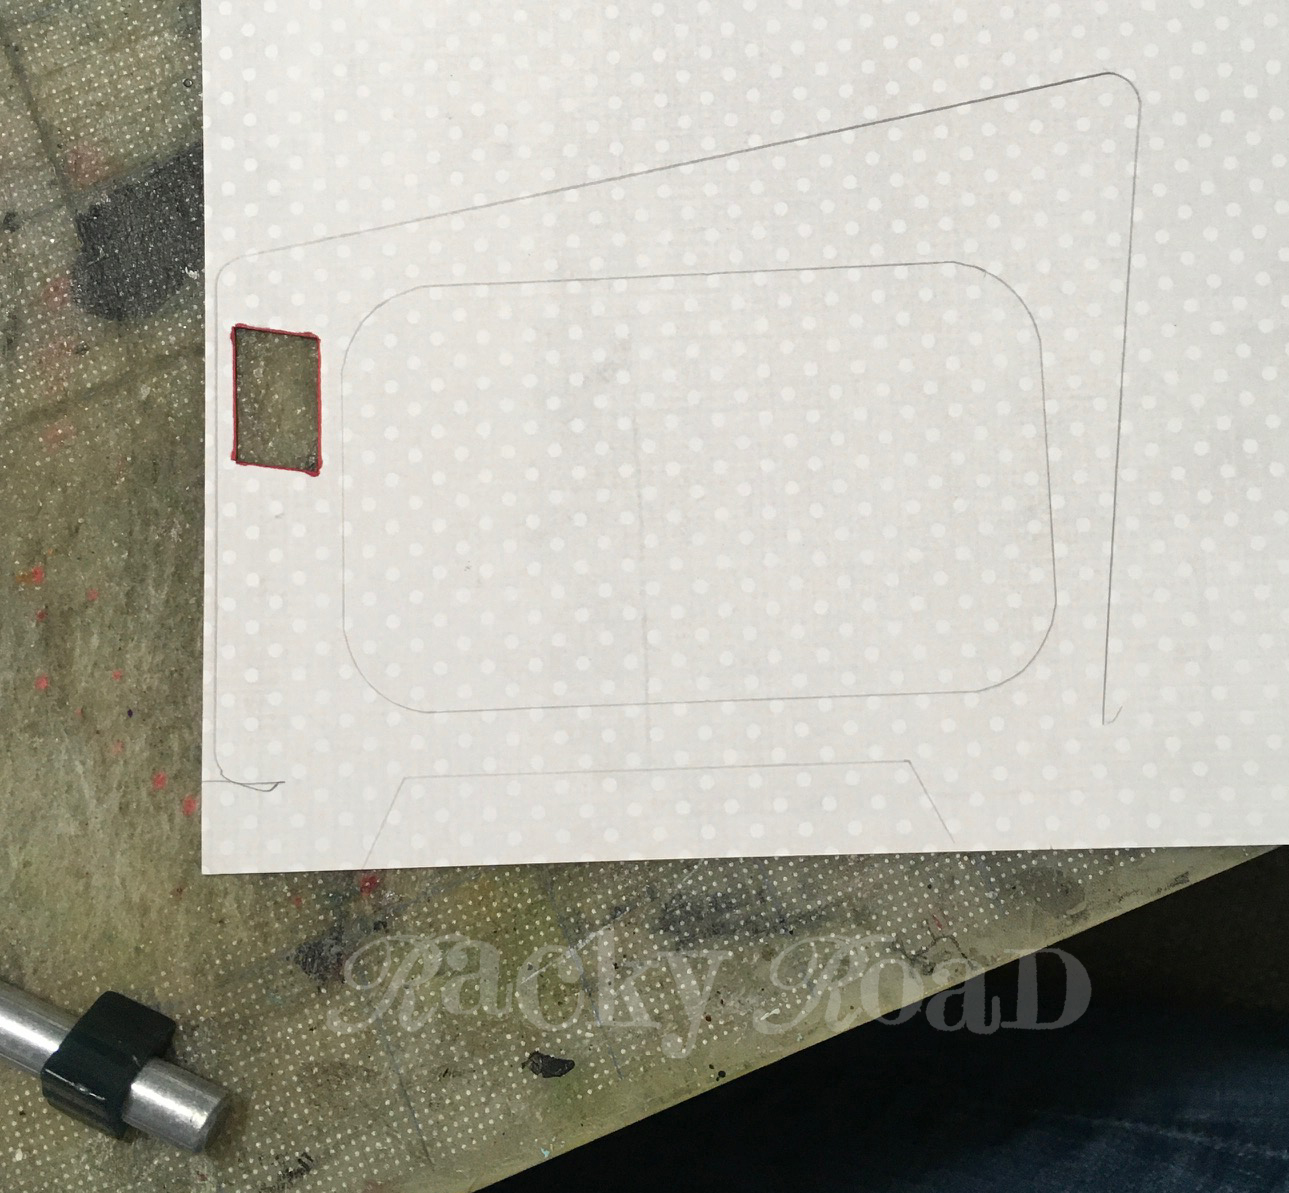
Here’s how KCTV was built. After deciding the theme of the program, I first decorated the tin. The cats were all cut out, then layered with foam tape to give dimension. A thick layer of glue was applied to the bottom of the tin, which was then sprinkled with… sprinkles! In the photo below, you can see the speaker vents in the upper corner of the tv. I wanted to preserve those, so I colored that area with a red marker so they will match the red paper that will be used on the front.
To cut the paper where the vents will show through, I traced the tv on the wrong side of the paper, and used a pencil to mark where the vents are. I then used an x-acto knife to cut out one hole for the vent area. I used a red marker to draw around the opening. This will help this area blend in with the red paper. Then, the front of the tv was glued down and cut out along the edges with the x-acto.
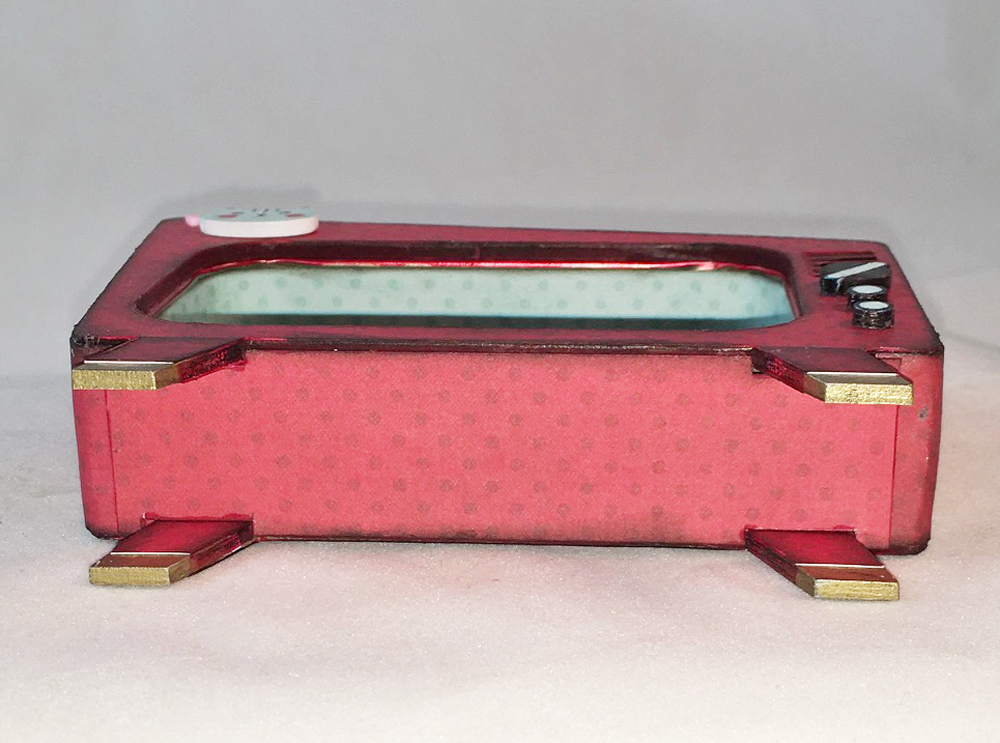
Below you can see the finished front of the tv, and the back of the back. I did not put paper on the entirety of the insides of the tv, as the back of each piece won’t show once it’s fully constructed. The “brass” bottoms of the legs were painted with gold metallic paint, and a silver Sharpie was used for the antenna. A grey Copic marker was used on the red legs to make them look like they’re set back a bit from the tv cabinet. I used a red Copic marker around the lip of the tin, in case any showed through once the tv facade was attached. A little bit of the turquoise paper is glued behind the speaker.

Here’s how to make sure your tv is sturdy: glue the tin to the front of the tv first. Once that’s good and dry, put lots of glue on the back of the tin and sandwich the two parts together. While the glue is wet, use some blocks (or whatever you have handy that will work) to make sure the back and front are exactly lined up. Let dry.
Once it’s completely dry, you can add the antennas, paint the knobs and add any other embellishments to the front and call it a day. I did want to add some sides, though. A 12" long piece of the same red scrapbook paper is just enough to go from the outside of one leg, all around the top and other side of the tin, to the outside of the other leg. Cut the paper to the width of the side. I cut a notch in the paper to accommodate the antenna, so I glued the paper at the top of the tv first. Then one side at a time, I glued the paper around the curves. Be patient and hold that paper in place for a bit while it dries! You’ll have to trim the paper a bit when it gets to the legs. I went ahead and cut another piece to finish the bottom. That piece was notched for the legs as shown below.
Thanks for tuning in to KCTV. ![]()

