I made a bunch of scrappy bookmarks for the Little Good Things swap. They are a great way to use precious small bits in your stash, and easy to adapt to your own taste and materials.
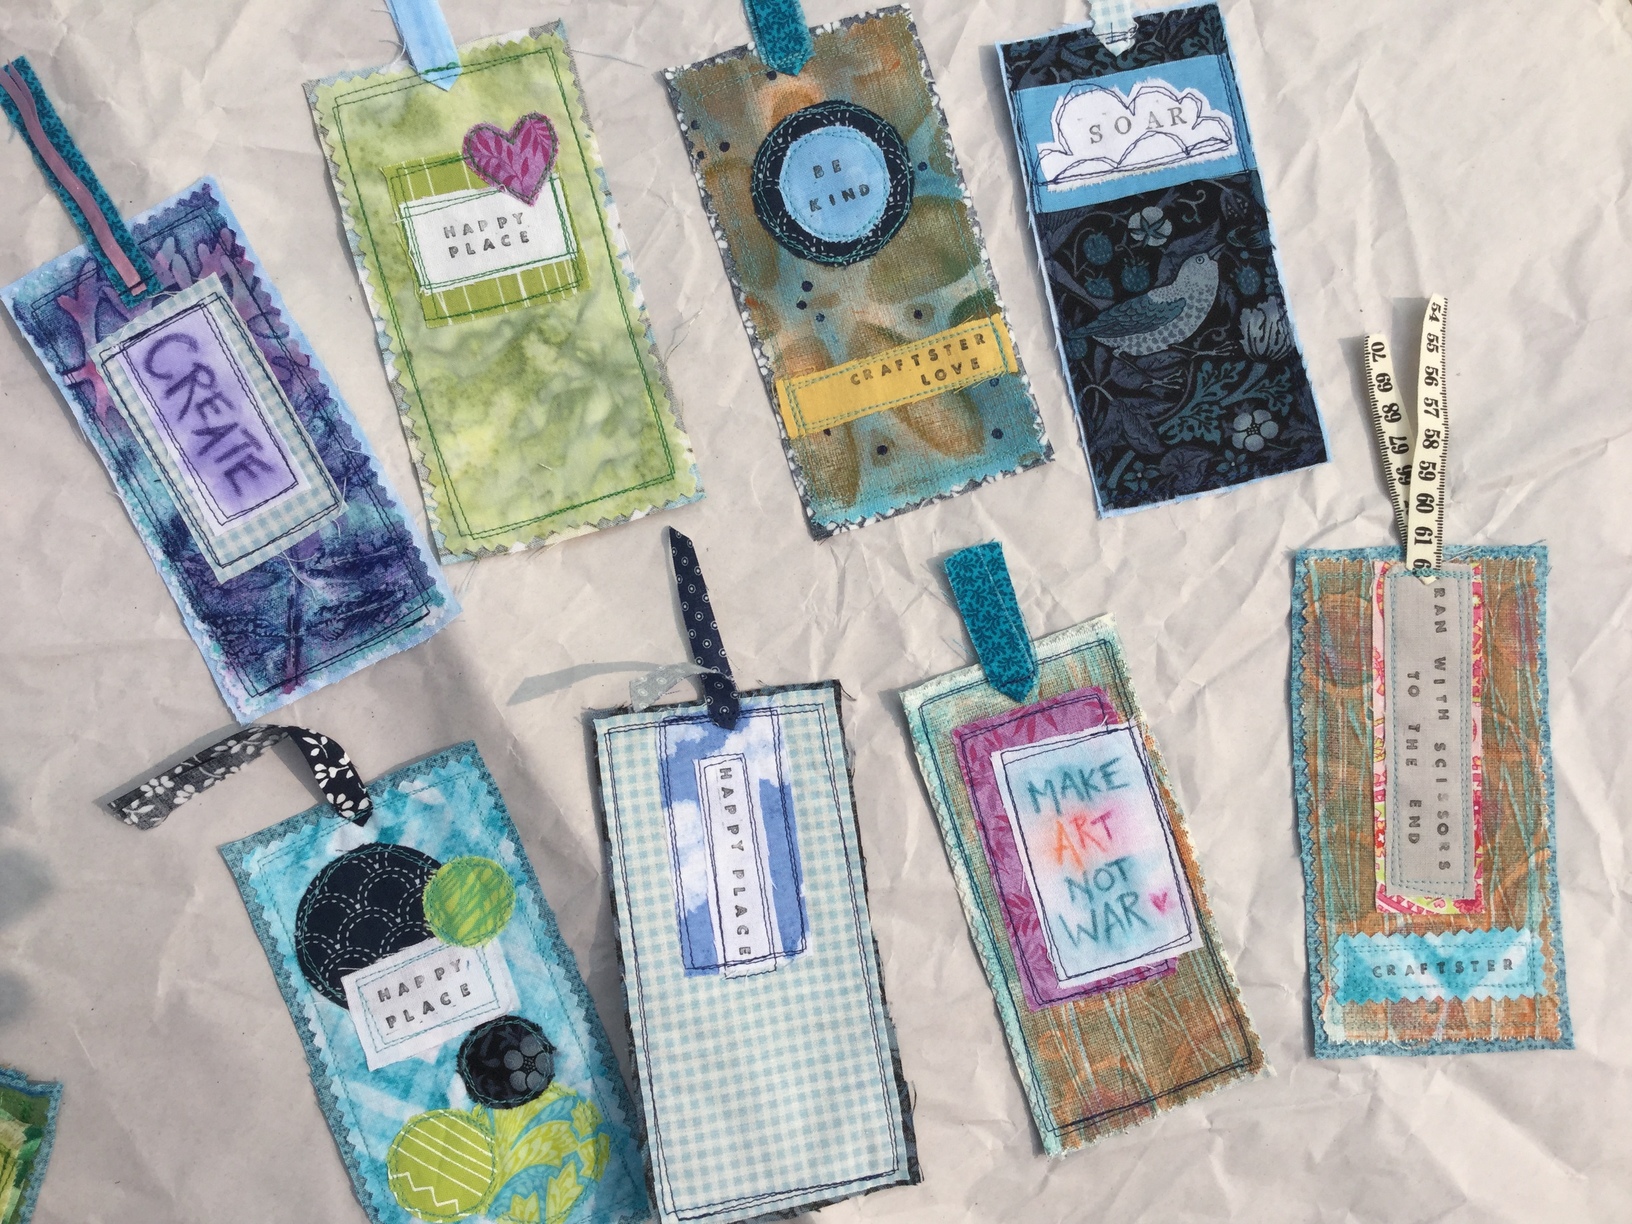
I thought I’d share my process with a tutorial, so I made a few more.
You will need:-
- scraps of fabric
- sewing machine
- bits of ribbon or pretty yarn or string (optional)
- letter stamps or fabric marker or something non-smudgy that writes on fabric (optional)
- double sided fusible webbing (optional, I don’t use it for these bookmarks)
I start with a rectangle about 3” x 5 1/2” (7cm x 14cm). Of course anything roughly bookmark size will work! I cut some with regular scissors and some with pinking shears.
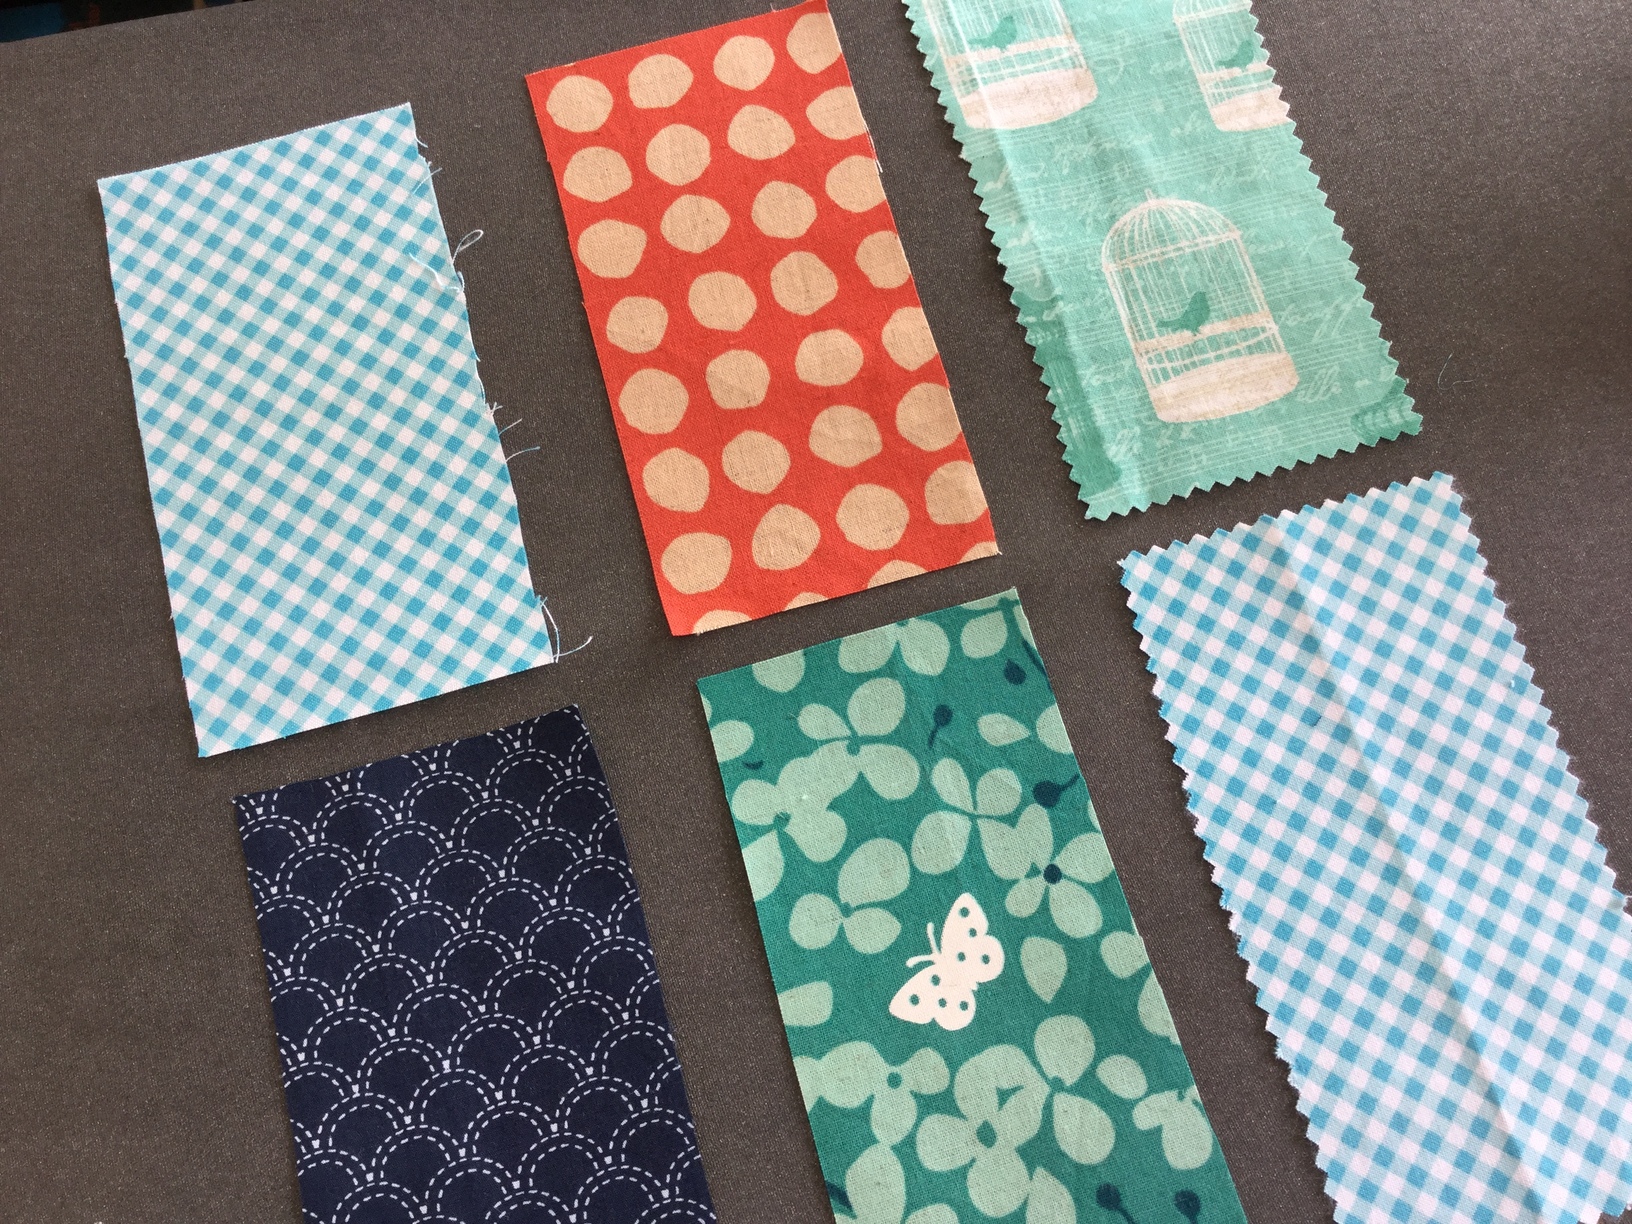
Assemble a bunch of little bits of fabric and cut out shapes. If you are new to machine appliqué and want to make the project easier, you could draw shapes onto paper-backed fusible webbing, iron onto the back of a slightly larger fabric scrap, and cut out the shapes. Fusible webbing is great if you want precise shapes and a smoother finish. It also makes the sewing easier and less likely to pucker. However I want a scrappy, frayed look, so I won’t use it for this project.
I did the writing using letter stamps and an ink that is permanent when you iron it. I also used Derwent Inktense pencils for coloured writing and brushed with water (also permanent on fabric). Other markers should work too, as long as they won’t smudge on paper.
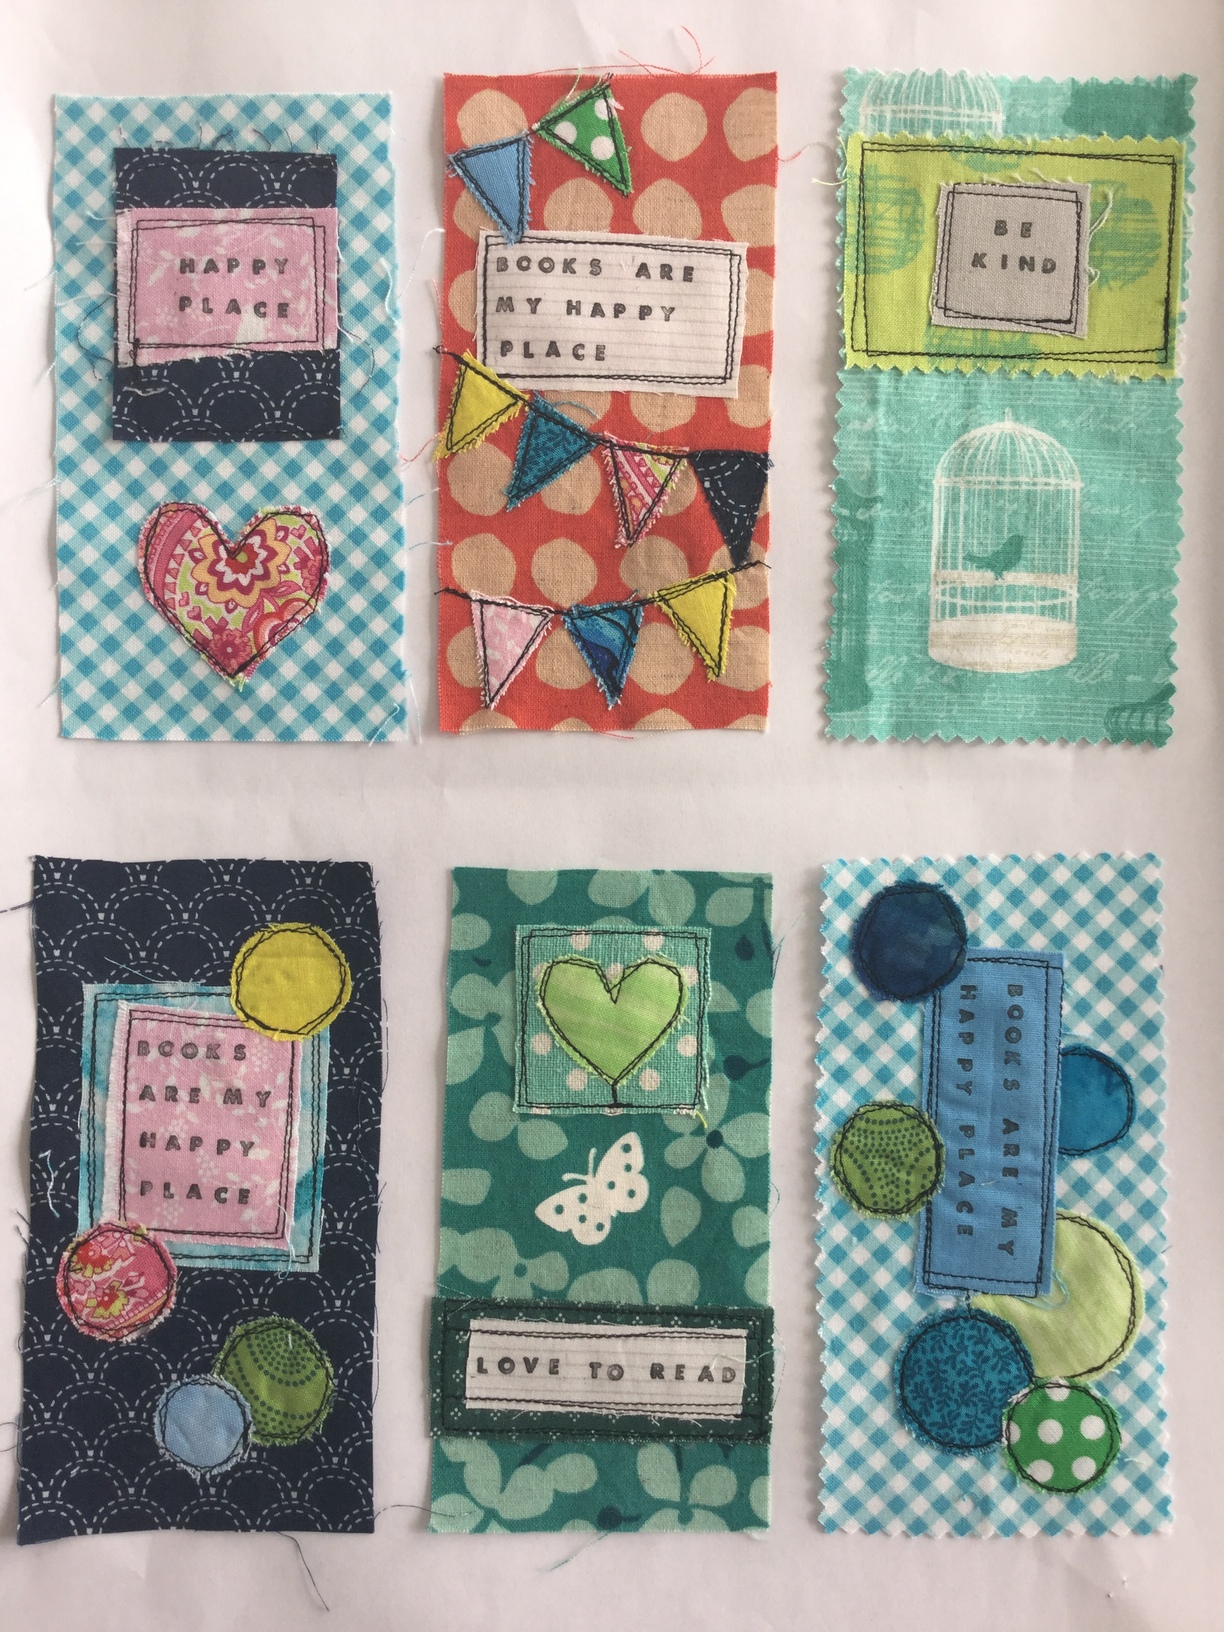
The fun part is arranging different designs. Doing a batch of five or six at a time rather than one at a time is more efficient, I think. If you’re not so confident with your machine, rectangular shapes are easiest. For a scrappy, handmade look, don’t worry about making all the shapes super-perfect.

Once you’re happy with the layout, pin your pieces in place in way that that allows you to fold the top pieces back as you sew around the lower layers. (If you’re using fusible webbing, iron the bottom layer, stitch around it, then iron the next layer, and so on.)

Stitch around each appliqué piece, two or three times. I deliberately make the stitching a bit wonky and criss-cross, to give a nice texture, and strength. I used black thread for this batch, but this would be great way to use up leftover threads in different colours (you can just change the top thread and use one bobbin thread).
Beginner tips - If you are new to machine appliqué, set your machine speed to quite slow. At the beginning of each piece, set the needle position to down, so that every time you stop around a shape you can leave the needle down, lift the foot, and pivot the fabric in place. This is a great practice project because if it goes wrong, it’s just a few scraps of fabric - grab another one and have another try 
Here you can see where I have folded a layer back while stitching -
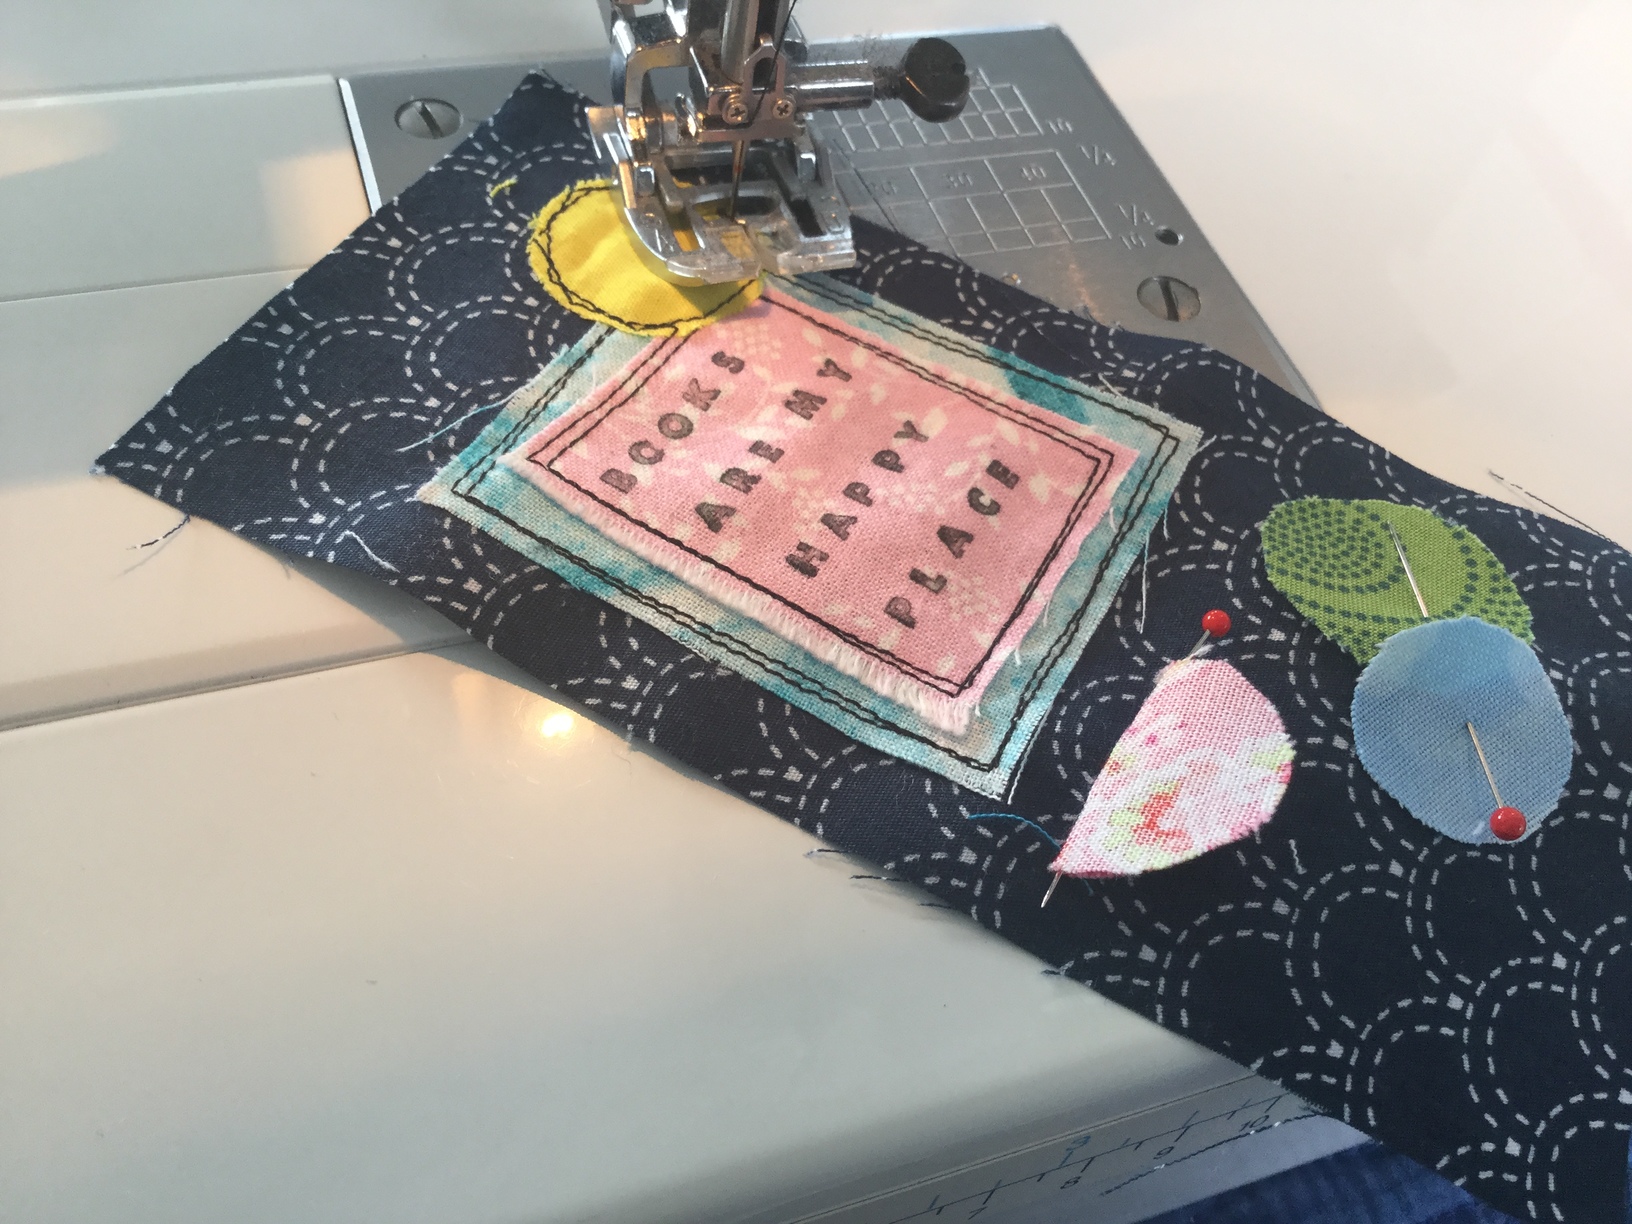
Appliqué done. The little circles are the fiddliest. It will pucker, don’t worry, just give it a steam iron. I always iron as I go with sewing, it makes a big difference.
I cut backing fabric a bit larger than the finished size (add about 1cm / half inch all round) because it’s easier to sew and then trim rather than sew very close to the edge.

Place the backing, wrong sides together, and pin a little trim/tassel to the top. I used scraps of ribbon, strips of fabric, and even bits of selvedge. I’m happy for mine to fray with use, but stick to ribbon or yarn if you want to avoid fraying.
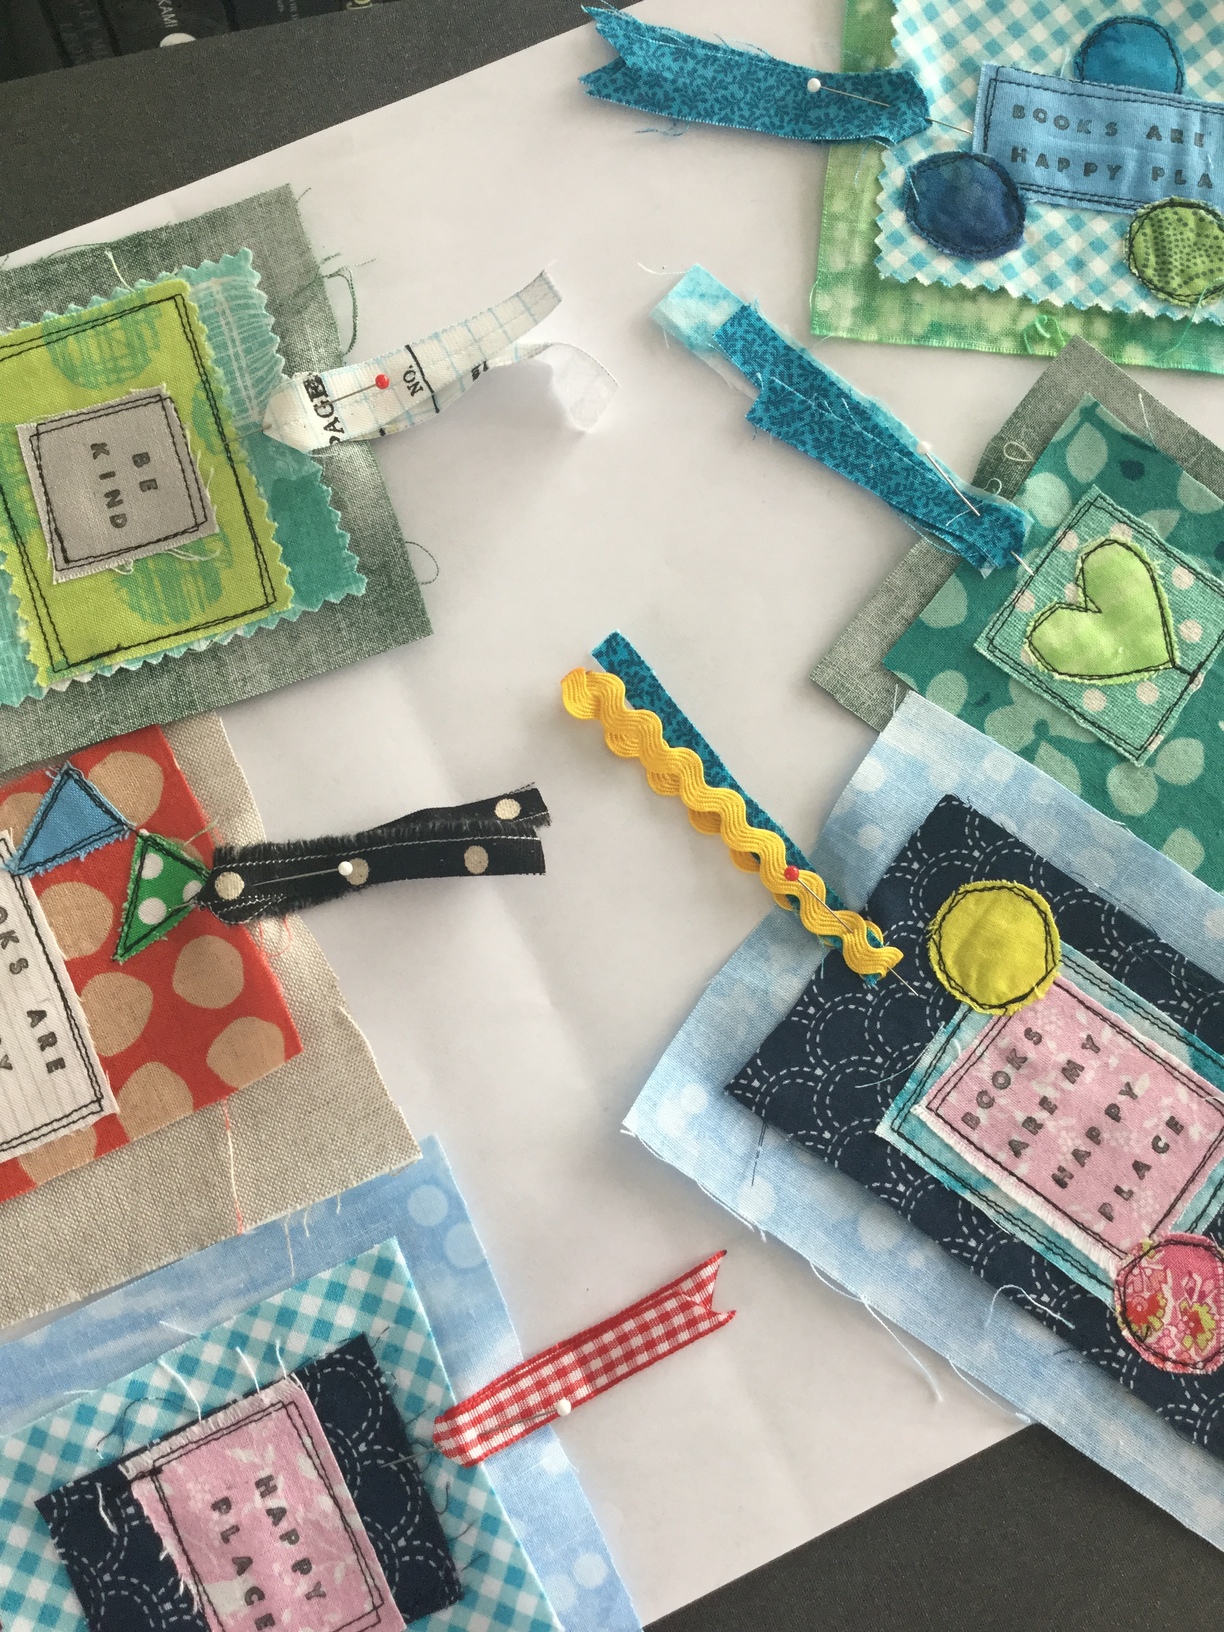
Begin by securing the trim with some back stitching, then sew around the bookmark twice, again offsetting and criss-crossing the lines of stitching. Trim close to the edge. I like to have a bit of the backing fabric showing for an extra layer, but you could start with a slightly bigger top, allow extra space for the final edge seam, and then trim both sides exactly the same.
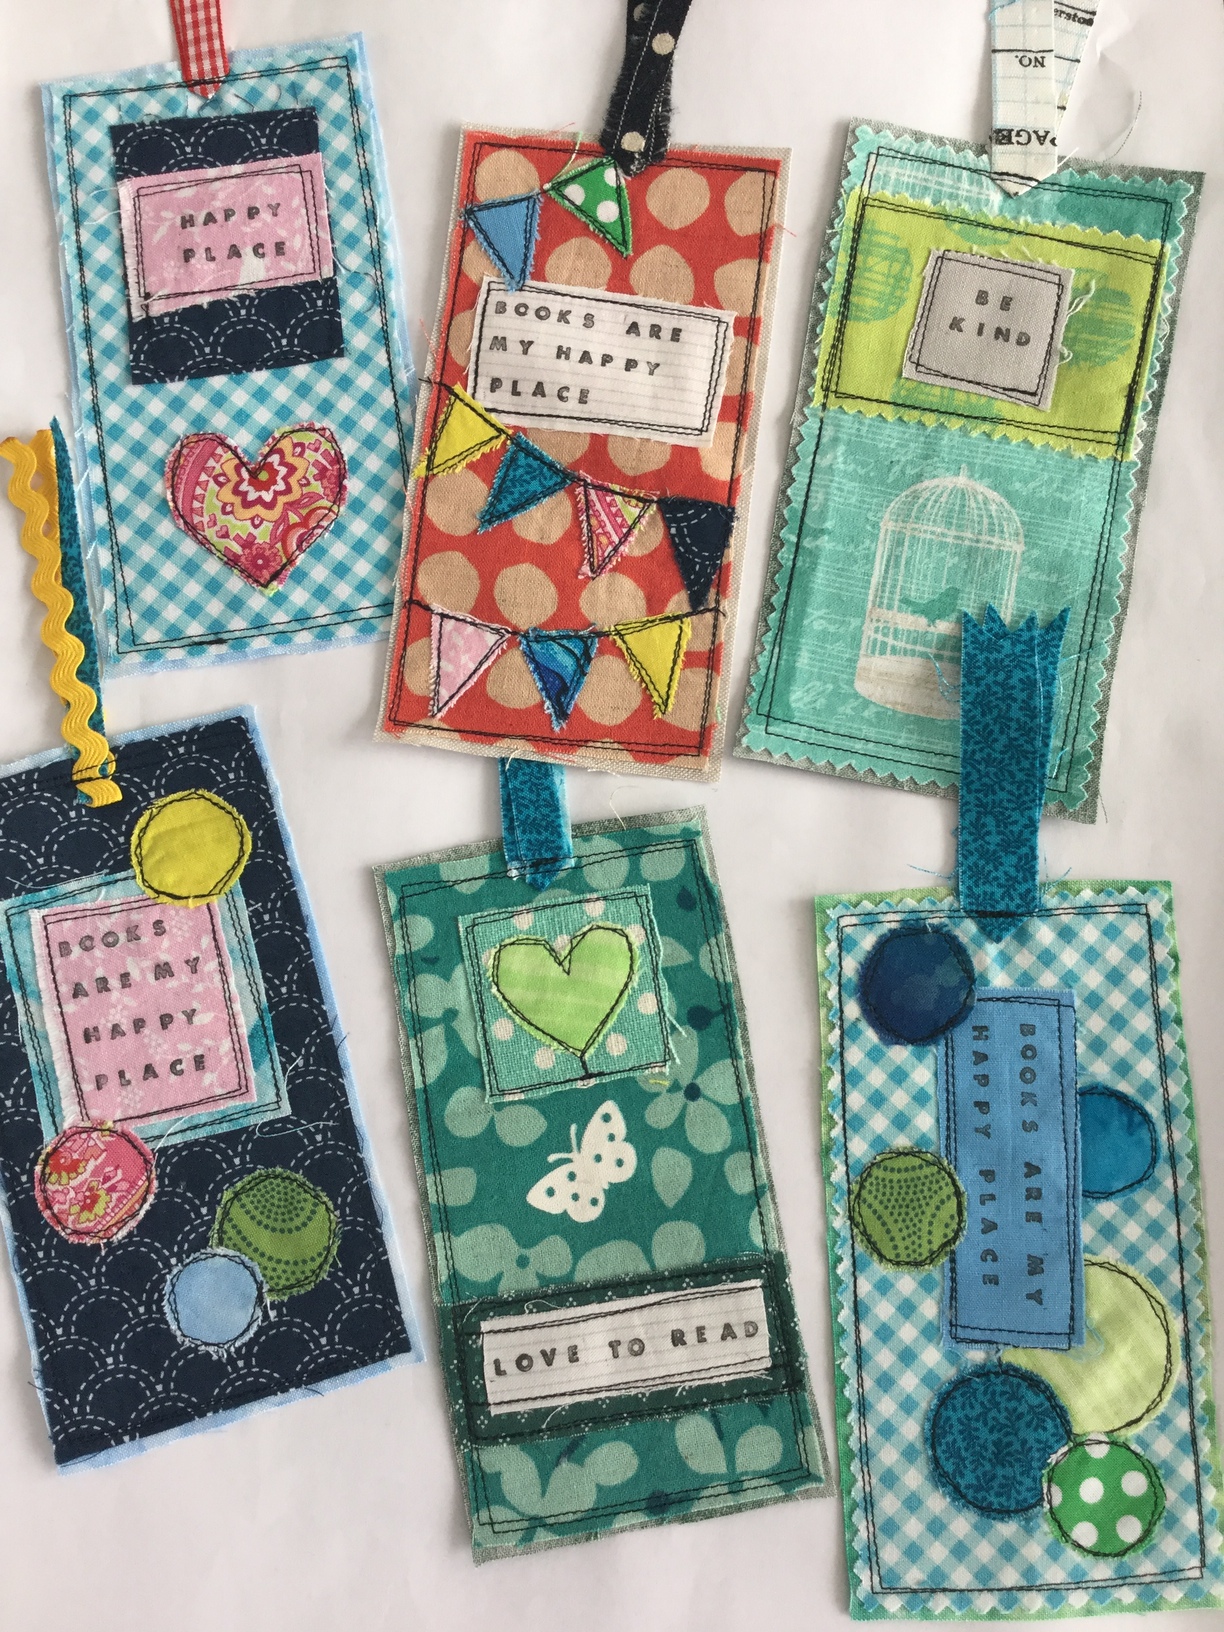
And there they are! There’s lots of ways you can adapt this process to your taste and the material you have on hand - hope you have fun with it!

