
I have had this set of six outdoor dining chairs for 20 years. I have redone the seats twice - “all-weather wicker,” i.e. vinyl strips just do not hold up like they claim they will. What I love most about these chairs, other than that they are already paid for, is that they stack, which is so great for storing them!
I have decided to work on them in pairs: that’s what I have room to do at one time and that’s an easy way to manage my morale. These are the 1st two set at the dining table I made last year from boards rescued from our old, demolished deck.

The all important stacking feature!

And here is the saga:
Their condition before was getting quite shabby. The redone seats were getting worn and chewed by the local gang of squirrels who also were starting to shred the slip covers I’d made for the back so I wouldn’t have to redo the failing vinyl wicker on those - which was getting worse.


I decided to make a prototype with just one chair, stripped of all it’s vinyl, using scrap wood. First, I did the seat. 1x2s for most of it and a 1x4 for the front for dealing with how the frame is constructed. It’s tapered at the front for comfort. The narrower width of the 1x2s allow the seat to curve along the metal frame making it a more comfortable surface, too. I first just set them in place on the surface to determine how many I would need.


Second the back, which is all 1x2s, also following the curve of the frame. They’re tapered at the bottom for comfort, as well. I had assumed I’d be able to make them all the same length, but it turns out that space between the bars on the back is a little longer on the outside edges than in the center. The center three slats are 15", then they graduate 1/4" longer at a time outward from there.


I attached them with cable clamps as per a method I found on Pinterest - this way I didn’t have to deal with drilling through metal which is a hassle and could weaken the structure. I had a hard time finding all the sizes I needed locally and certainly not in bulk and in black. It wasn’t obvious to me, but there are 3 sizes of metal bar for the seat sides and back (top and bottom), but I was able to make due with 2 sizes of clamp which I ordered in bulk and in black after the prototype was complete.


I didn’t get pictures of the process of taking the tape and tape residue off the the frames, then priming with rust converter, and repainting. The frames were originally an oiled bronze, but are now a flat black to coordinate with the legs on the table. The slats are stained the same color as the table top.

I’ll add pics of the rest when they’re done over the coming month or so. I also have most of what I need to make seat cushions for them, but they’re actually quite comfortable already! And since we now have other places to sit since expanding out deck a couple years ago, these won’t likely be sat in for hours like before.
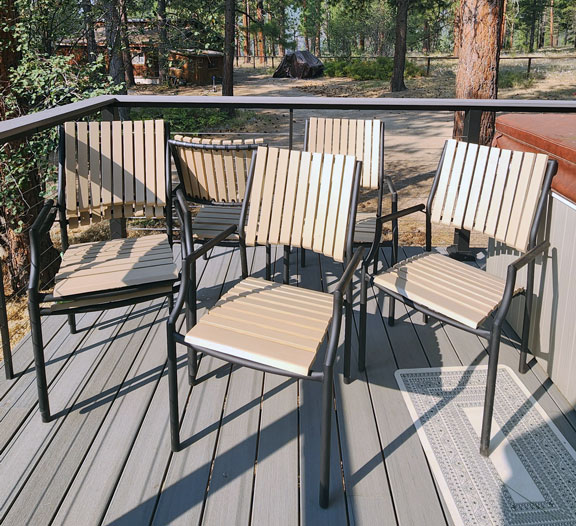
July 19: And then there were four! Two more to go.

Aug 3: And now there are six! And that’s a wrap.
I finished seat cushions for them, too!


 You did such a stylish job with your design. They look high-end!
