Not long ago, I came across a tutorial to make a tray using heat moldable interfacing. We couldn’t find the exact brand used in the tutorial, so we ordered a brand by Bosal. It comes in a fusible and non-fusible version. We used the non-fusible version.
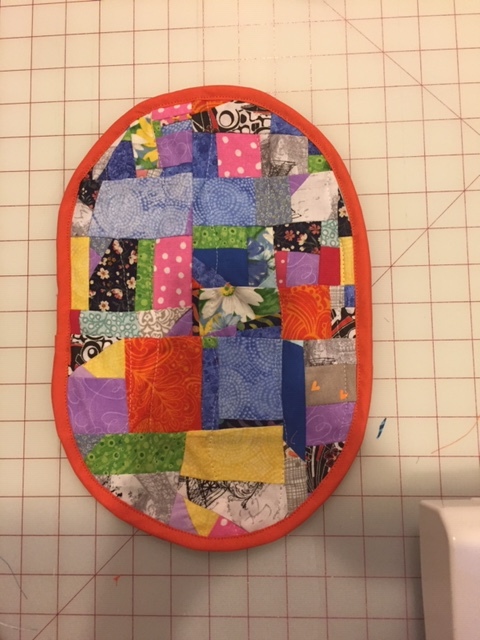
We decided we didn’t want to make trays because a bowl would be more useful. The first thing we did (my mom, my aunt, and I) was to make a scrappy panel using a crumb quilt method… and it took way too long. We were hoping that we’d each get a scrappy panel, but we only ended up with one (so I got to claim it). We actually ran out of time on the day my aunt was visiting, so she didn’t get to make one ![]()

Next, because we didn’t have the fusible version, I quilted the scrappy top, the moldable layer, and the backing together using (rather sloppy) wavy lines.

Then, using a water washable marker, I traced out an oval shape (I used a bowl, and traced it twice).
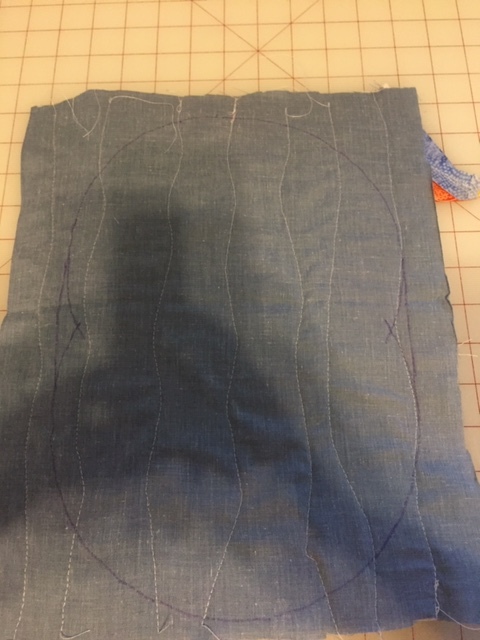
Then I cut out the 3 layers.
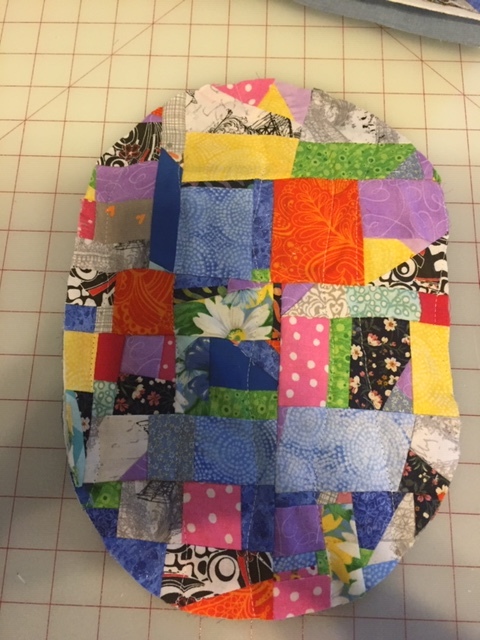
Next, I attached some binding…
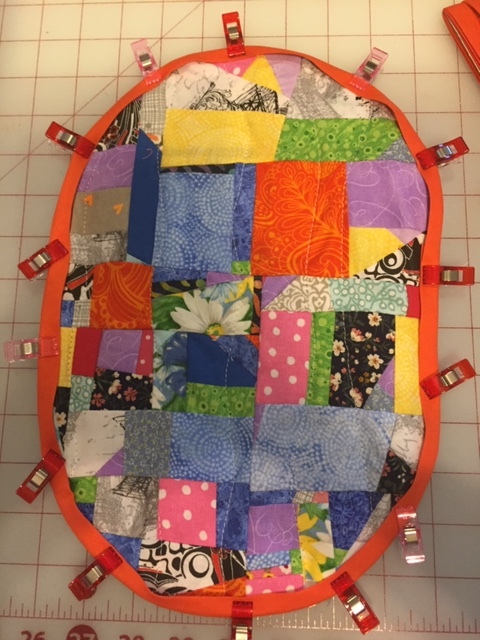
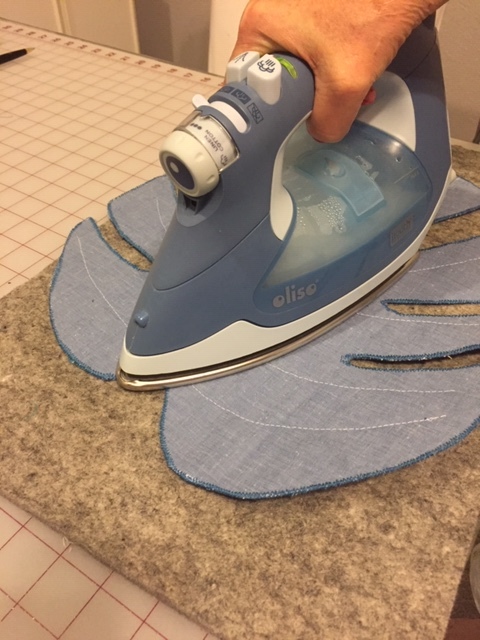
Then, to make it moldable, it has to be heated with an iron (some of the pictures are from my mom’s bowl because I forgot to take photos of some steps):
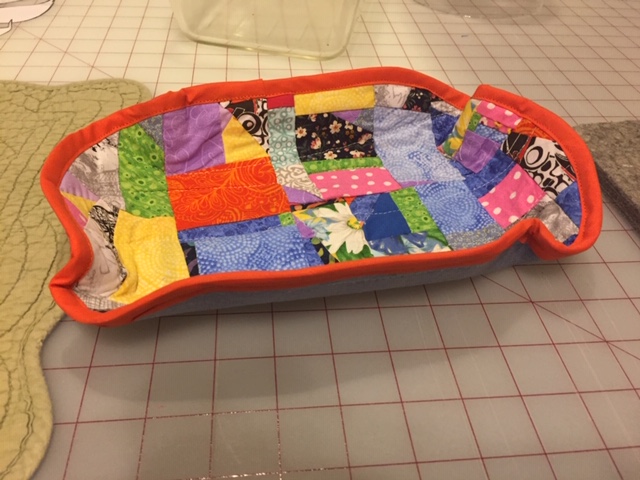
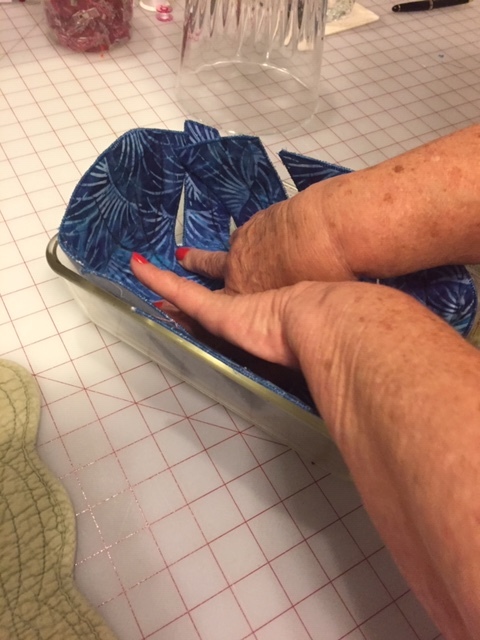
And then we used a baking dish to mold it. We could have flipped the dish over and molded it over the bottom of the dish, but this was easier to manage (it was hard to keep it from sliding off of the dish when we tried it that way).
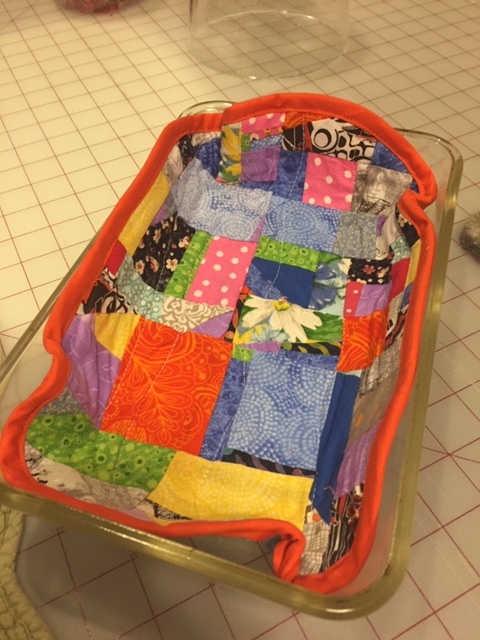
Then you have to let it cool so the moldable layer can harden.
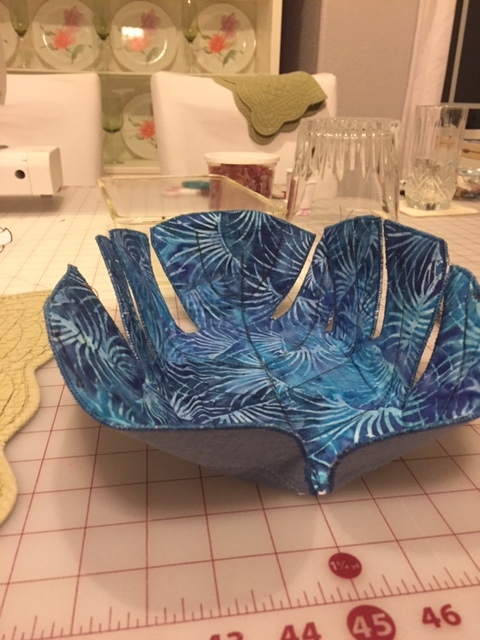
Here’s my mom’s (@Mumscrafts)!
We were supposed to have lunch with my aunt the day after we finished making them, so I brought mine along to show her. Unfortunately, sitting in the car in the hot FL sun caused it to “unmold” so I’ll have to reshape it now that I’m home. I might use a loaf pan to mold it to make it a little deeper. I’ll add a photo once I do it.
It was a fun project, but I’ll have to think about what else I can use the moldable material for because I don’t know how many bowls I want to make!
 ). But, it was neat to see it build, and even how the colors that I thought wouldn’t go together somehow all worked, in the end!
 for crafty family!
