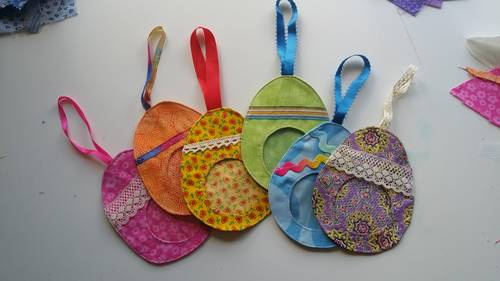
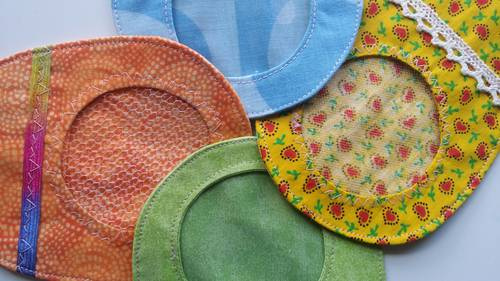
V-1 made of fulled wool sweater scraps is here.
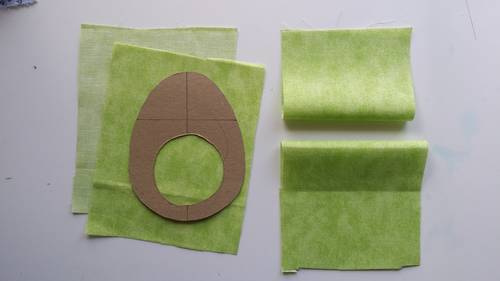
Draft a pattern for the egg on printer paper, fold it in half to make it both sides even, mark orientation lines on it then traced everything onto a cardboard template as shown. Cut 2 pieces of fabric large enough for the egg shape and then 2 more piece of fabric folded in half and just a bit smaller than the egg. Can you see how one is larger than the other? It will make sense in a few steps. Read through the entire tutorial and if you are still confused please let me know and I will clarify anything that’s hazy.
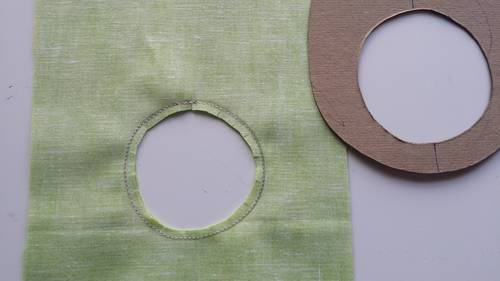
Place the 2 pieces of fabric large enough for the egg right sides together, center the template with room for a seam allowance all the way around and trace the inner circle. Sew along that line, cut away the inner fabric and clip the curve all the way around.
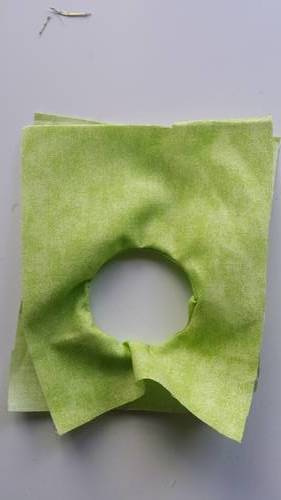
I’ll show this part in 2 steps. Pull the top fabric through the hole like so…
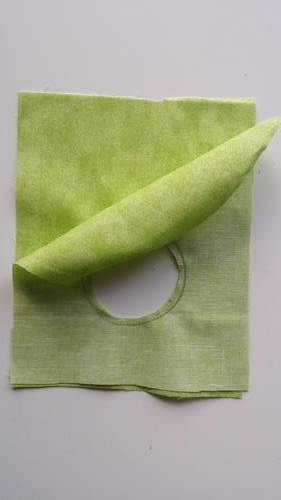
until you’ve turned it right sides out. Press everything flat with a hot iron.
I added some trim here and pinned a piece of blue tulle to the back, it’s a bit difficult to see. You can also use netting or clear plastic for this step (***see hints for sewing plastic at the end). Sew around the circle to secure the tulle then trim the tulle on the inside.
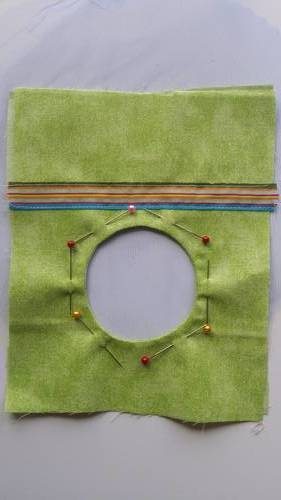
Here is a closer shot of what the tulle/netting looks like.
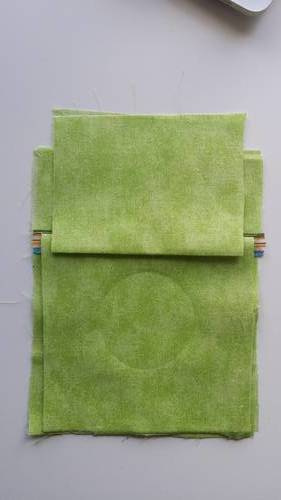
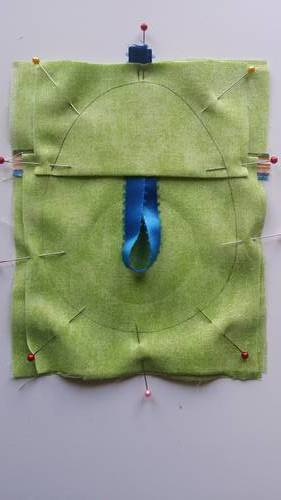
Now place the larger folded piece of fabric on top of that with the fold at the top. The smaller piece goes next with the fold at the bottom. Overlap those pieces about 1/2 inch. I found the ribbon trim very helpful here for orientation. Then I used a fingernail to press an outline of the circle in the bottom piece of fabric.
Using the orientation marks on the template to position it, lay it evenly on the fabric and trace the outline. If you want to add a ribbon for hanging now’s the time. Pin everything together, sew around the outline, trim close to the stitching line and turn the egg right side out.
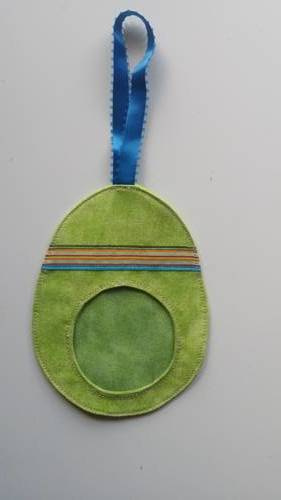
Carefully press the edges on the back of the egg taking care not to melt any trim, plastic, netting etc on the front.
Edge stitch around the outside of the egg.
*** how to machine stitch plastic.
There are special sewing machine feet available for sewing leather, plastic, and other materials that “stick” to regular presser feet, they are made of telfon and usually white plastic.
An alternative is to place a later of tissue paper between the plastic and the presser foot (or the bottom of the machine if the plastic is the bottom layer being sewn).
Another alternative is to apply a layer of “magic tape” to the bottom of the presser foot. That’s the one that is slightly hazy looking. It’s quite slippy and should not stick to the plastic.
