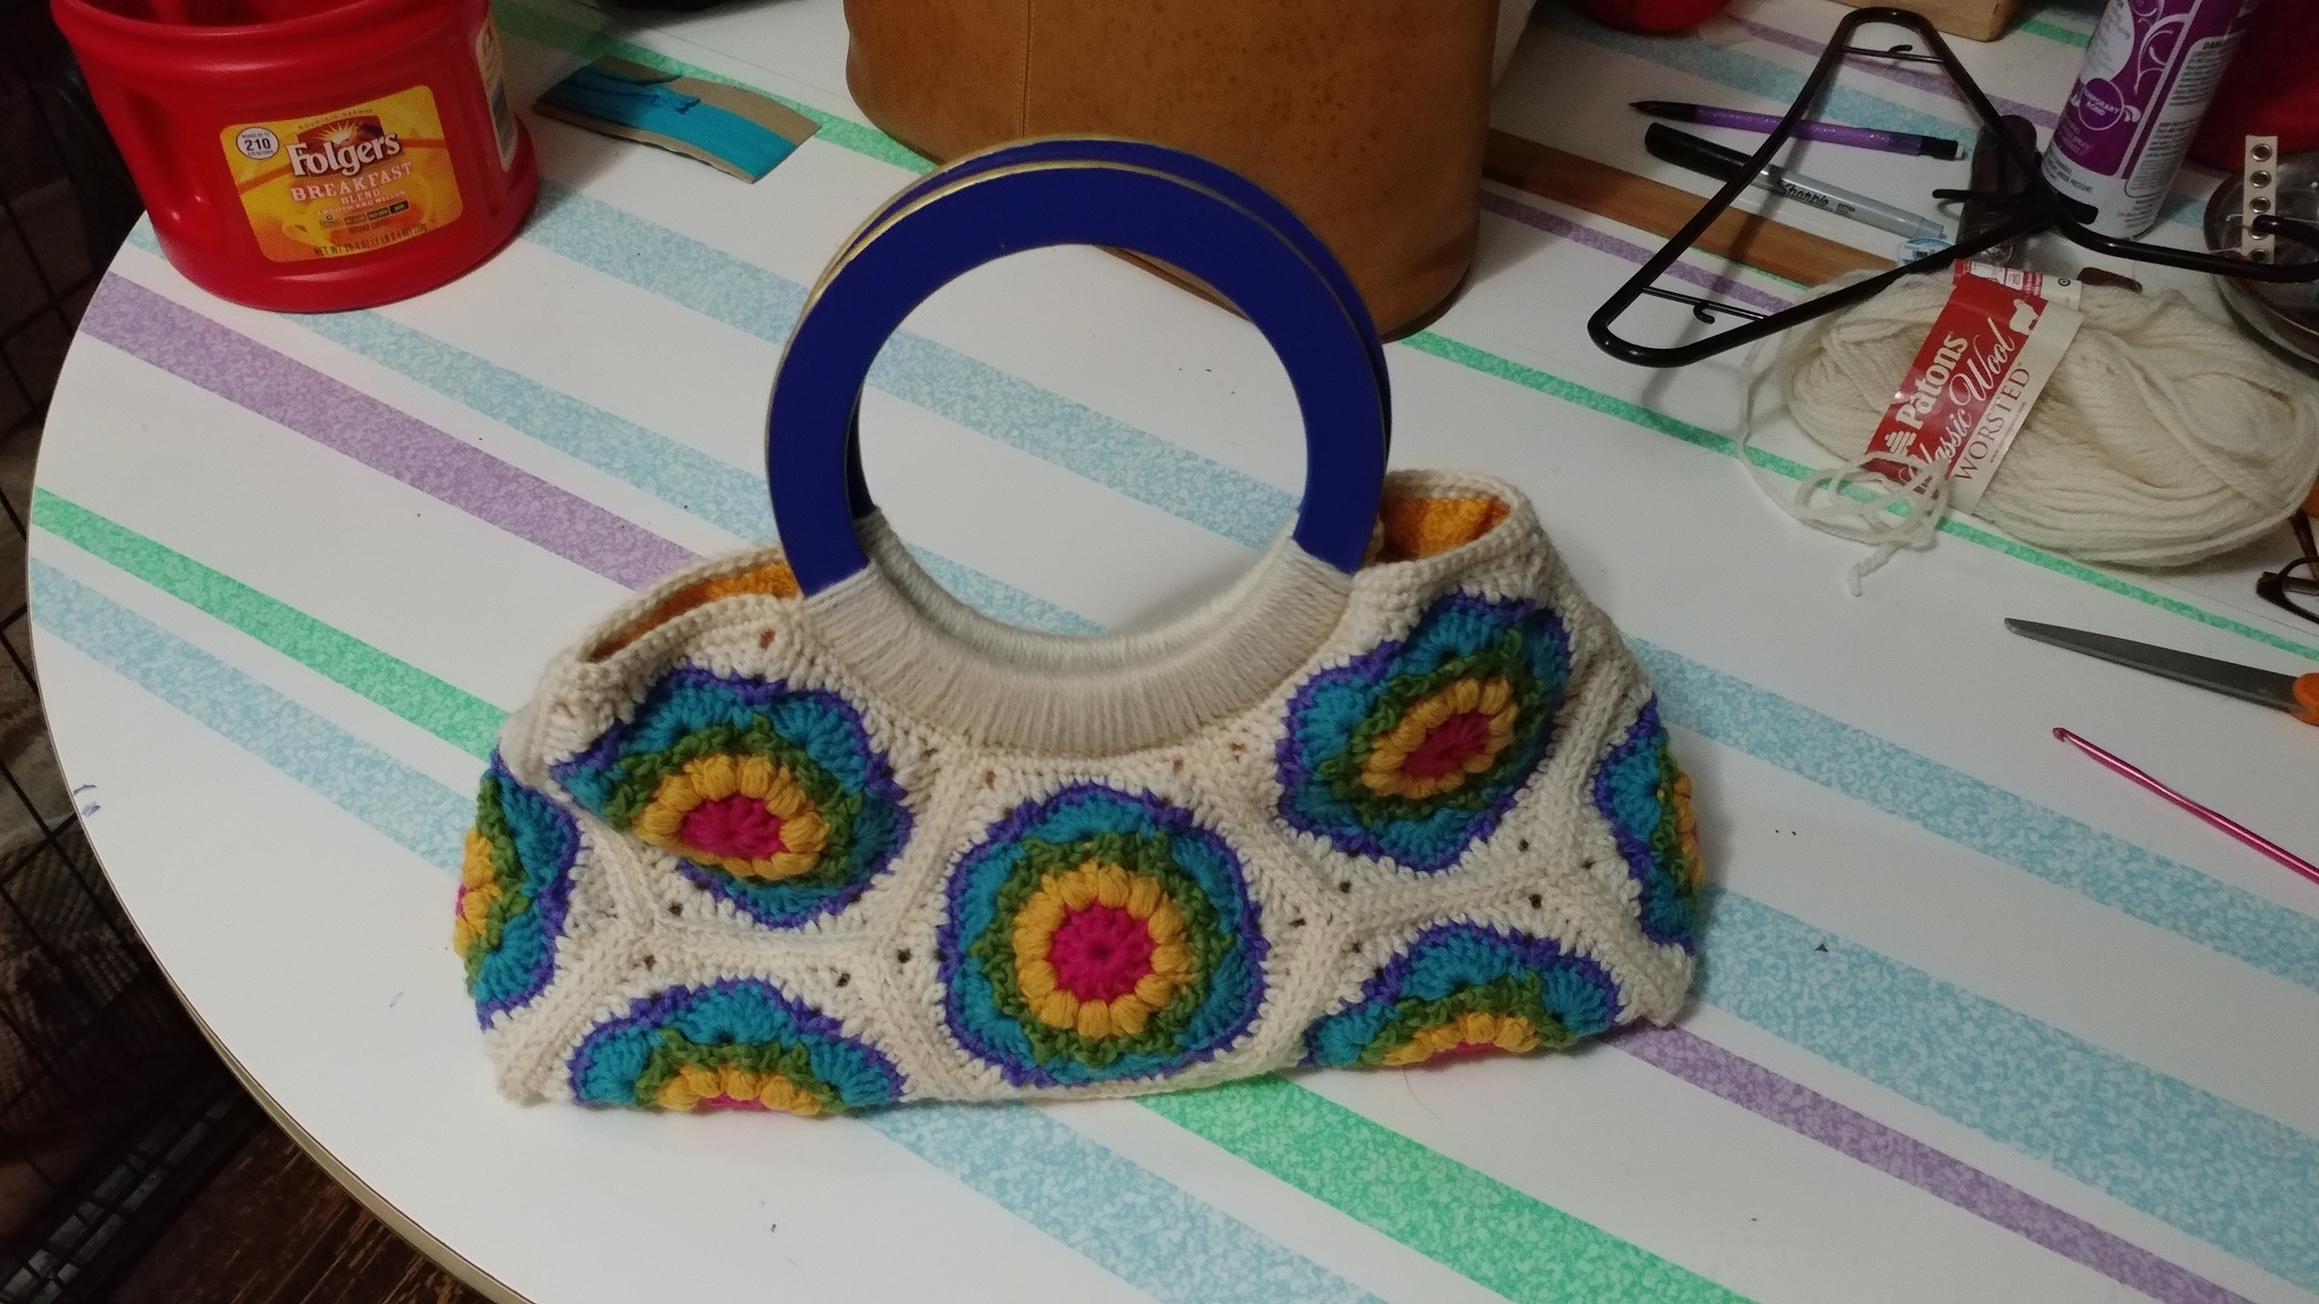
I frequently buy my yarn at thrift stores. My Goodwills are magical places, and my yarn stash is amazing, but I do wind up with a lot of single and partial skeins. In an effort to stashbust, I combined a hexie block I really loved (https://mijocrochet.wordpress.com/2016/12/08/merry-go-round-hexagon/), a handbag pattern (http://psicrochet.com/project/almond-blossom-bag/), and some additional details, like customized handles and a fabric lining with a snap pocket, to make this entirely too cheerful bag.
It is cheerful! such great bright colors.
1 Like
Ohhh, I love it! It’s pure Rainbow perfection! 


2 Likes
Love the size and shape! What a great way to use up those pesky, self-multiplying leftover or partial skeins…very cheerful!!
1 Like
Beautiful bag, love the hexie pattern!
1 Like
Love everything about it. The color palette, the hexies, the handles. Awesome sauce!
1 Like
This is gorgeous! I absolutely love how well this bag is finished off. By the time I’ve generally crocheted or knitted something this large, I’m so over the project that I probably wouldn’t have taken the time you obviously did to make it so polished looking.
Thanks for sharing.
1 Like
So vintage!
1 Like
The perfect stashbuster! I love the colours.
1 Like
great job! i love the square/hexie design you went with too. makes it that much more cheerful.
1 Like
This is awesome!
1 Like
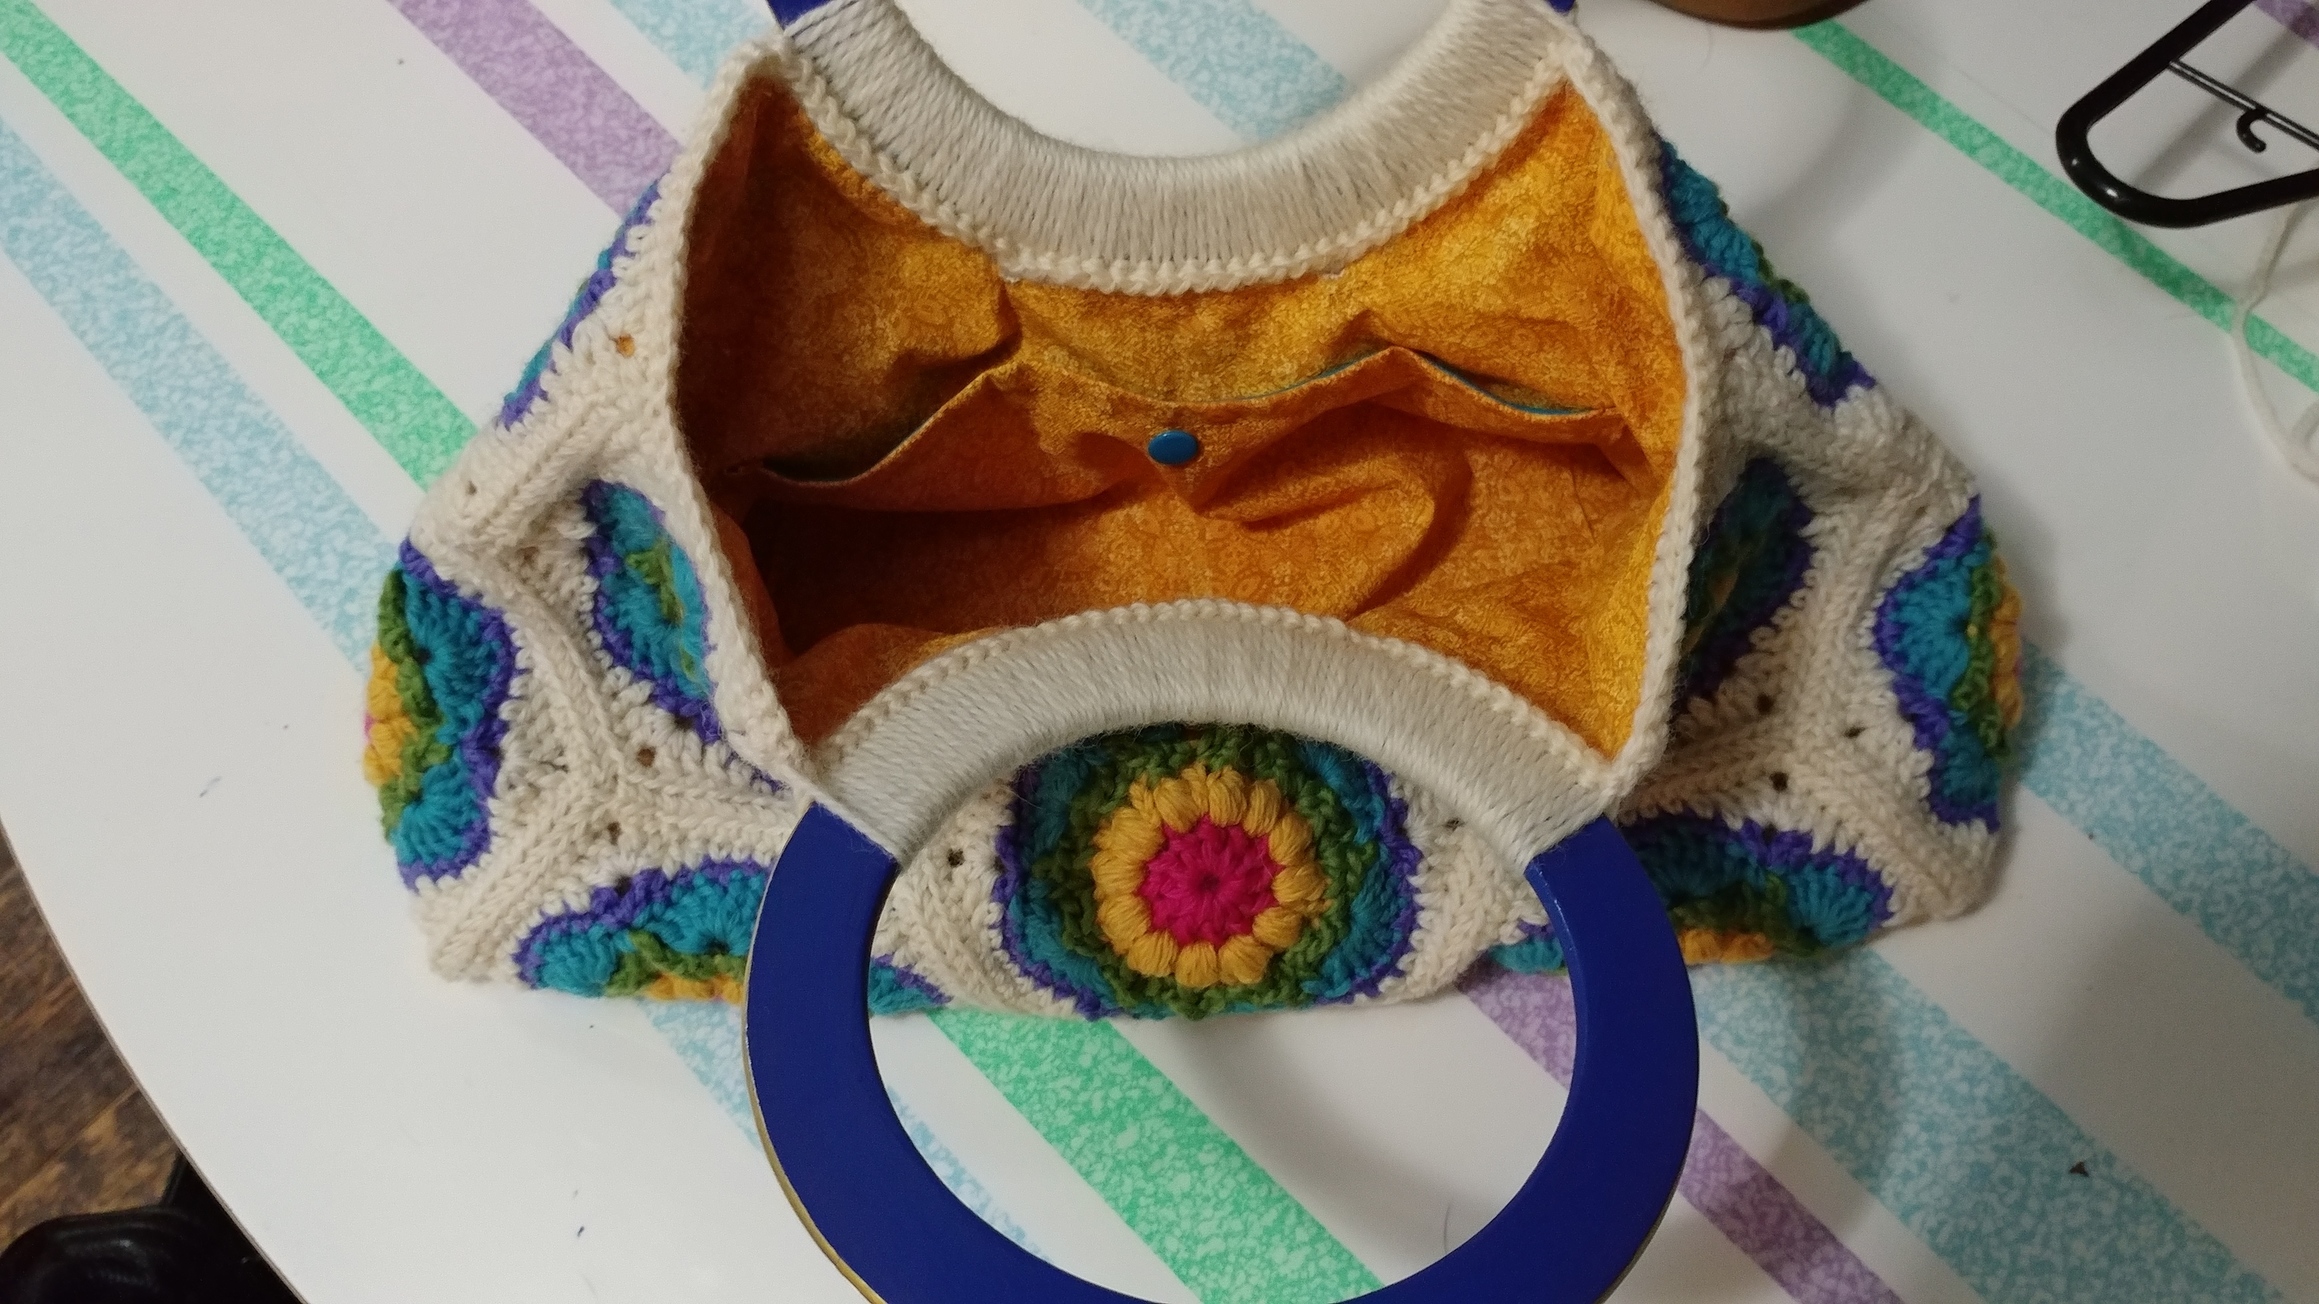
Beautiful!! I’ve never figured out how to attach a fabric lining to a crochet bag. Yours looks amazing!
1 Like
That is beautifully made. Yay for using thrifted and leftover bits!
1 Like
It looks so classic and fun. I never find fun yarn at my thrift stores. Jealous!
1 Like
I watched a number of videos on YouTube and decided that they were all a little slapdash and what others call my perfectionism, but I prefer to think of as my attention to detail, would serve me well, and then just jumped in.
Most tutorials, including the one for the bag that I followed, recommend laying your crocheted/knitted piece out while still flat and tracing around it, then adding seam allowances. But that didn’t sit right with me, so I whipped out a ruler and protractor and carefully measured out my blocks, squared all my lines and perfected my angles, and cut my lining out as perfect as I could make it. Folded over the seam allowances and pressed them thoroughly, and then it’s just whip stitched to the open edge, but making sure that I pinned it carefully, matching up all the exterior and interior angles, and catching the same part of each edge stitch so it looked pretty flawless. It is also tacked at the bottom corners so the lining doesn’t shift, and at the edges of the pocket to make it easier to open. It probably took a little longer than a lot of the tutorials would have, but I think the little extra time was well worth it.
4 Likes
I love your color choices! And, the handles coordinate perfectly! It’s beautfully done, and the brightness of the yellow lining was a great choice!
1 Like
It totally did. This far surpasses many linings I’ve seen. Thanks for a rundown of how you achieved it. I tend to be a bit slapdash myself, so it’s always nice to see something that reminds me that taking a deep breath and slowing down is so worth it.
1 Like
That is a bag to put smiles on faces  It’s gorgeous! I love the bright colours of the yarn and sunshine yellow interior!
1 Like
You can never be too cheerful! Such a great way to use up bits and pieces. Love the looks of this bag and the lining was the perfect choice.
1 Like
Thrifting yarn is so much fun  And I love the colour combinations used Great job on the bag
1 Like