Made for the man, he absolutely loves it and is entranced with the technique of getting designs onto fabric. It’s so nice having a fan to make things for!
Here’s how I create a freezer paper stencil.
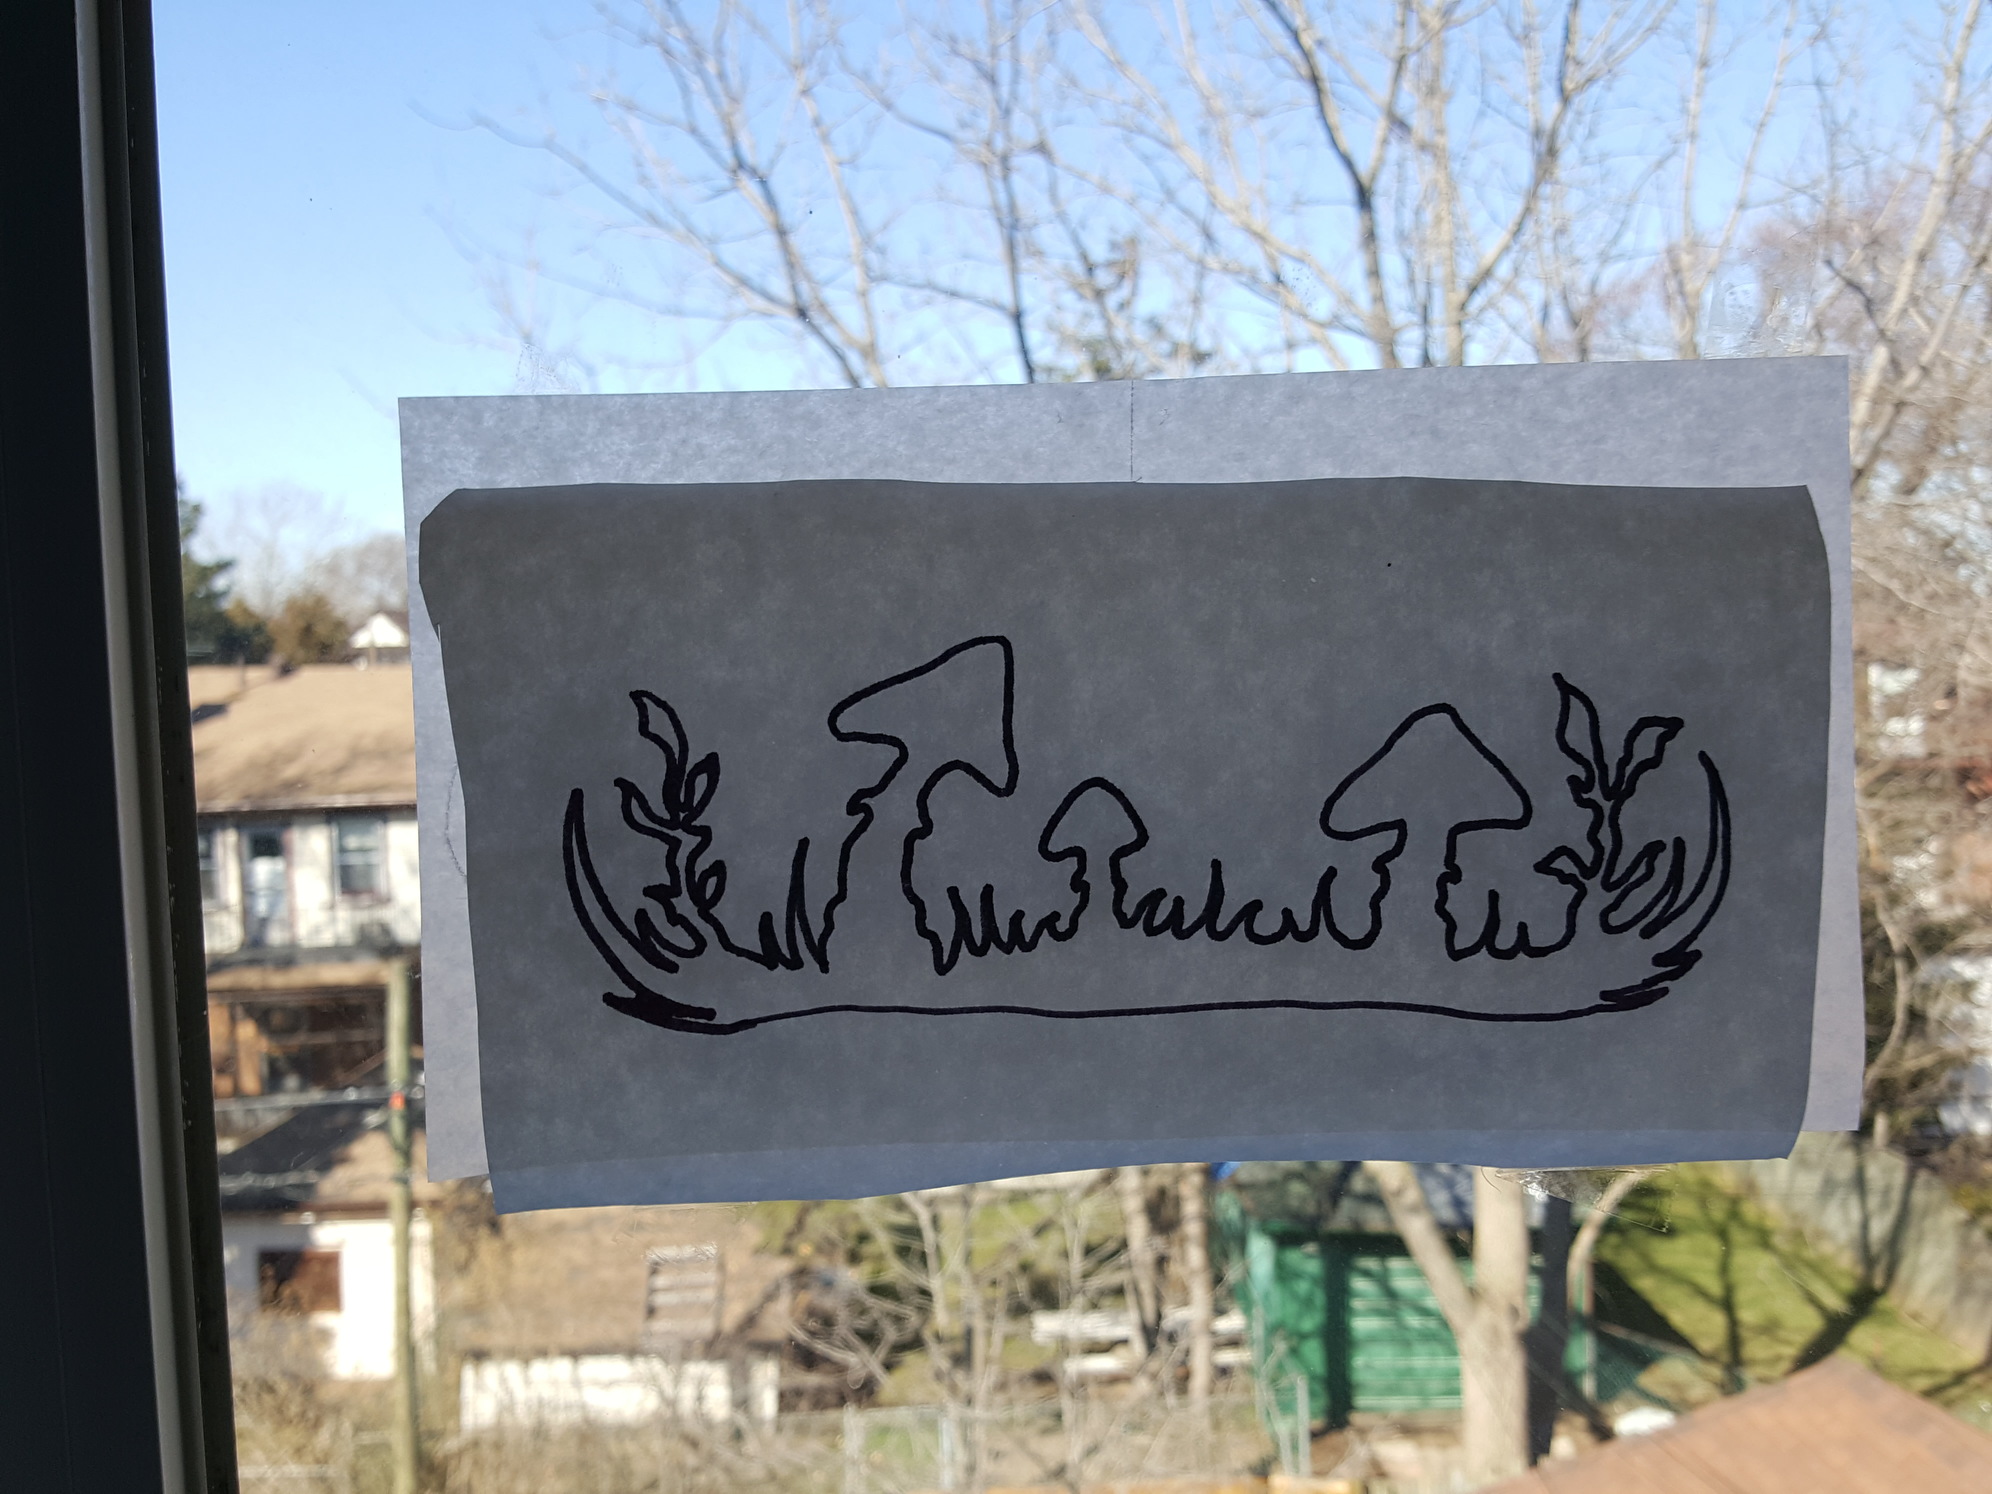
Start by sketching out your design. If you don’t have a light box, tape it to a window then tape a piece of freezer paper over top and trace the design onto that.
Carefully cut out your design with a very sharp blade, I use a tiny pivoting exacto but you could use very sharp little scissors if you were really careful. (sorry about the sideways photo, I can’t seem to get that right way up no matter how much cropping I do on the computer
 )
)
Put a piece of cardboard inside the shirt to create a flat surface & protect the other side from paint seeping through.
Using a hot dry iron, lightly and quickly press with the shiny side of the freezer paper touching the fabric, not the iron! If there are any free-floating bits such as the centre part of a letter like “e” or dots like I have applied, position them shiny side down and lightly press with the iron. Too much heat for too long will disrupt the stickness and allow paint to leak in around the edges of your stencil.
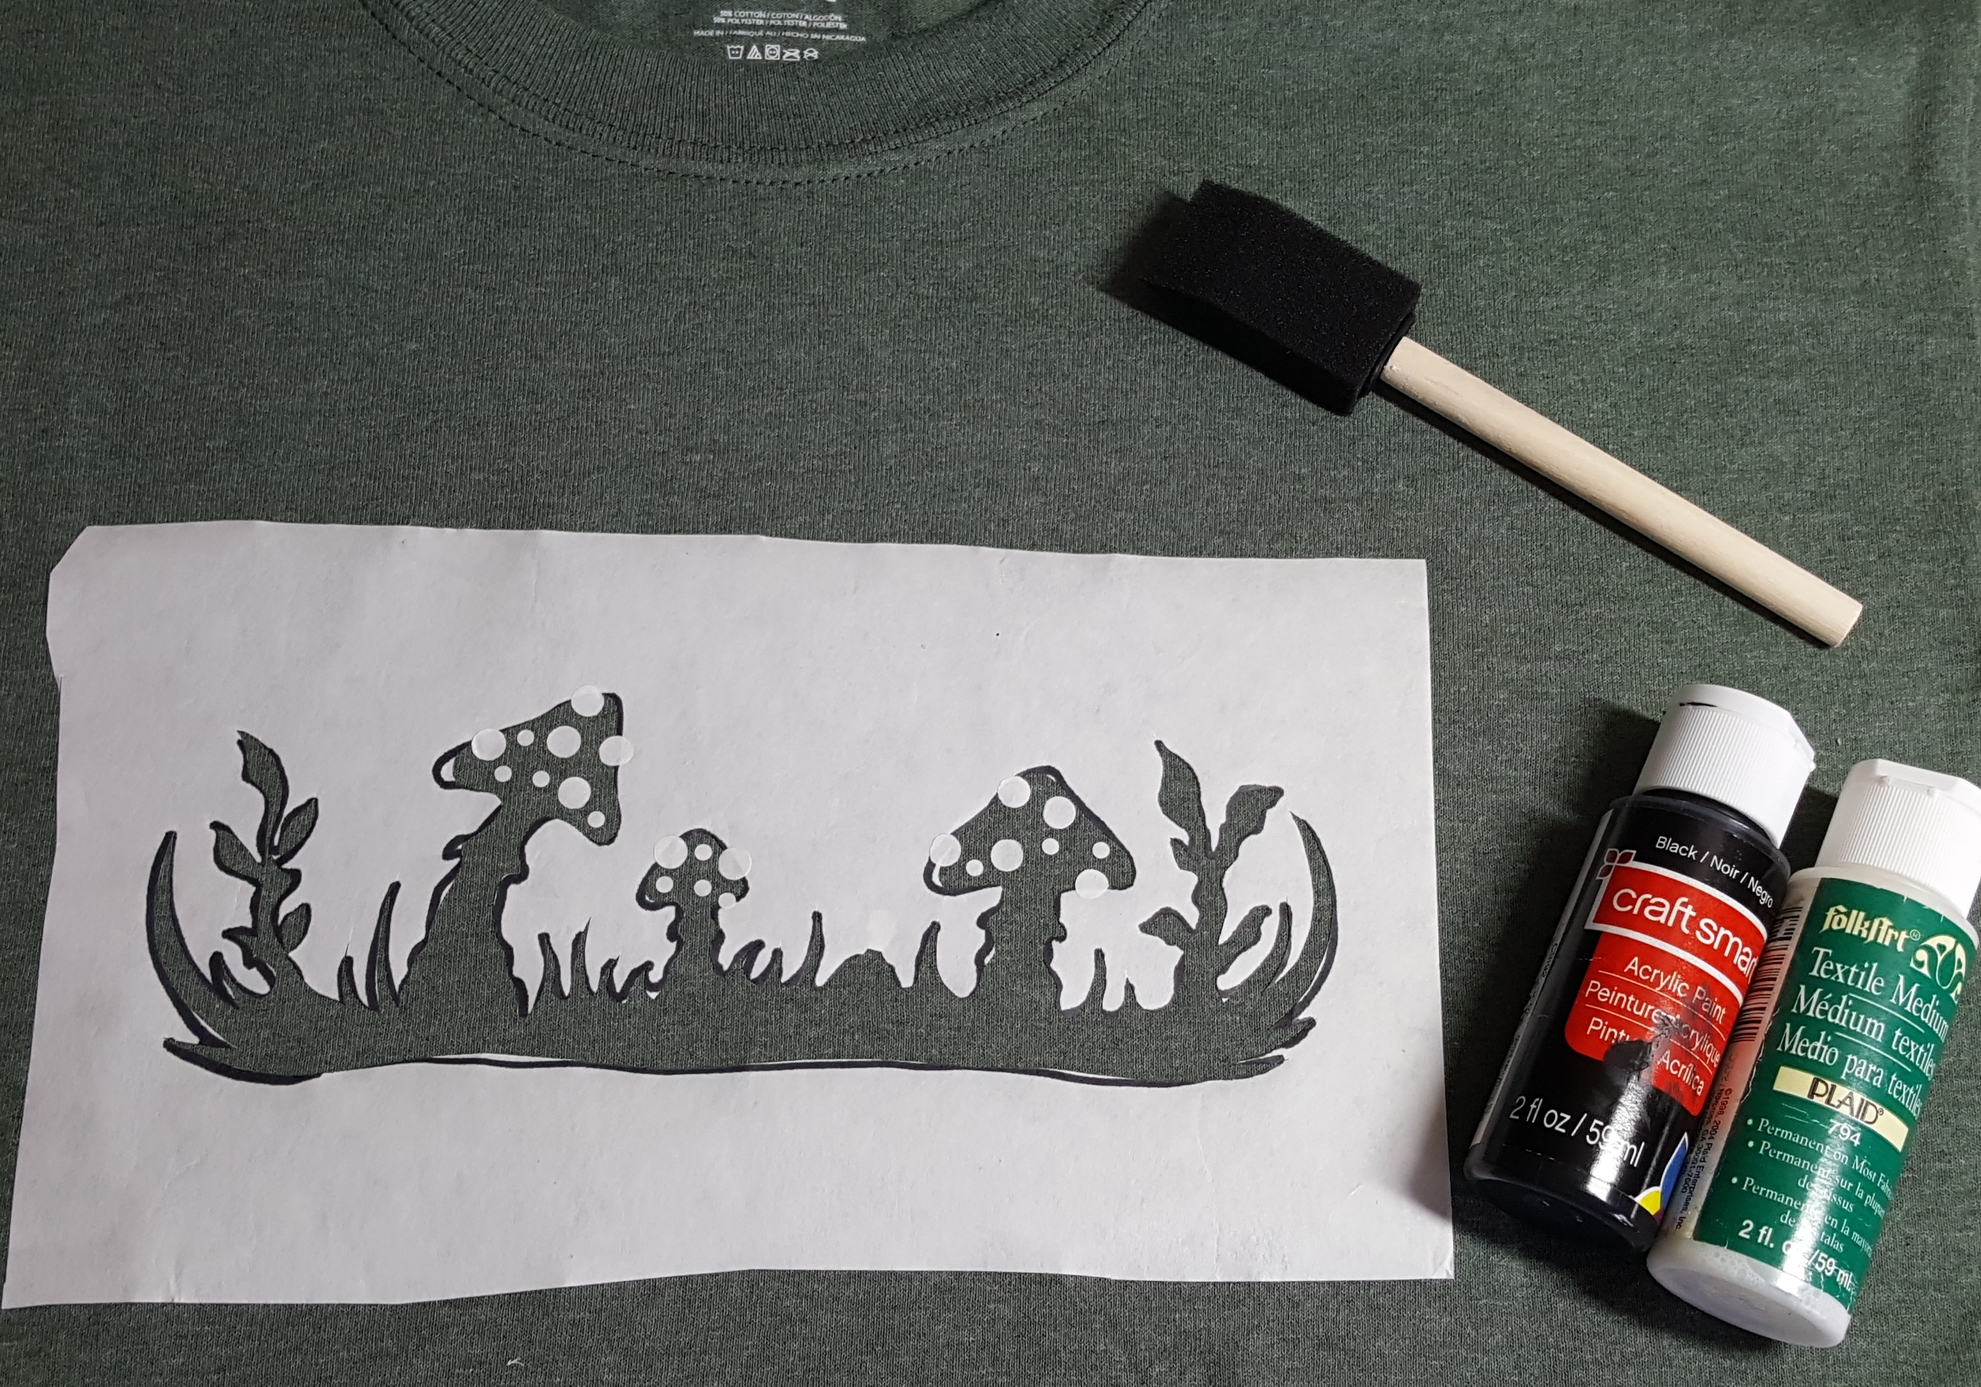
Mix equal parts acrylic paint and textile medium together and sponge onto the fabric. It’s best to do a couple passes with less paint in the sponge applicator rather than saturate the fabric as this too can cause leaking around the edge of the stencil. You just need a bit of paint on the sponge and lightly but quickly dab it all over, then reload with paint and repeat.
I peel the stencil away as soon as I am finished with the paint, using a teeny pair of tweezers to carefully lift up any free floating bits.

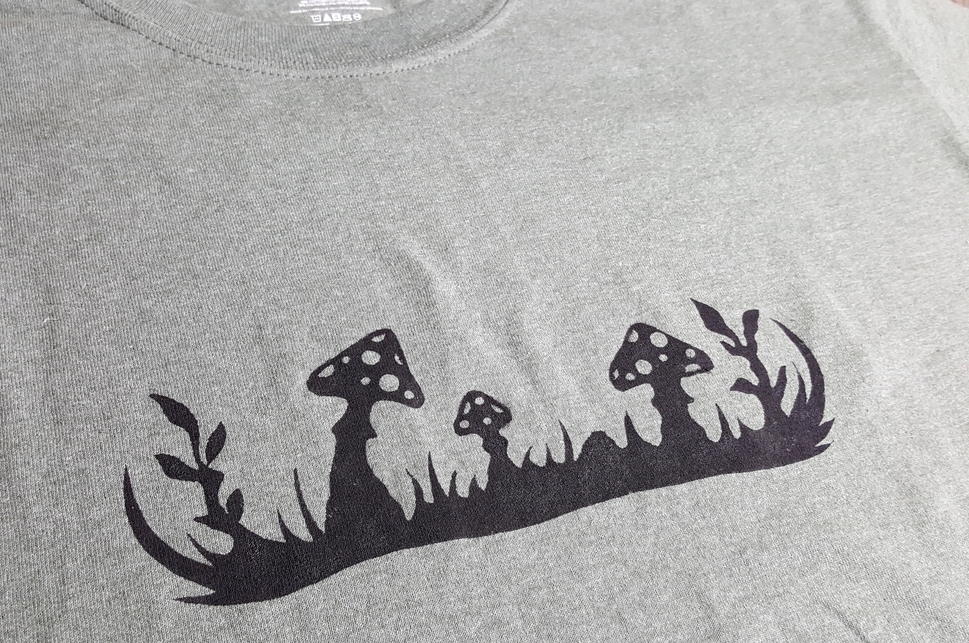
Rather than looking like speckled toadstools, these appear to have been nibbled by teeny fairies! No worries, I used a very fine brush to touch up the outline around the spots.
Once dry, turn the shirt right side out & run through a dryer cycle on high to set the paint. I always wash inside out and hang to dry to keep the design from fading.
You can dilute paint with water instead of textile medium if you haven’t got any but experiment with that so you’ll know how dense the colour will end up and how durable in the wash. Acrylic paint is basically liquid plastic, the medium or water helps it to soak into the fibers rather than sitting on top which prevents it from cracking or peeling.


