Temari Ball: D&F 2020 Q1 Contest Entry

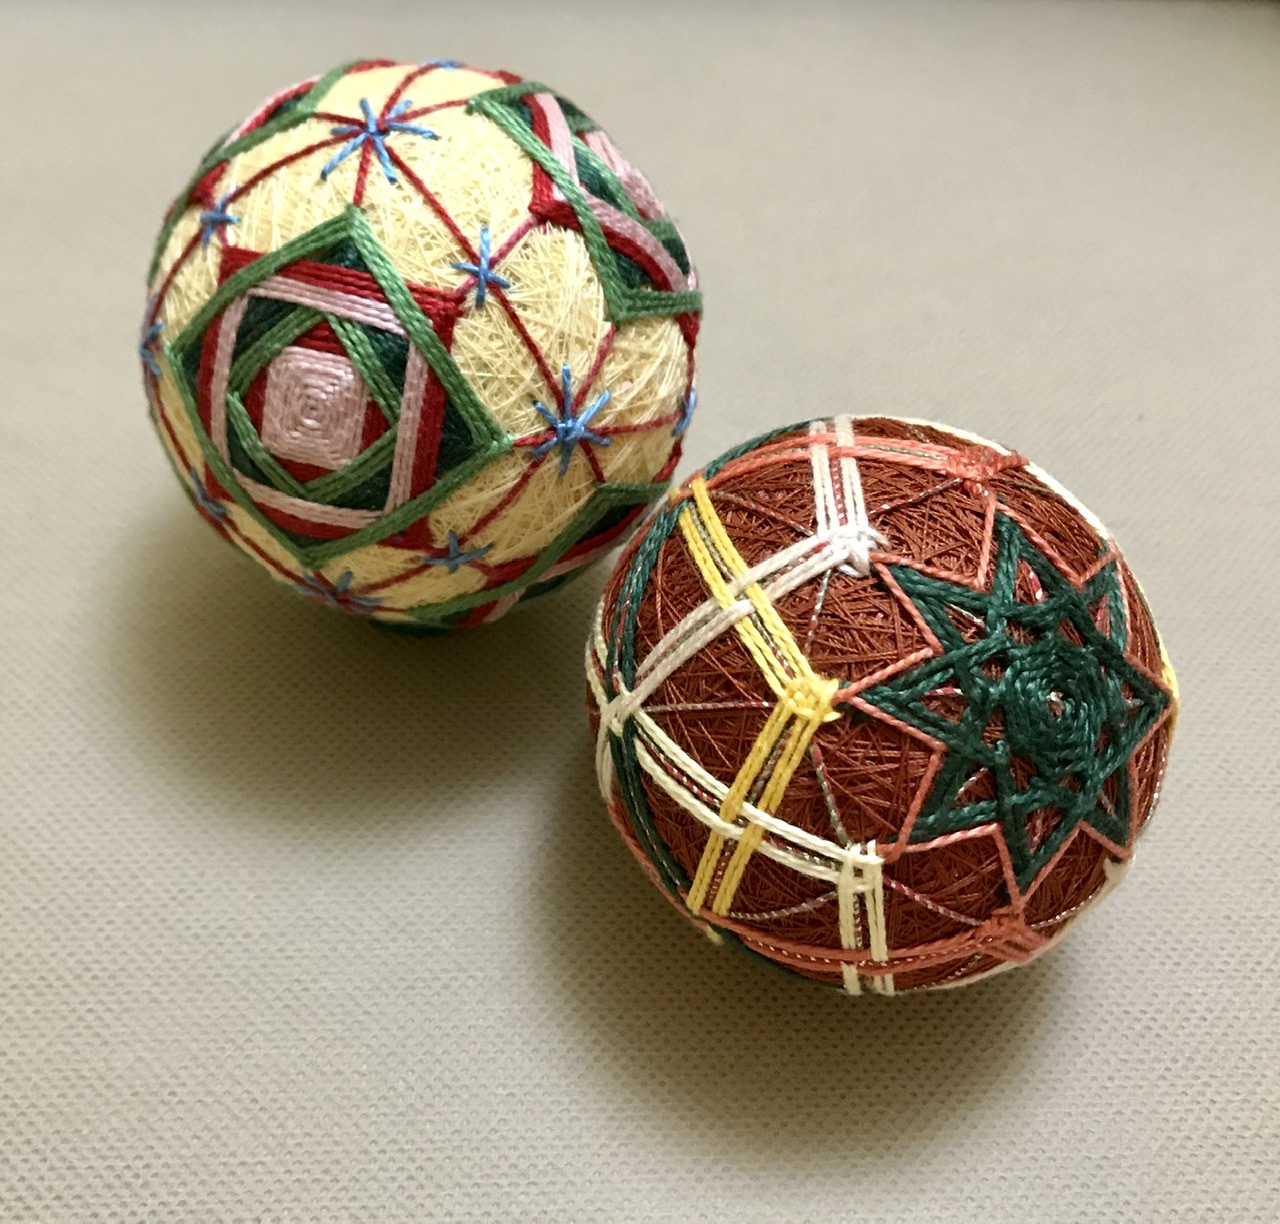
This is my second Temari ball ( and the first that I have made totally “from scratch.”)

I took a few progress shots before I got so engrossed in crafting that I forgot.

First, this is the material I used for the core: dryer lint and used dryer sheets.
image

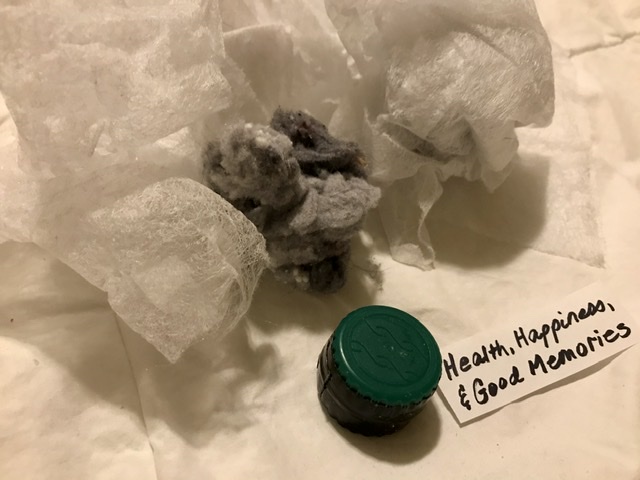
In the picture, you can also see the little capsule I made from two plastic bottles caps. There is a jingle bell inside. Also a little message for my MIL ( this was intended to be a gift for her.)

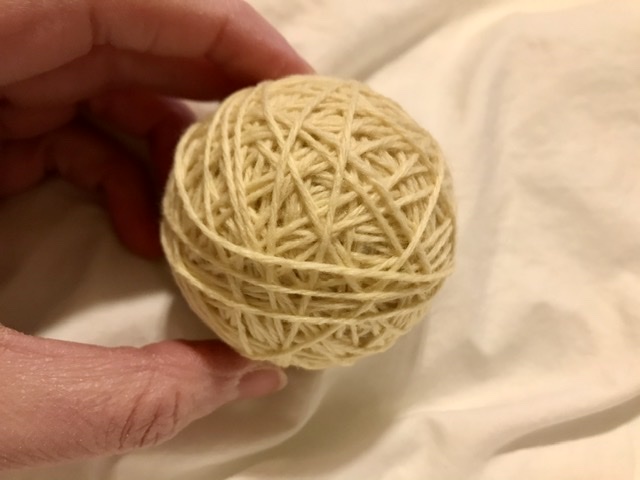
I used some old, faded, sport weight yarn as the first wrapping material. The color is inconsistent, so it’s not really useful for other crafts.

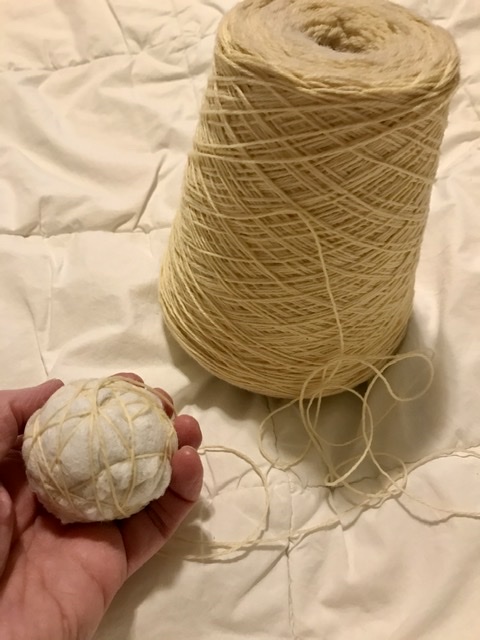
Tried to compress the core material and wrapped it until it was a fairly nice sphere shape.

image

Then wrapped it with progressively finer thread. First, size 10 crochet thread and then size 30.

The final wrapping was sewing thread. I have a bunch of old thread that I got at an estate sale. It’s very old, and I worry it may be weaker than newer thread, so I don’t use it often. I was able to completely finish off a partial spool!

image

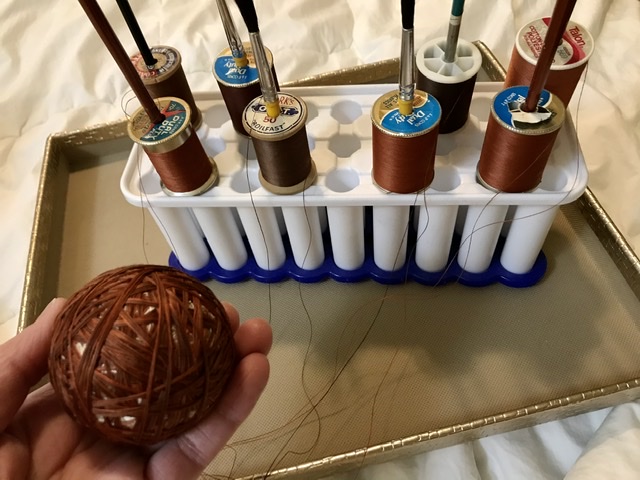
I started off “power wrapping” with eight spools of thread. Then cut off 4 and continued. Then cut off 2. Then cut off the last extra spool and continued with only one.

Next step, measuring and marking. You use a strip of paper (visible in the picture below) to measure off halves and quarters.

Then I used the marking pins as landmarks to place the guide lines. Once they are all placed and then tacked with a tiny stitch at each intersection, you can remove the pins. (I keep the North and South Pole pins in place.)

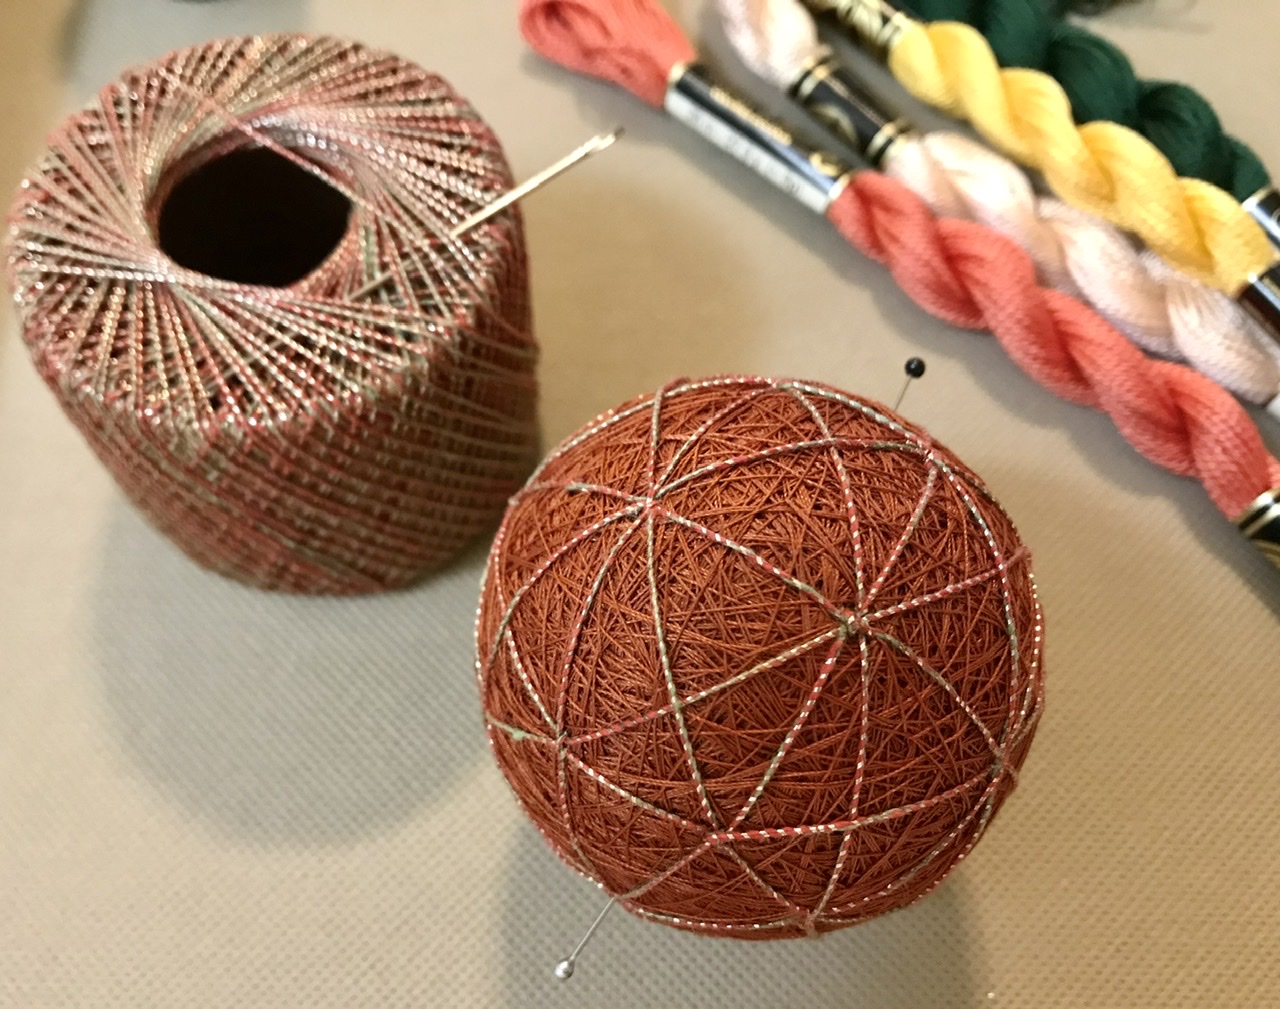
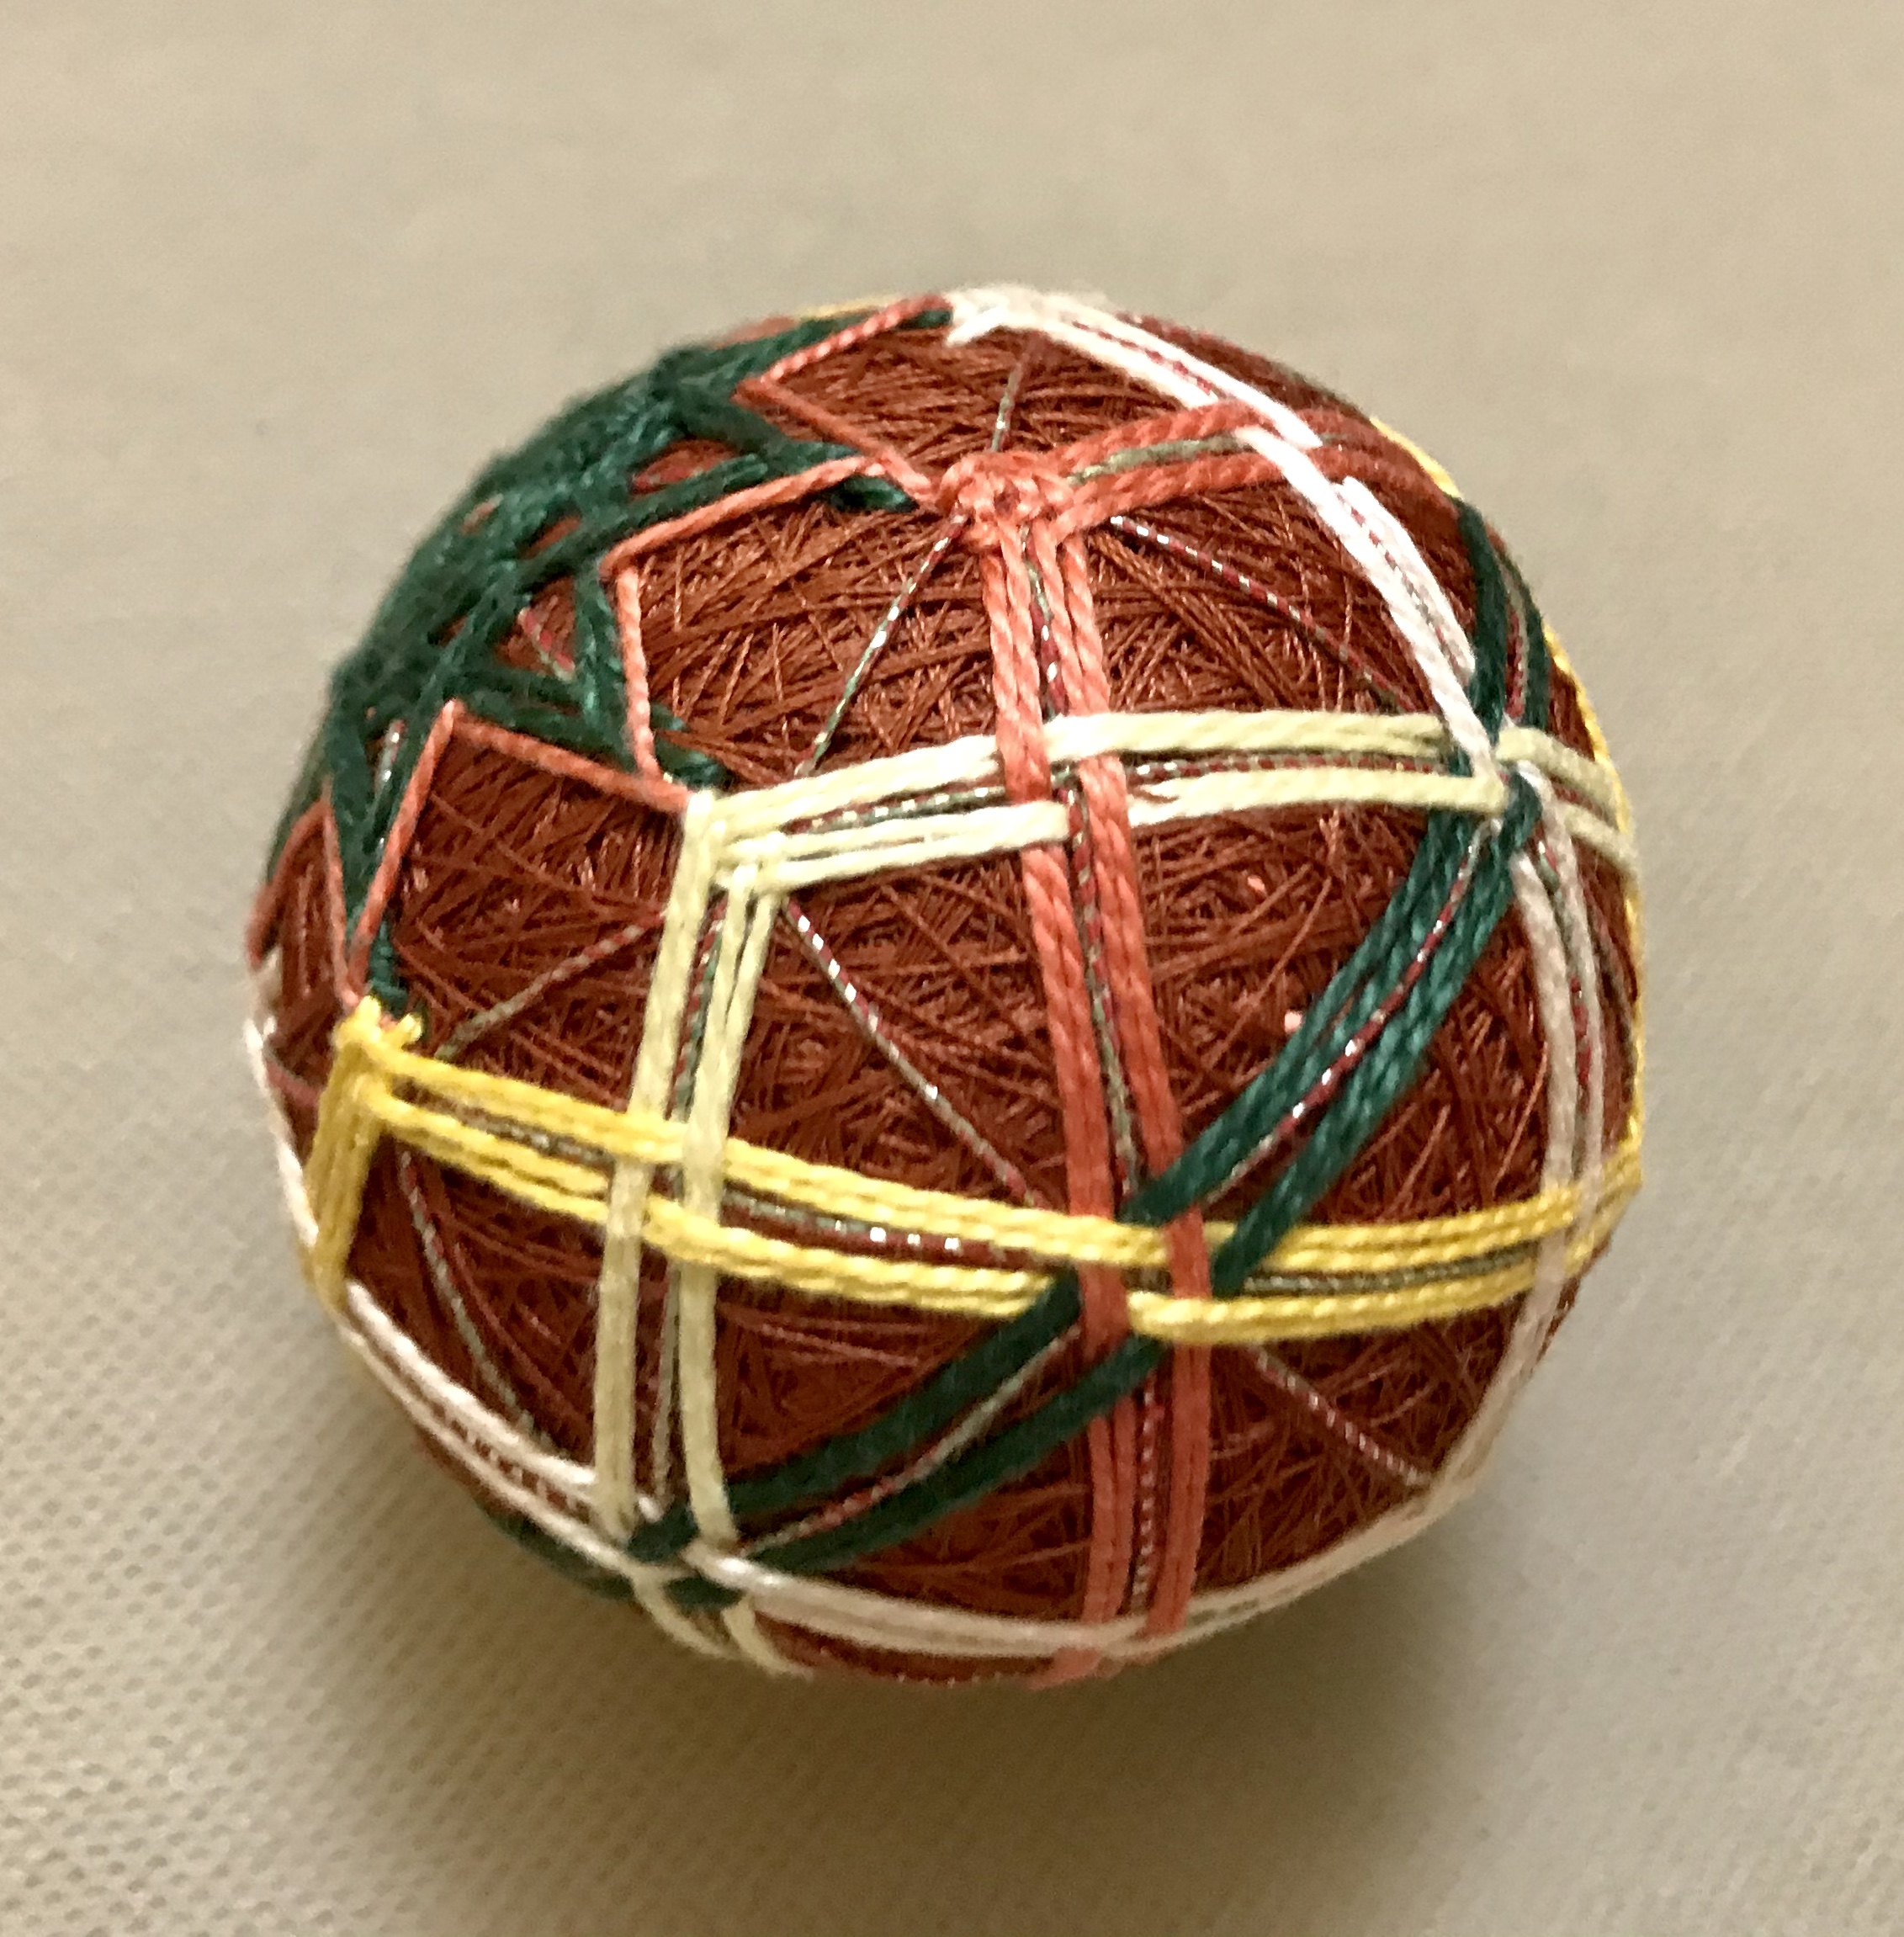
… and then I embroidered it, totally losing track of the fact I was planning to take more photos. Oh, well! @marionberries’ photo of her temari balls inspired me to try a design with mainly obi stitches (the ones that look like bands.)

Below is a picture of the finished second Temari ball, along with the first. (And from this angle, you can see how wonky the first one was! The squares don’t line up at all.)

23 Likes

Beautiful. Thanks for posting all the progress shots. I’ve never known how these were made but now I do :smiley:

2 Likes

Jingle bell! :green_heart:
So it’s beautiful and fun!

2 Likes

Beautiful…and so interesting…it is wonderful to see old crafts being kept alive.

Thanks for showing the process that ends with a lovely temari ball.

2 Likes

Lovely!

2 Likes

Those are spectacular. I’ve never seen one before.

2 Likes

Beautiful

1 Like

Woah. And thank you for the process photos!

:metal:

1 Like

This is so awesome! Way to transform garbage and simple materials into amazing art!

1 Like

Awesome!

1 Like

Another beautiful Temari! Thank you for showing the steps. I think when I tried to make one of these the last time I skipped most of them because I just wanted to get to the embroidery part. :laughing:

1 Like

This is an awesome temari ball! All those steps show me I wouldn’t have the patience for it, so I will really appreciate those who do! Great entry!

1 Like

So amazing!

1 Like

Awesome project! What a good way to make use of the yarn and thread bits. I loved seeing how you form the ball.

1 Like

That is beautiful!

1 Like

That’s so cool, I had no idea this sort of thing existed! I don’t see anything wrong with the first one, they’re both fantastic!

1 Like

So beautiful - do you use it as a centerpiece?

1 Like

Awesome! I love the jingle bell idea. My cats would love it, but they might not appreciate The beauty of the piece.
I like the earthy colors and the star. Just lovely.

1 Like

Thanks for the love, everyone!

@sheepBlue: You can display it in different ways:

  1. Add a loop to hang it on a Christmas tree or in a window as an ornament.
  2. Set it on a shelf on a stand (you can buy these or make your own from a bottle cap, slice of a wrapping paper tube…)
  3. Many people display a group of Temari in a large, shallow bowl. (Of course, you would need to make enough to fill the bowl!)

@marionberries: Back in the days when I had cats, I know they would have LOOOVED to play with a Temari ball. But I would have tried my best to prevent it! (Nowadays, I cannot have cats because my DH is terribly allergic. So I just try to make friends with other people’s cats whenever I can.) :heart_eyes_cat:

I found a bunch of YouTube videos done by Barbara Seuss, who is the person who taught my workshop instructor. So it shows the same method I learned, if anyone is interested in taking a peek.

I just watched her videos…it is a fascinating project…I especially loved her power wrapping…looks like she used a plain wooden cone thread holder on the floor. I wonder what her history is? She has been to Japan so she must have gotten interested there.

1 Like