
A friend and I had seen the online class and kit that Tim Holtz was doing through Simon Says Stamp and were both soooo tempted. Alas, we’d also already spent our Halloween crafting budgets so weren’t willing to spend $99 on the kit (which was still a great value). However, the class was free (on YouTube) and we decided to do it using our own materials a week after the live class.
It was a ton of fun to craft on video with my friend in California while we each ran the replay of the class! I love that the only things that our projects have in common are the caldron and the pumpkins, but we built them together. Mostly. She’s posted hers, too! Of course it took us both a lot longer than the 4 hours of the class. Which is to say… there are a lot of details and I took photos of them all, so buckle up if you care to continue!

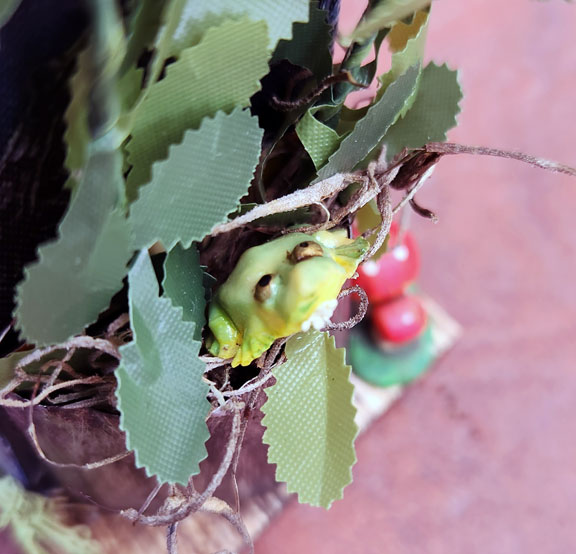
I had the house-shaped Vignette Box in my stash and decided to use it here. I mounted it off-center on its base. This side has a vine growing out of a tin planter that is also home to a little frog. The frog is an old Cracker Jack charm that was my grandmother’s. The mushrooms were in a baggie of little bits and bobs that I picked up at a garage sale that I stained with watered down paint.

The back is simply decoupaged with a piece of printed cardstock. The pack of cardstock and the cauldron bubbles are the only thing purchased for this project. I added an Italian horn charm for just a bit of detail. I think I will add a label with my name and the date on the back, too.
The other side shows the frog print ribbon I glued to both sides, but I didn’t get a photo! I will come back and add it above.

I used a beverage can and an embossing folder to made roof panels, that I then painted to look old. A scrap from these is what I used for the planter.
The attic!
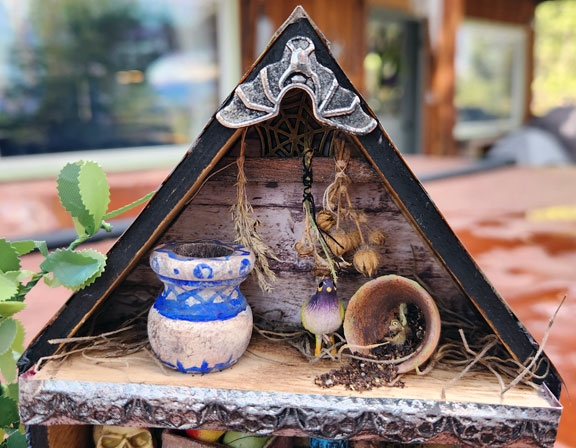
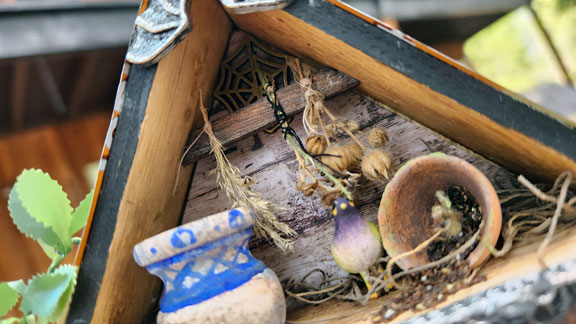

Wood board printed cardstock in the back with a spider web charm in the peak. I made a rafter tie to tie bundles of drying herbs to - the “herbs” are dead plants from the property. The blue/white pot is a wood finial that I painted, the pot is a mini terra cotta pot that I distressed. Its soil is tea. The pigeon is from a garage sale baggie. The detail on the edge of the floor is a scrap of embossed bev can from another project.
The Work Area!
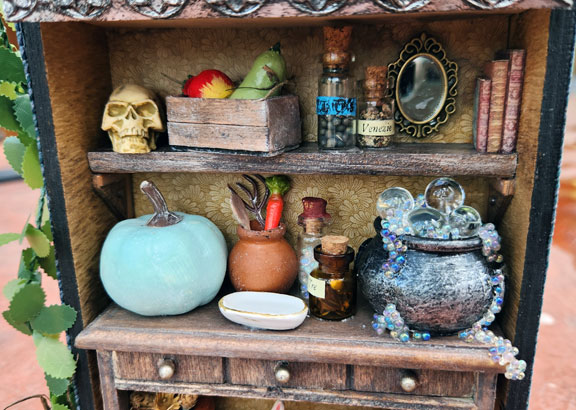
Shelf details:
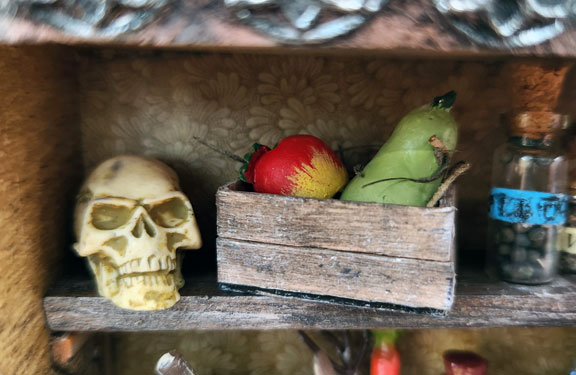
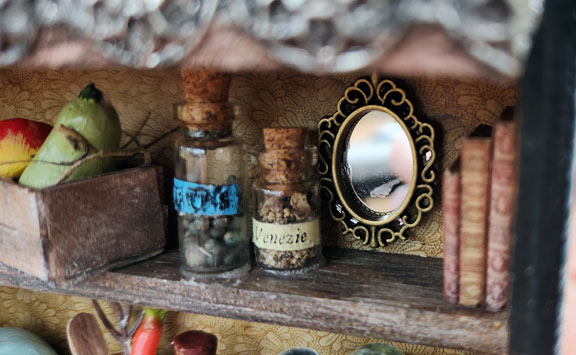
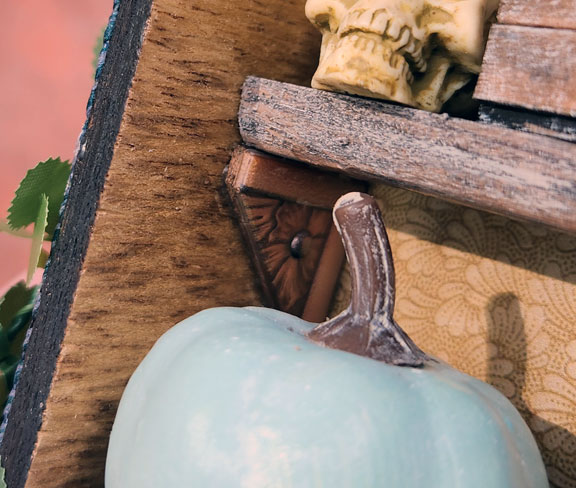
The skull was a keychain from a thrift or garage sale and the only actually-spooky thing in this project (who am I?). I made the crate with coffee stirrers and a tongue depressor. The apple and pear are from a set of mini fruit ornaments (thrift/garage sale). The bottles have painted mustard seeds and fresh ground pepper in them. The labels are from the seal-like thing on the top of a wine bottle. I had a mini mirror that fit behind this mini frame and the books are ones I made from online printables in, like, 2001. The shelf itself is a piece of scrap screen moulding used in my big book case project and it sits on some Dollar Tree stickers stuck to paperboard from packaging.
The work table!
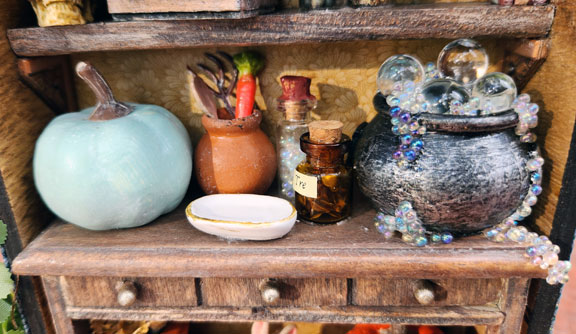
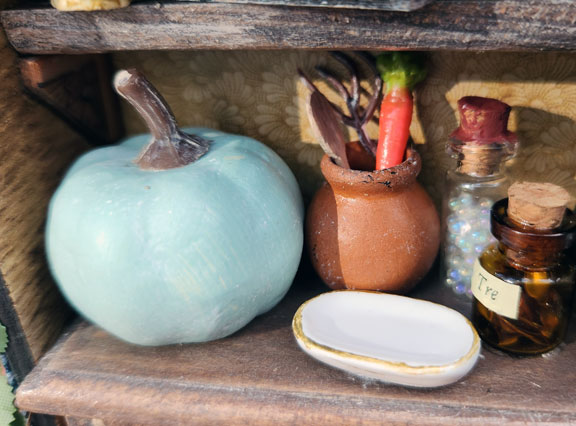


The table itself is a Dollar Tree piece I’ve had for decades, as well. Stained with watered down craft paints and topped with Distress Crackle Paste. The knobs are painted with gold craft paint. Pumpkins from Dollar Tree years ago, painted blue. Mini crock has another Cracker Jack charm (carrot), a bit from a plastic floral piece (fork) and a wooden spoon that I whittled from a popsicle stick. The tray is a mini from Michael’s. The bottles hold beads and cut-up flower-shaped sequins. The cauldron is a Tim Holtz piece from years ago - I had a 2-pack and shipped on to my friend with a few other funsies. I had a lot of fun making that cauldron really spill over!
The floor!
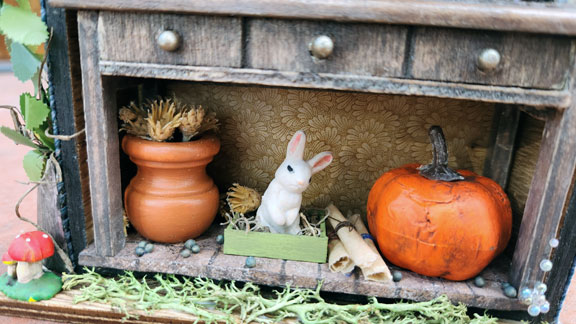
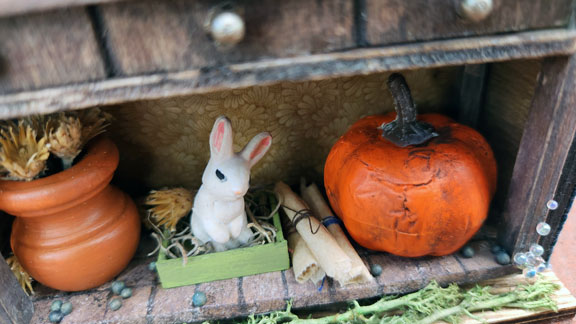
The tile floor is part of what remained from an experiment trying to use an embossing folder with paper clay (with a rolling pin rather than the Sizzix). I painted it to look like old clay tiles. Another finial for the terracotta crock with more stuff from the yard in it. The rabbit was from a garage sale, it’s nest box made from more coffee stirrers and a tongue depressor. Scrolls made from tan colored tissue paper tied with thread. Another Dollar Tree pumpkin, this one was wrinkly to begin with, so I though just distressing it with dark, watered down paint would give it a starting-to-rot look. The spilled bits are more of the painted mustard seeds. I like to think that they are big enough and blue enough to not be mistaken for rabbit droppings! In several pics you can see the “wallpaper” made from printed cardstock from the new pack.
I’m kind of shocked just how not-creepy this Halloween project of mine turned out! In fact, it’s barely Halloween-y at all. ![]()