
This project was 5.5 years in the making! Because in mid-July 2019 I almost finished replacing out upstairs floors with a floating LVP that could not tolerate a full bookcase upon it and we had a… really full bookcase. In February of this year (2025), I finally screwed up my courage to start the Big Built-in Bookcase project I decided would be the solution way back then. It took me about 5 months to complete and High Five Challenge helped push me to finish in July!
I’m going to share A LOT of pics; consider yourselves warned. Skip to the end for end-of-project images. ![]()
It started with building a base on which to set the boards, similar to a method for cabinetry. This base sits on the subfloor rather than the LVP and is set to level so everything after would be level, as well. You can see where I did not do the wall finish where I knew shelves would be.

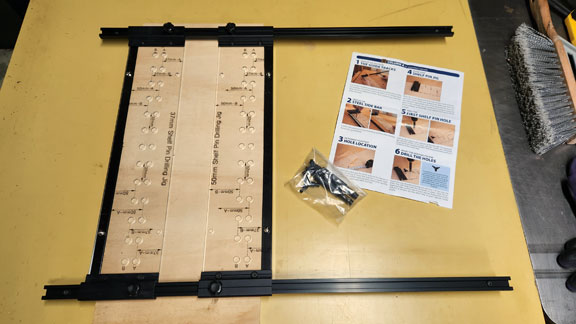
Then I made 5 individual cases. February in Montana in an unheated shop is not the best time to do woodworking, so I set myself this parameter: if it is at least 25F, I will work at least 2 hours, at least 5 days/week. I mostly stuck to that! They have adjustable shelves which required lots and lots of drilling using a jig made for that purpose.


I built 3 first to make sure exactly how wide the other 2 would be. Those two are just a tad narrower than the other three, but it’s not really noticeable when seeing them all installed. It did mean that I had two cut two lengths of shelves, though. ![]()
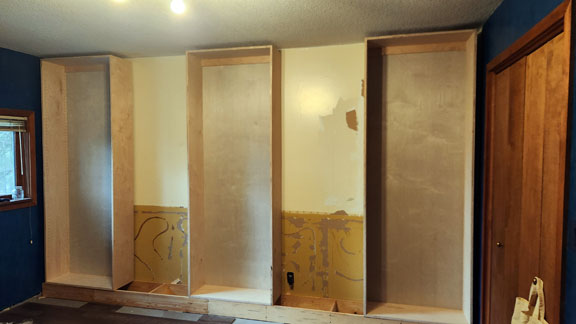


Once they were all plumbed up, they were attached to the base at the front bottom and to a cleat I installed near the top of the wall (not pictured). You can see that I cut through the backs for electrical outlets. Back when I was going the wall finish, I made sure to replace these outlets with dark brown ones so that they would blend in.

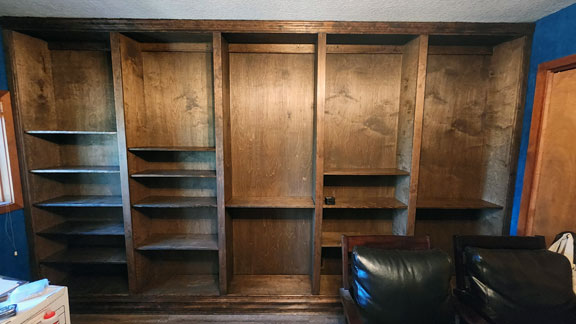
Now it was time to trim out the edges. The cases and the shelves are all built using Baltic Birch veneer plywood, so trim was necessary to cover the edges, but also to make them all look like one big unit as well as be “built-in”. Birch was not really available to me unless I had it custom milled at ridiculous prices and lead time, so I went with another blond wood, one that’s readily available: hemlock. I started with the top and bottom pieces, then added moulding to the top. The bottom moulding piece I had arrived damaged and I was waiting for a replacement

Finally I added the vertical trim pieces. On the end pieces, I added a little extra piece for some subtle detail which I didn’t get a photo of until the staining process. After those were in, I received the base moulding and added that.


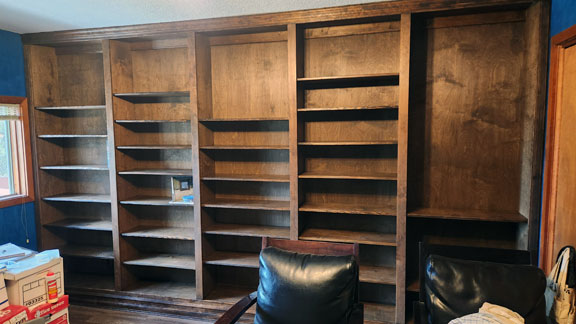
Which means I could finally start staining! I used Minwax Espresso and Minwax Finishing Wax to protect it all.


With the cases stained and waxed, I could finally install the last course of LVP and add the pre-stained/waxed base shoe moulding.

What was left after this was making all the shelves! I ended up with 36 in total. They’re the same Baltic Birch plywood as the cases with hemlock screen moulding on the front to cover the plies as well as add a bit of strength against warping. Because the shelves are not fixed, they can be turned over if they start to bow. Being plywood will help prevent warping, as well.


I had enough clamps to attach the moulding to 5 shelves at a time. For staining and waxing, I worked in batches of 7 and originally made 7 for each of the 5 cavities. I ended up making one more once all the books were loaded, because we had room in the center section. As each batch was done I would bring them into the house and put them in temporary places in the cases. I used brass pegs.


Along the way, a few friends were politely baffled about why so big? Why 30-odd shelves? No matter that I showed them all the boxes full of books, the guest room shelves full of books, sometimes two-deep, the shelves in the guest closet filled with books (also 2 deep). And yet…


Notice piles of books on the floor? We actually did cull as we put book on the shelves! Seven boxes of books are set aside to try to sell at the used book store and to donate to the Friend of the Library annual sale. There were also a few bags of unsaleable books (25-year old Let’s Go travel guides and severely damaged titles). Mostly, TheMisterT now reads on an e-reader so our accumulation of books has slowed dramatically in the last several years, but I imagine we’ll be shelving the paperbacks 2-deep at some point in the future.
Another detail: one of the electrical outlets. The cover plates are an unfinished wood, purchased at a home center. When this project was underway, a certain TheMisterT, who is the owner of 70-75% of these books, proclained he would do a serious culling. As the completion of the shelves approached he started waffling. Ahem. We had both thought there would be room of objets and seasonal decorations, including lights and other plug-in items. I had planned to cut notches in the back of some shelves to accommodate cords behind the books. Obvs this is not an issue!

And here are the final shots!
How it looks right now. There is still a lot to do in the room, not just the boxes of books behind the chair on the left.

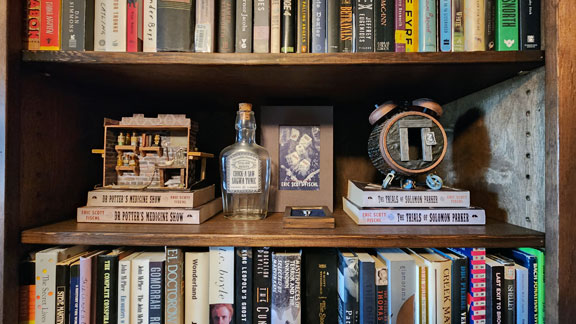
A shelf with TheMisterT’s books and some fan art stuff I made for him.
The completed, empty shelves with a TheMisterT for scale.

We opened a bottle of good bubbz to celebrate the official completion!

If you’ve made it this far, you deserve a HIGH FIVE! And also my sincere gratitude for hanging in with me this whole time. It was quite a journey for us both. ![]()

