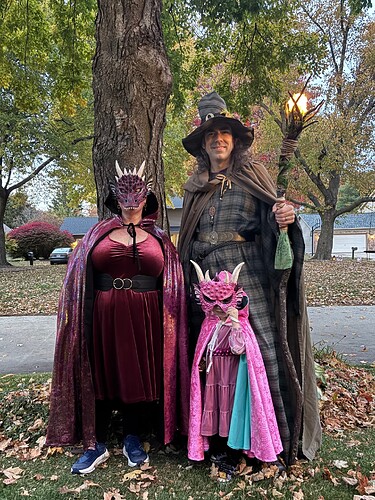
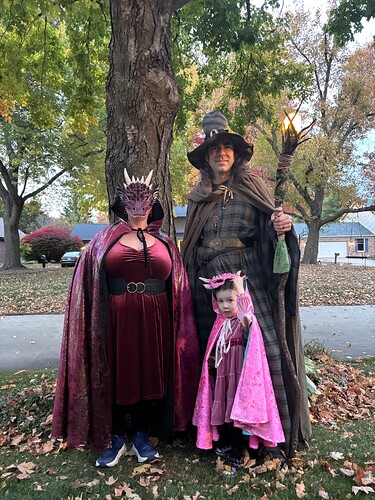
This year my daughter is 3. A very mercurial 3, who changes her mind and moods often. I started asking her in August, wha she would like to be for Halloween. She said a pink dragon. Over the weeks she stuck to it, but elaborated to explain the dragon would be pink, but with some purple and turquoise.
Since she still wears pieces of the Strawberry Shortcake costume I made 2 years ago, I knew she would want to play dress up after the holiday. Therefore it would have to be sturdy, and something she could easily put on herself. (That ruled out a fuzzy zip-up suit.) She would be wearing it to her class party, so it would also need to be comfortable enough for her to wear all day, and be actual clothing, if she decided to take part of the costume off. Plus she’s an active kid, so I wanted her to be able to mimic a dragons wings with her own arms. So I settled on a cape and mask as the main part of the dragon.
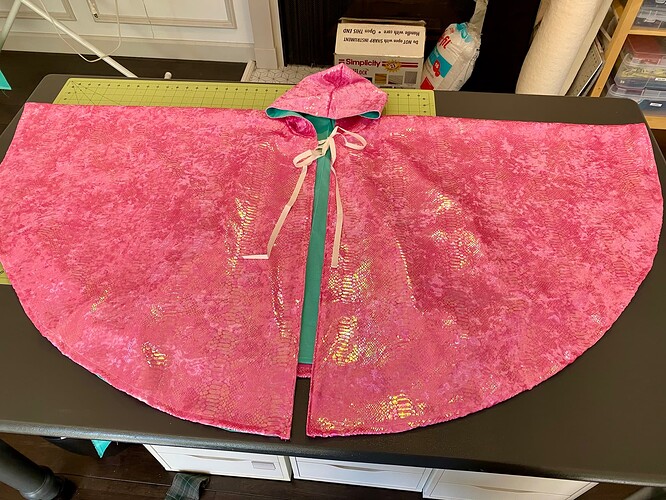
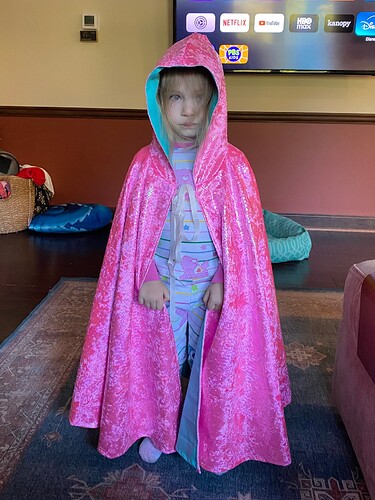
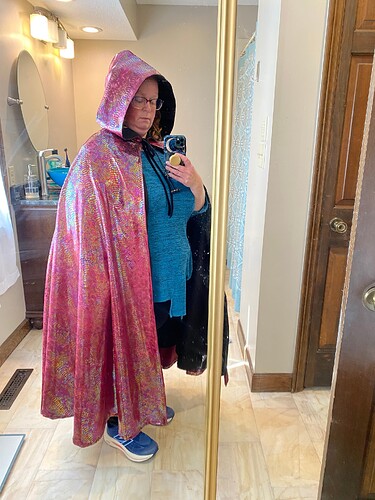
I found the fabric for the cape on Etsy. It’s an iridescent dragon scale print on crushed velvet. While I wasn’t planning on dressing my husband & I up, I did notice the seller also happened to have it in burgundy… It’s a full circle cloak with hood, and I lined it in some turquoise quilting cotton from my stash.
If I could go back and do it again, I think I would make it a half circle instead, as it was a TON of fabric, and it’s pretty heavy for a preschooler, but she did keep it on all through her party, and all trick or treating.
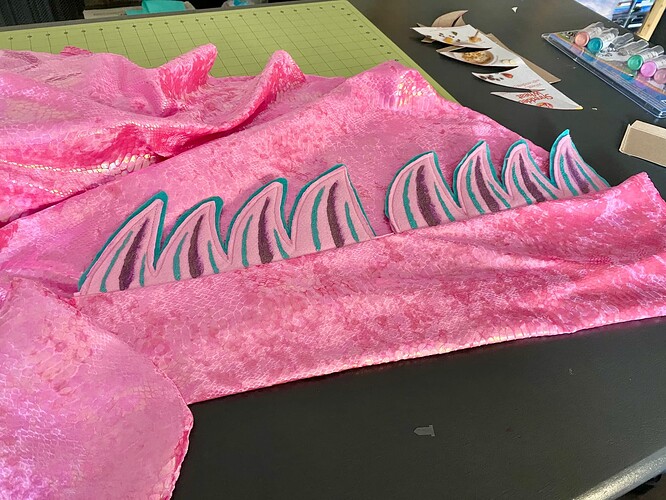
I used felt to add spines to the back of the cape. I sewed down two sheets, end to end the long way, and stitched along the center back line. Then I folded them in half along the stitching, and slid a piece of turquoise felt into the middle of each. I made a scale template out of a cereal box, and drew on the shapes, before top stitching it all on my machine. Then I went back and trimmed them all down to the height of the turquoise felt, and used small embroidery scissors to cut the pink even further down, so I’d get a two-color effect, and give the spines a bit more structure. Finally, I painted them with some Jacquard Lumiere paints, that have an amazing shimmer effect.
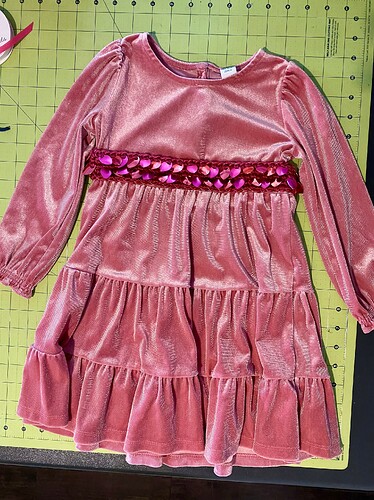
I poked around on ThreadUp (an online secondhand shop) and found a lovely pink velvet long sleeve dress for Ada to wear for just $6. It would keep her warm, be comfortable, and she could wear it as regular clothes after Halloween. ThreadUp also had a brand new burgundy velvet dress from Torrid, in my size for just $12. It looks like the Universe is telling Mama to be a dragon too! For Ada’s dress, I added a row of crochet and aluminum dragon scales that I usually use on dice bags. The scales go just past the side seams, as I didn’t want to make it too heavy. I whip stitched the crocheted piece onto the dress, so it can be easily removed, and I can add ribbons for her to wear it as a belt later.
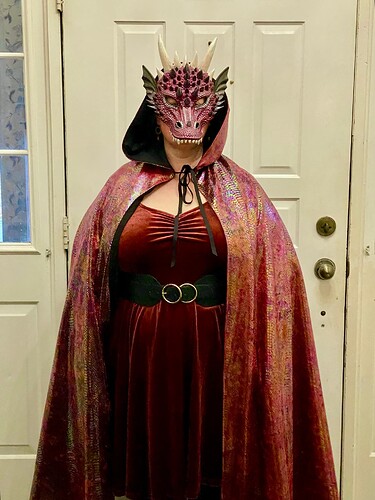
For my cape I made a half circle (instead of a full) and lined it in black quilting cotton from my stash. The half circle sat back on my shoulders more, allowing my dress to show, and was still plenty heavy, and kept me warm last night. I never got to add spines to the back of mine, but that’s fine. Now it can be reused as another costume someday. The only other addition, was a wide thrifted belt to give a leather corset vibe.
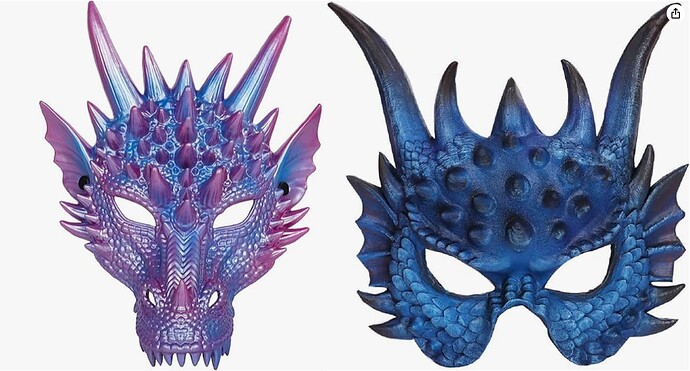
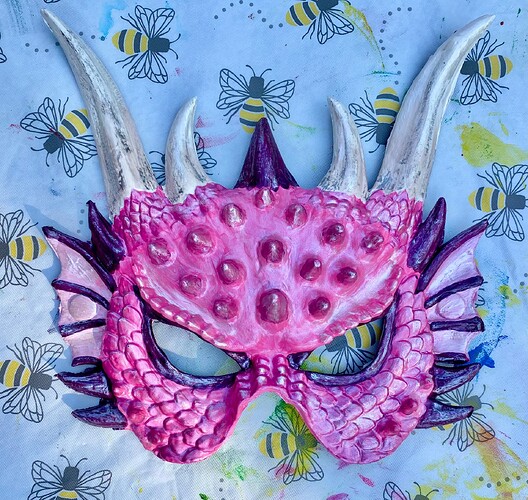
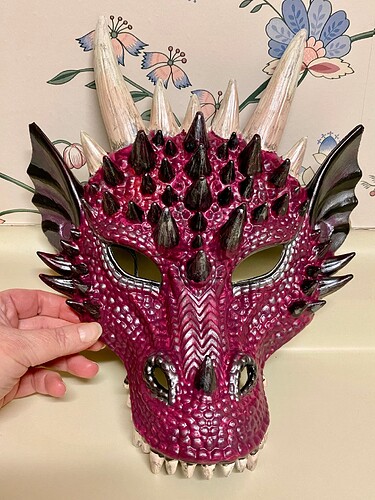
For our dragon faces I started with masks from Amazon. They are both a lightweight foam, and since I knew I’d do some painting to whatever I bought, I just went with whatever colors were least expensive from the same masks. I picked a full mask for myself, and a half mask for Ada, to help keep her comfortable.
I painted them both with a Fusion spray paint, that could be used on plastic and foam, then went over them each with acrylic craft paints, and more of the Jacquard Lumiere paints to give them shimmer and depth. Finally I gave them a coat of sealer to keep the paint from chipping later. I managed to wear the mask all evening, and since the snout sits away from the face, it was pretty comfortable. Ada had trouble wearing hers, so I ended up whip stitching it to the hood of her cape, which helped for awhile, but eventually she just pushed the hood off.
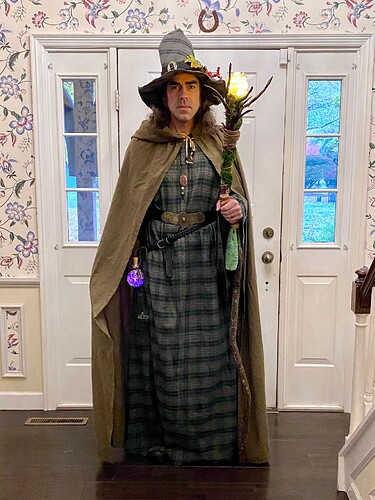
As all of this was going on, I was trying to figure out what to do with my husband. He’s a good sport, and would wear whatever I handed him (see that previous Strawberry Shortcake costume to see him as Huckleberry Pie) He’s also a big fan of D&D, so I thought he might like being a D&D type character. Jim works from home, for a tech company, and can wear what he likes. That usually means a tee and a cozy flannel. He has long black hair streaked with grey, and as he walks around the house, both the hair and flannel shirts billow out behind him. Because of that, I often call him my “Flannel Wizard”. After doing a reorganizing of my fabric stash this summer, I found an 8-yard cut of green & tan flannel, that I’ve had since about 2002. It was time to use that sucker up. The color gave forest vibes, so I decided he’d be a Forest Flannel Wizard.
I started by making him a robe. I used a pattern for a woman’s medieval gown with long bell sleeves from Patterns for Theatrical Costumes. The book has all the patterns drawn to scale in 3 sizes, so if you have a ruler, you can easily scale them up to full size. I widened it to accommodate a man’s larger frame.
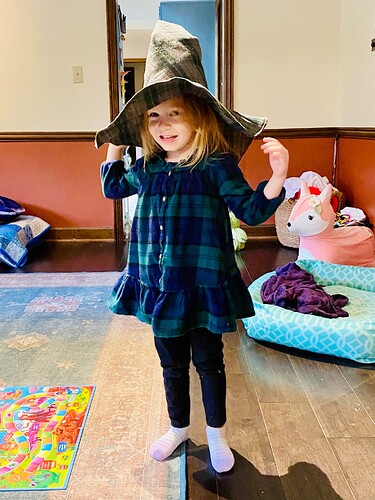
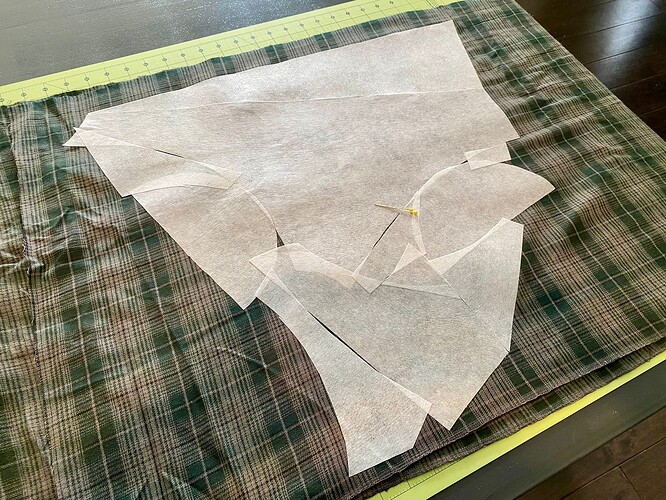
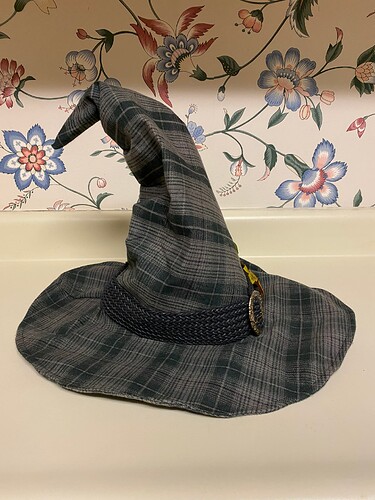
A wizard just isn’t a wizard without a hat. Since it’s been decades since I last made one, I watched some fun YouTube tutorials, and started with a basic hat. But I seem to have been distracted while drafting the pattern, and ended up making the crown too small to fit me, let alone Jim. Oh well, it became another dress up piece for Ada, and I started again.
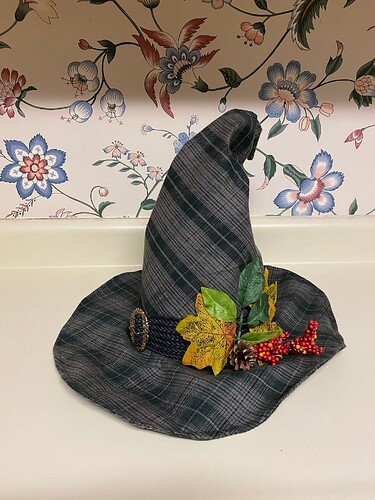
This time I drafted the crown from a hat making oval (instead of a circle; heads aren’t actually round). I shaped the brim slightly, so it would shadow his eyes just a bit. I had used most of my interfacing on the first hat, so I ended up Frankenstining scraps together to line this one.
The edge of the brim has a piece of jewelry wire sewn in, so it can be bent or twisted. I hand stitched a series of tucks along the center back seam to give it a curve.
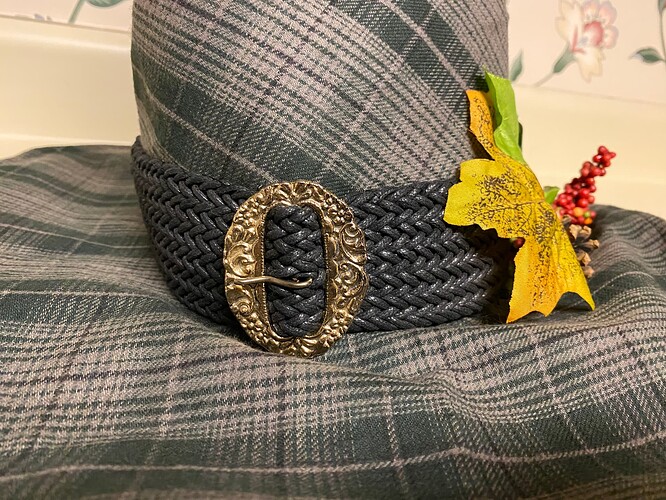
The hat band is a braided belt, and the buckle from another belt, both scavenged from Goodwill for a few bucks each.
To keep with the Forest Wizard feel, I added a spray of faux leaves, berries and a pinecone, most of which came off of a lantern I bought at Dollar Tree (for $5) to carry as we trick or treated.
I didn’t have time to make Jim a full cloak, but I wanted the look of one, so I googled around for ideas on making a cloak from a bed sheet, and found an idea on Instructables. I thrifted a brown king size sheet for $4, and cut it down to the size of a queen sheet. The hood is overall too big when worn over the head, but it looks just fine worn with the hood down.
At this point, I quickly realized that pulling off a wizard costume was going to be all about the accessories. I bought yet more belts from Goodwill, one with a cool overlapping oval buckle to wear at his waist, and another to hang lower on his hips, and carry pouches and potion bottles.
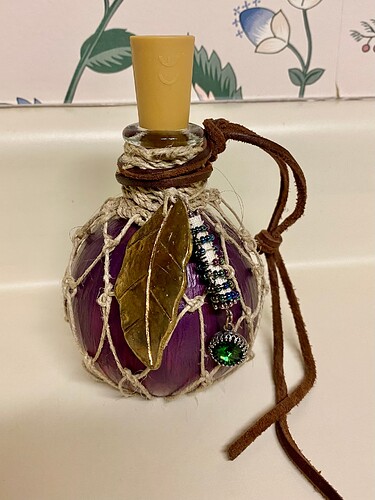
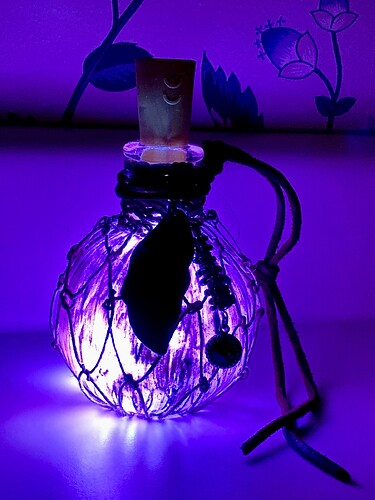
I bought a few blank potion bottles at Michael’s, and painted them with a mix of acrylic and mod podge, then decorated them, and added a bottle cork string light to help it glow. The twine net was just made up as I went along, and the bits and bobs on the bottle all came from my jewelry making stash. I started another potion, but didn’t have time to finish it. Here is the purple one, all lit up. It looked great, glowing on his belt last night in the dark.
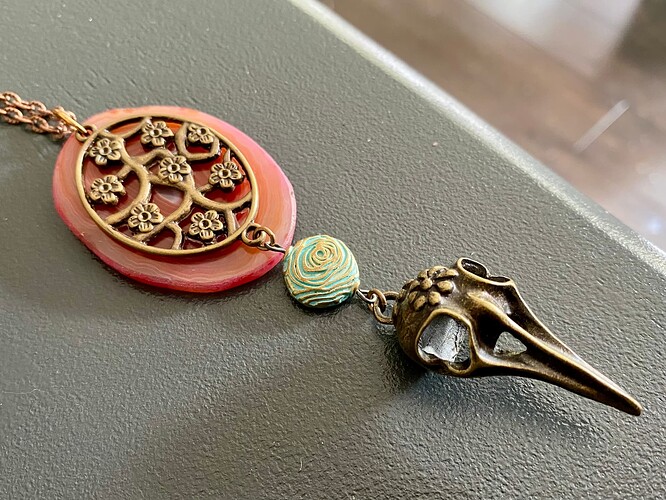
I made a talisman from bits in my jewelry stash. A long copper chain, a geode slice, a gold branch with flowers, a gold bead with green patina, and a charm of a bird skull.
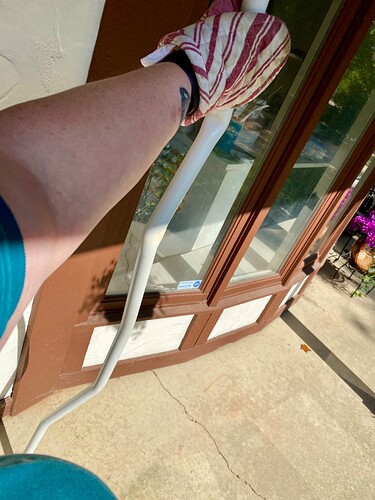
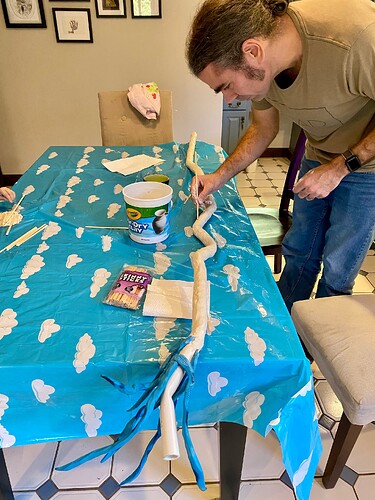
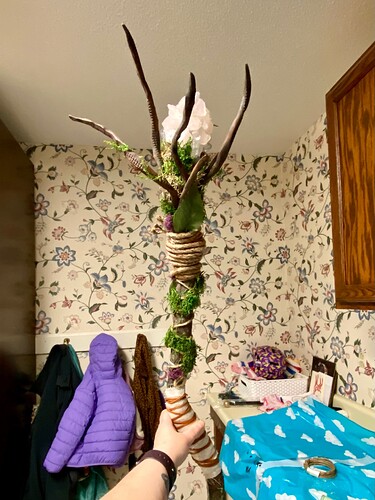
The other thing a wizard most needs is a magical staff. I started with a piece of PVC pipe, that I twisted and bent with my heat gun.
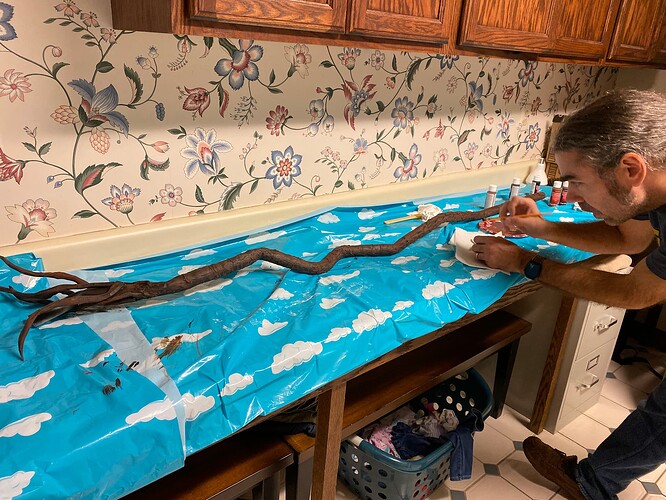
Jim helped me cover the whole thing in air dry clay, and we let it dry for a week. There were lots of cracks, and a few areas where the clay came off, so I repaired the cracks with hot glue, hoping the bouncy nature of the glue would hold the pieces of clay, while also allowing a bit of wiggle between them.
We coated it in the same fusion spray paint, then started in on layers and layers of acrylic craft paints. Dry brushing, sponging on bits of lichen, etc.
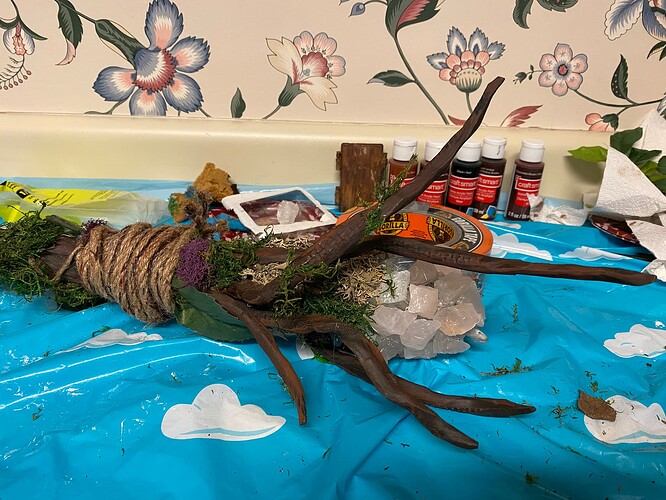
The branches at the top are made from bits of EVA foam, that I scrounged from some floor tiles we bought for Ada when she was learning to walk. She kept pulling up the straight edge pieces to chew on, so we eventually took them away, and put them in the closet. I cut them with kitchen sheers, and melted them with the heat gun too.
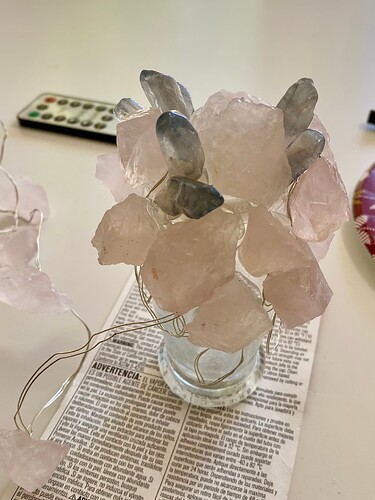
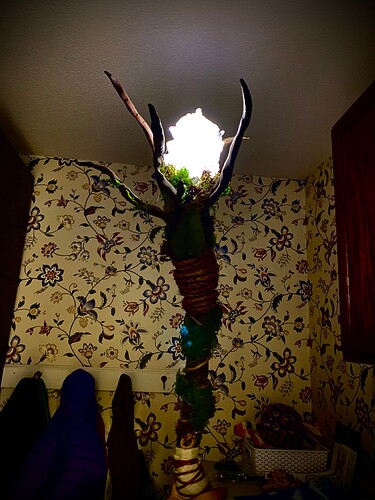
The magic crystal is actually a set of rose quartz string lights. They came wrapped up in a small ball, and I decided I wanted the crystal to be bigger than that, so I took one of the glass potion bottles, and started gluing the stones around it the bottom. When I ran out of string lights, I used some regular rough cut rocks along the bottom. I used a string of grey/clear crystal point beads to fill in the holes and hide the wire, and to give it all a more organic appearance.
I put the open end of the bottle over the end of the pvc pipe, and use a lot of hot glue to fill the remainder of the opening. I wrapped the wire that ran to the power pack along the staff in an irregular pattern, to try to disguise it, then covered it with jute-covered wire, just rope, dried moss, twigs, and faux leaves. I gave the rope and wire some age with brown and black markers.
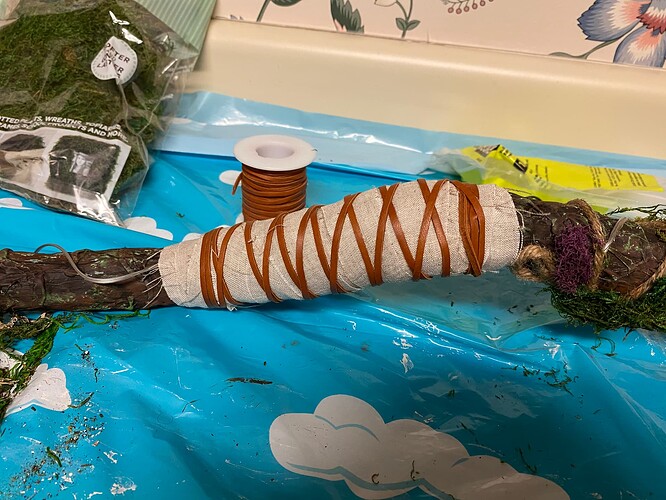
The wire kept running under the hand grip, so I covered that with strips of linen from a bag that a new set of sheets came in, and some deerskin leather lacing. It all looked too new, so I piled on wet coffee grounds and let it dry there to leave some staining.
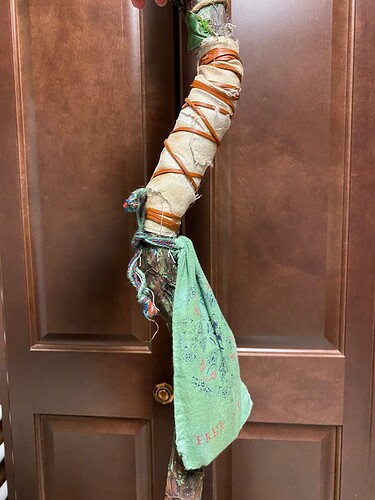
I still had to hide the battery pack, but I wanted to be able to access it, to change the batteries. I dug through my reusable gift wrap and found a little cotton drawstring bag from Free People that someone gave me a gift in. I threw the bag in an old take-out container with some hot water and some liquid dye, to dye it green. If I had more time, I would have tried to hide the writing better, and perhaps added some gold fabric paint to make magical symbols or runes. But I was running out of time, and I figured we’d be out in the dark anyways. We just tied the bag on with its own drawstrings.
The string lights came with a remote to change the function from warm to cool light, or to twinkle, strobe, etc. But you could also just pinch the top of the USB cord to change function too. This worked out well since Jim couldn’t access his pockets in the long robe.
While I’m proud of the whole set of costumes, I think I’m most pleased with the staff. We trick or treated with our neighbors and a little girl from Ada’s preschool, who just moved to town. Her family is from Ecuador and Halloween was a new experience to them. But the kids all became fast friends, and they were able to see & follow Jim easily in the dark. His silhouette was unmistakable. Even when he was standing back from the doors, draped in shadow, people kept saying “Whoa! You’ve got a wizard!”
I hope you all had a wonderful Halloween!
