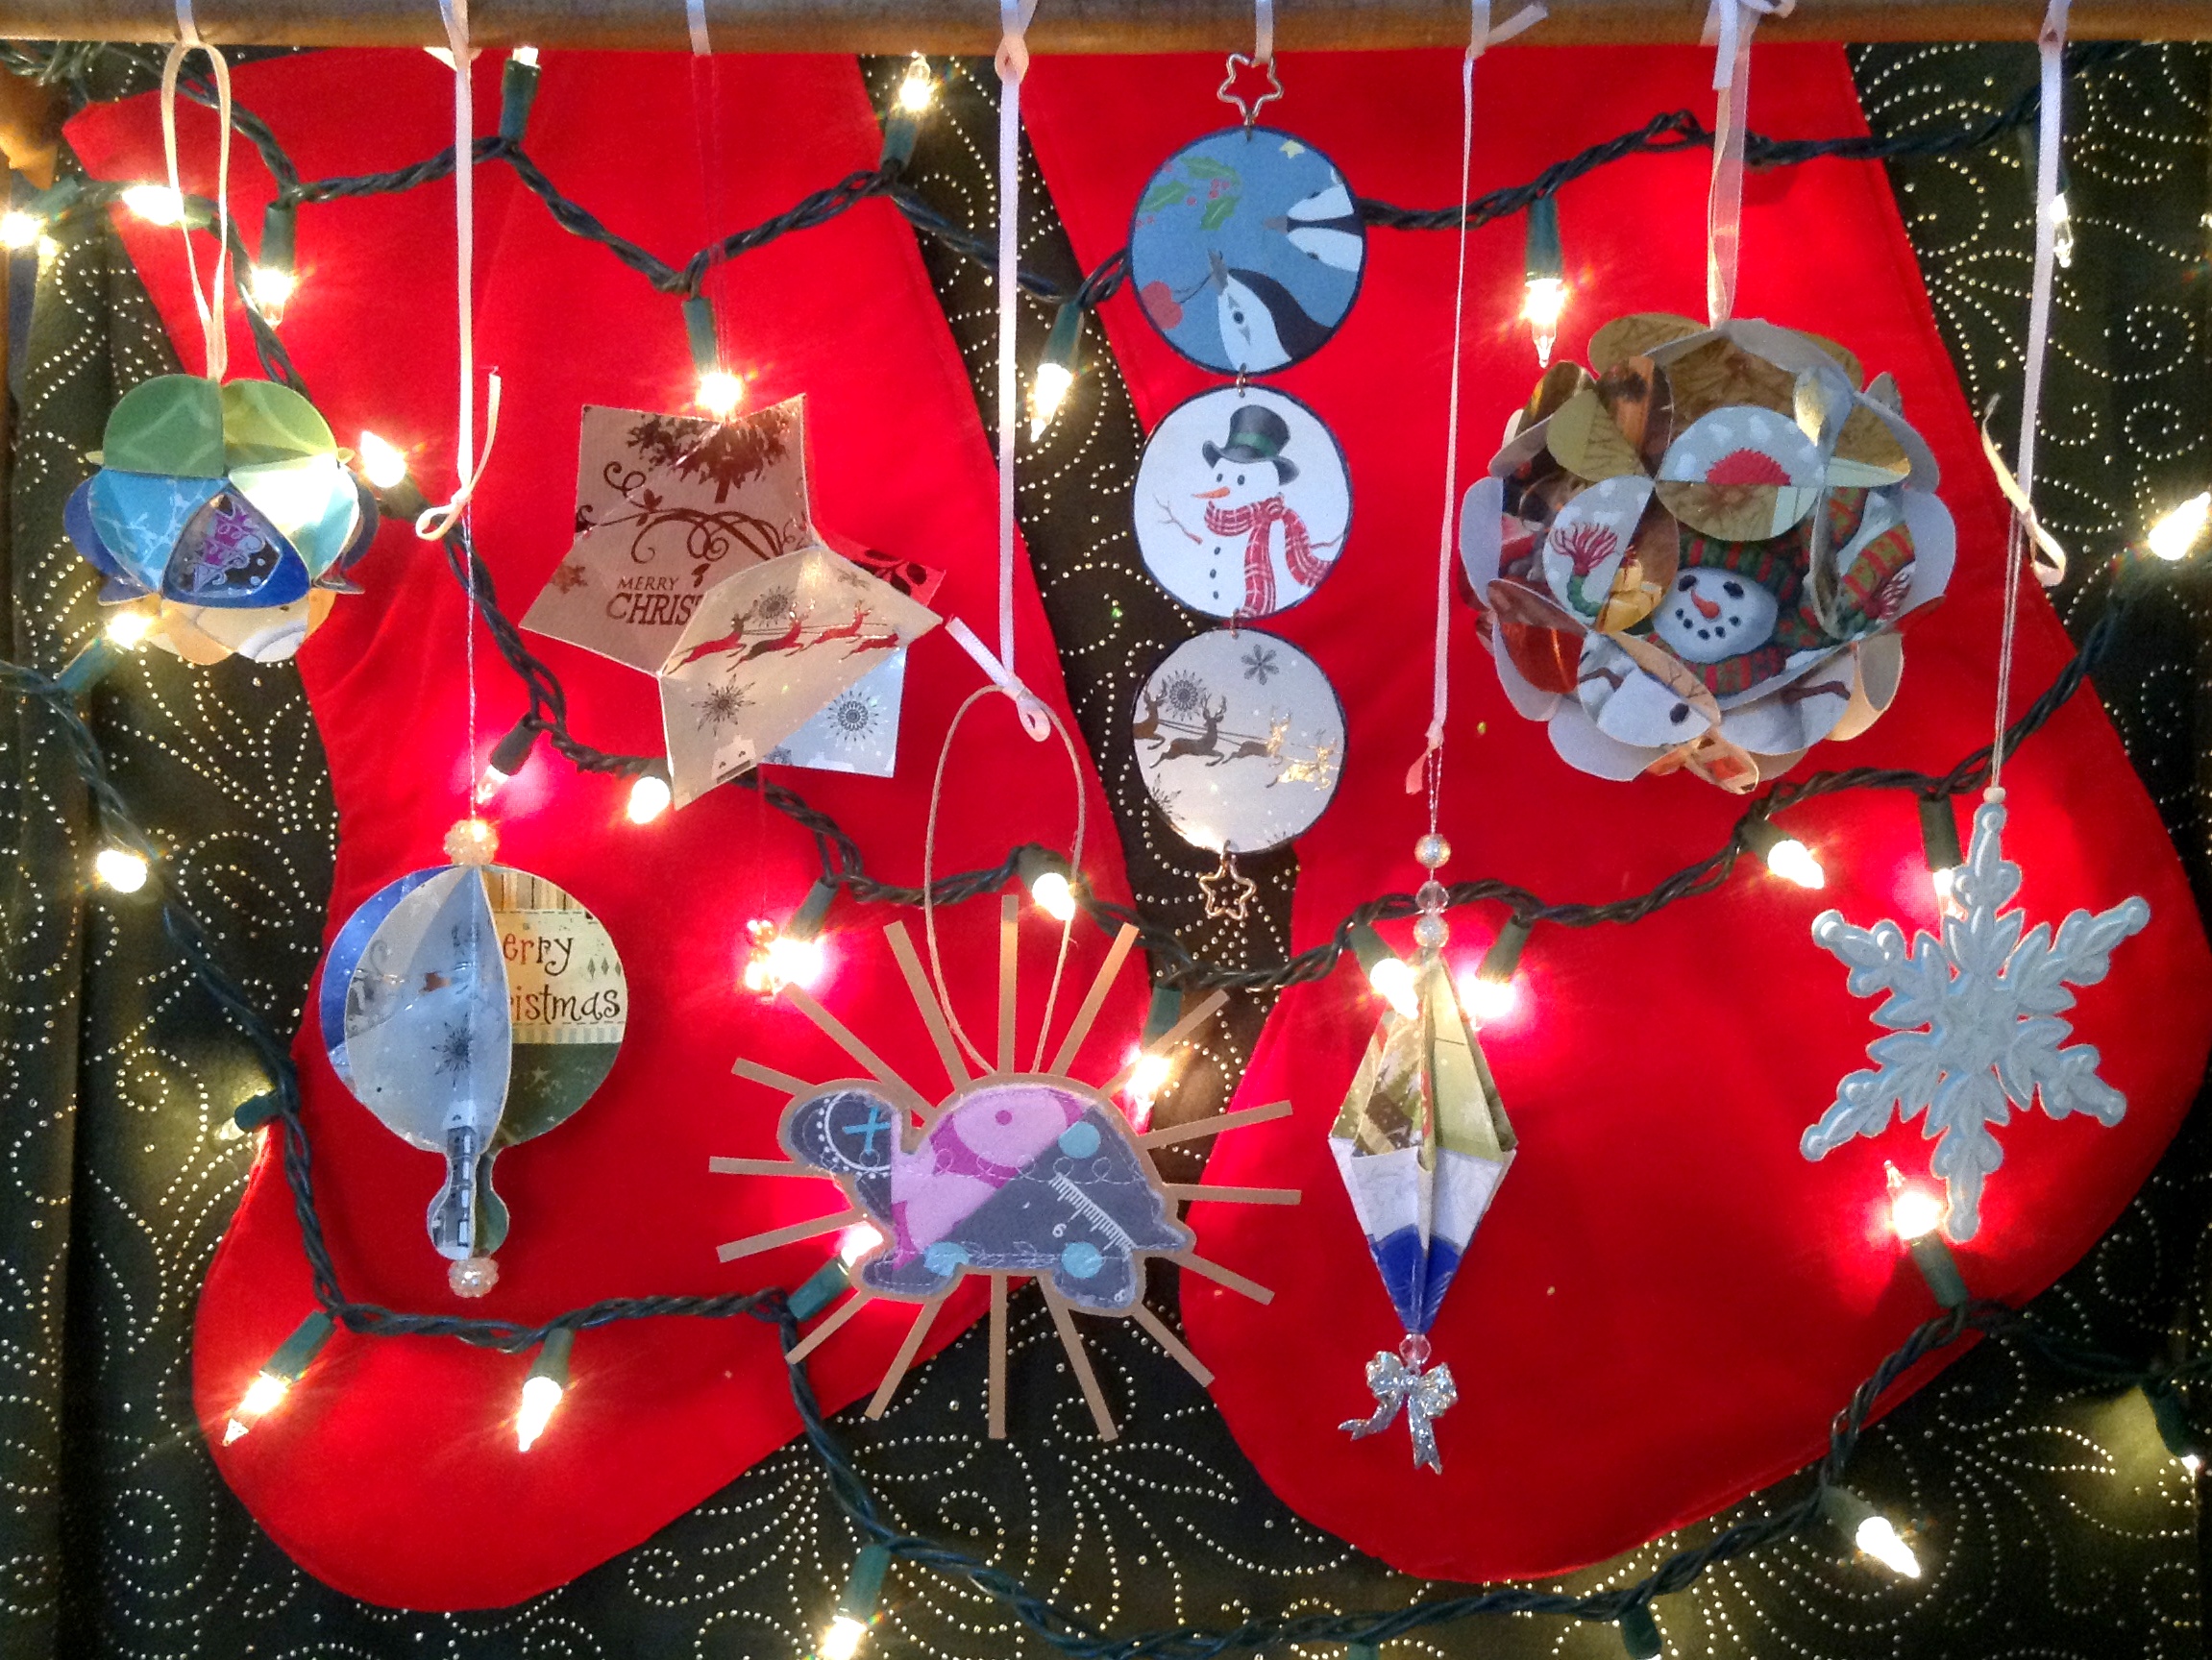
In 2013, my partner and my second year of living together, I used the holiday cards we received to make an ornament. That was the start of a tradition of repurposing these well-wishes from our loved ones to carry forward year to year. Now I’ve tried to diversify the patterns I use, but I will probably have to repeat myself at some point!
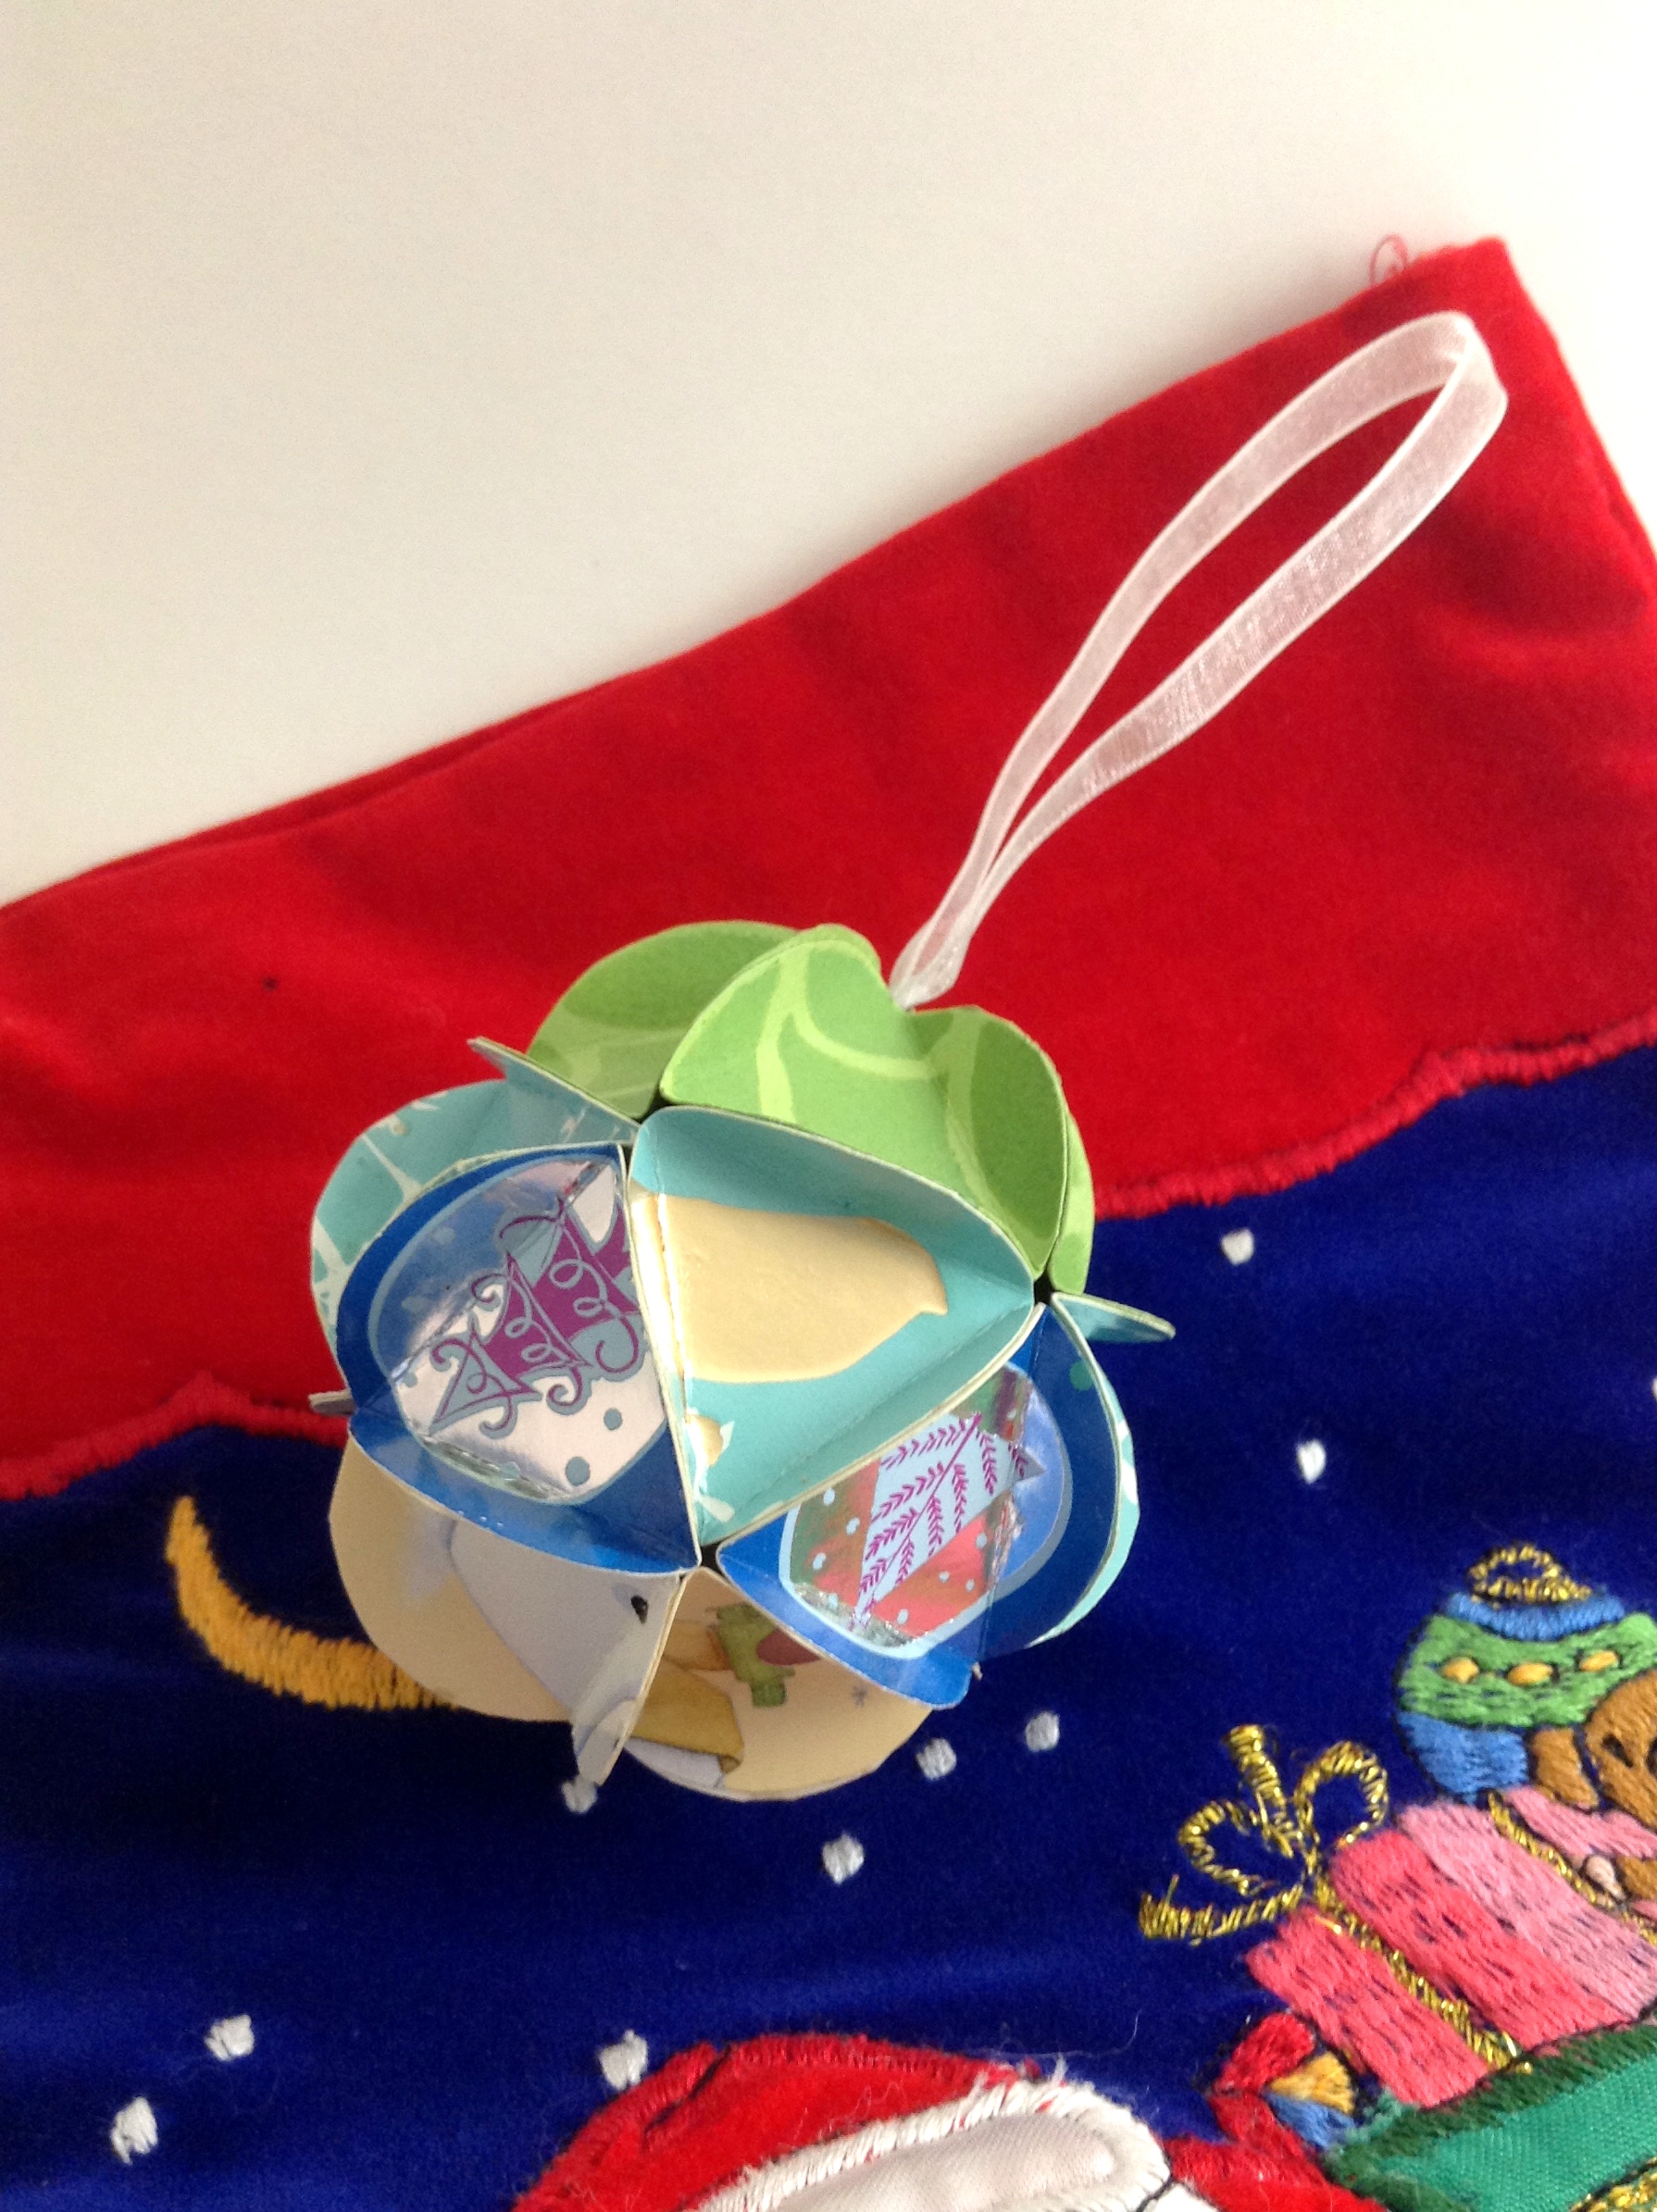
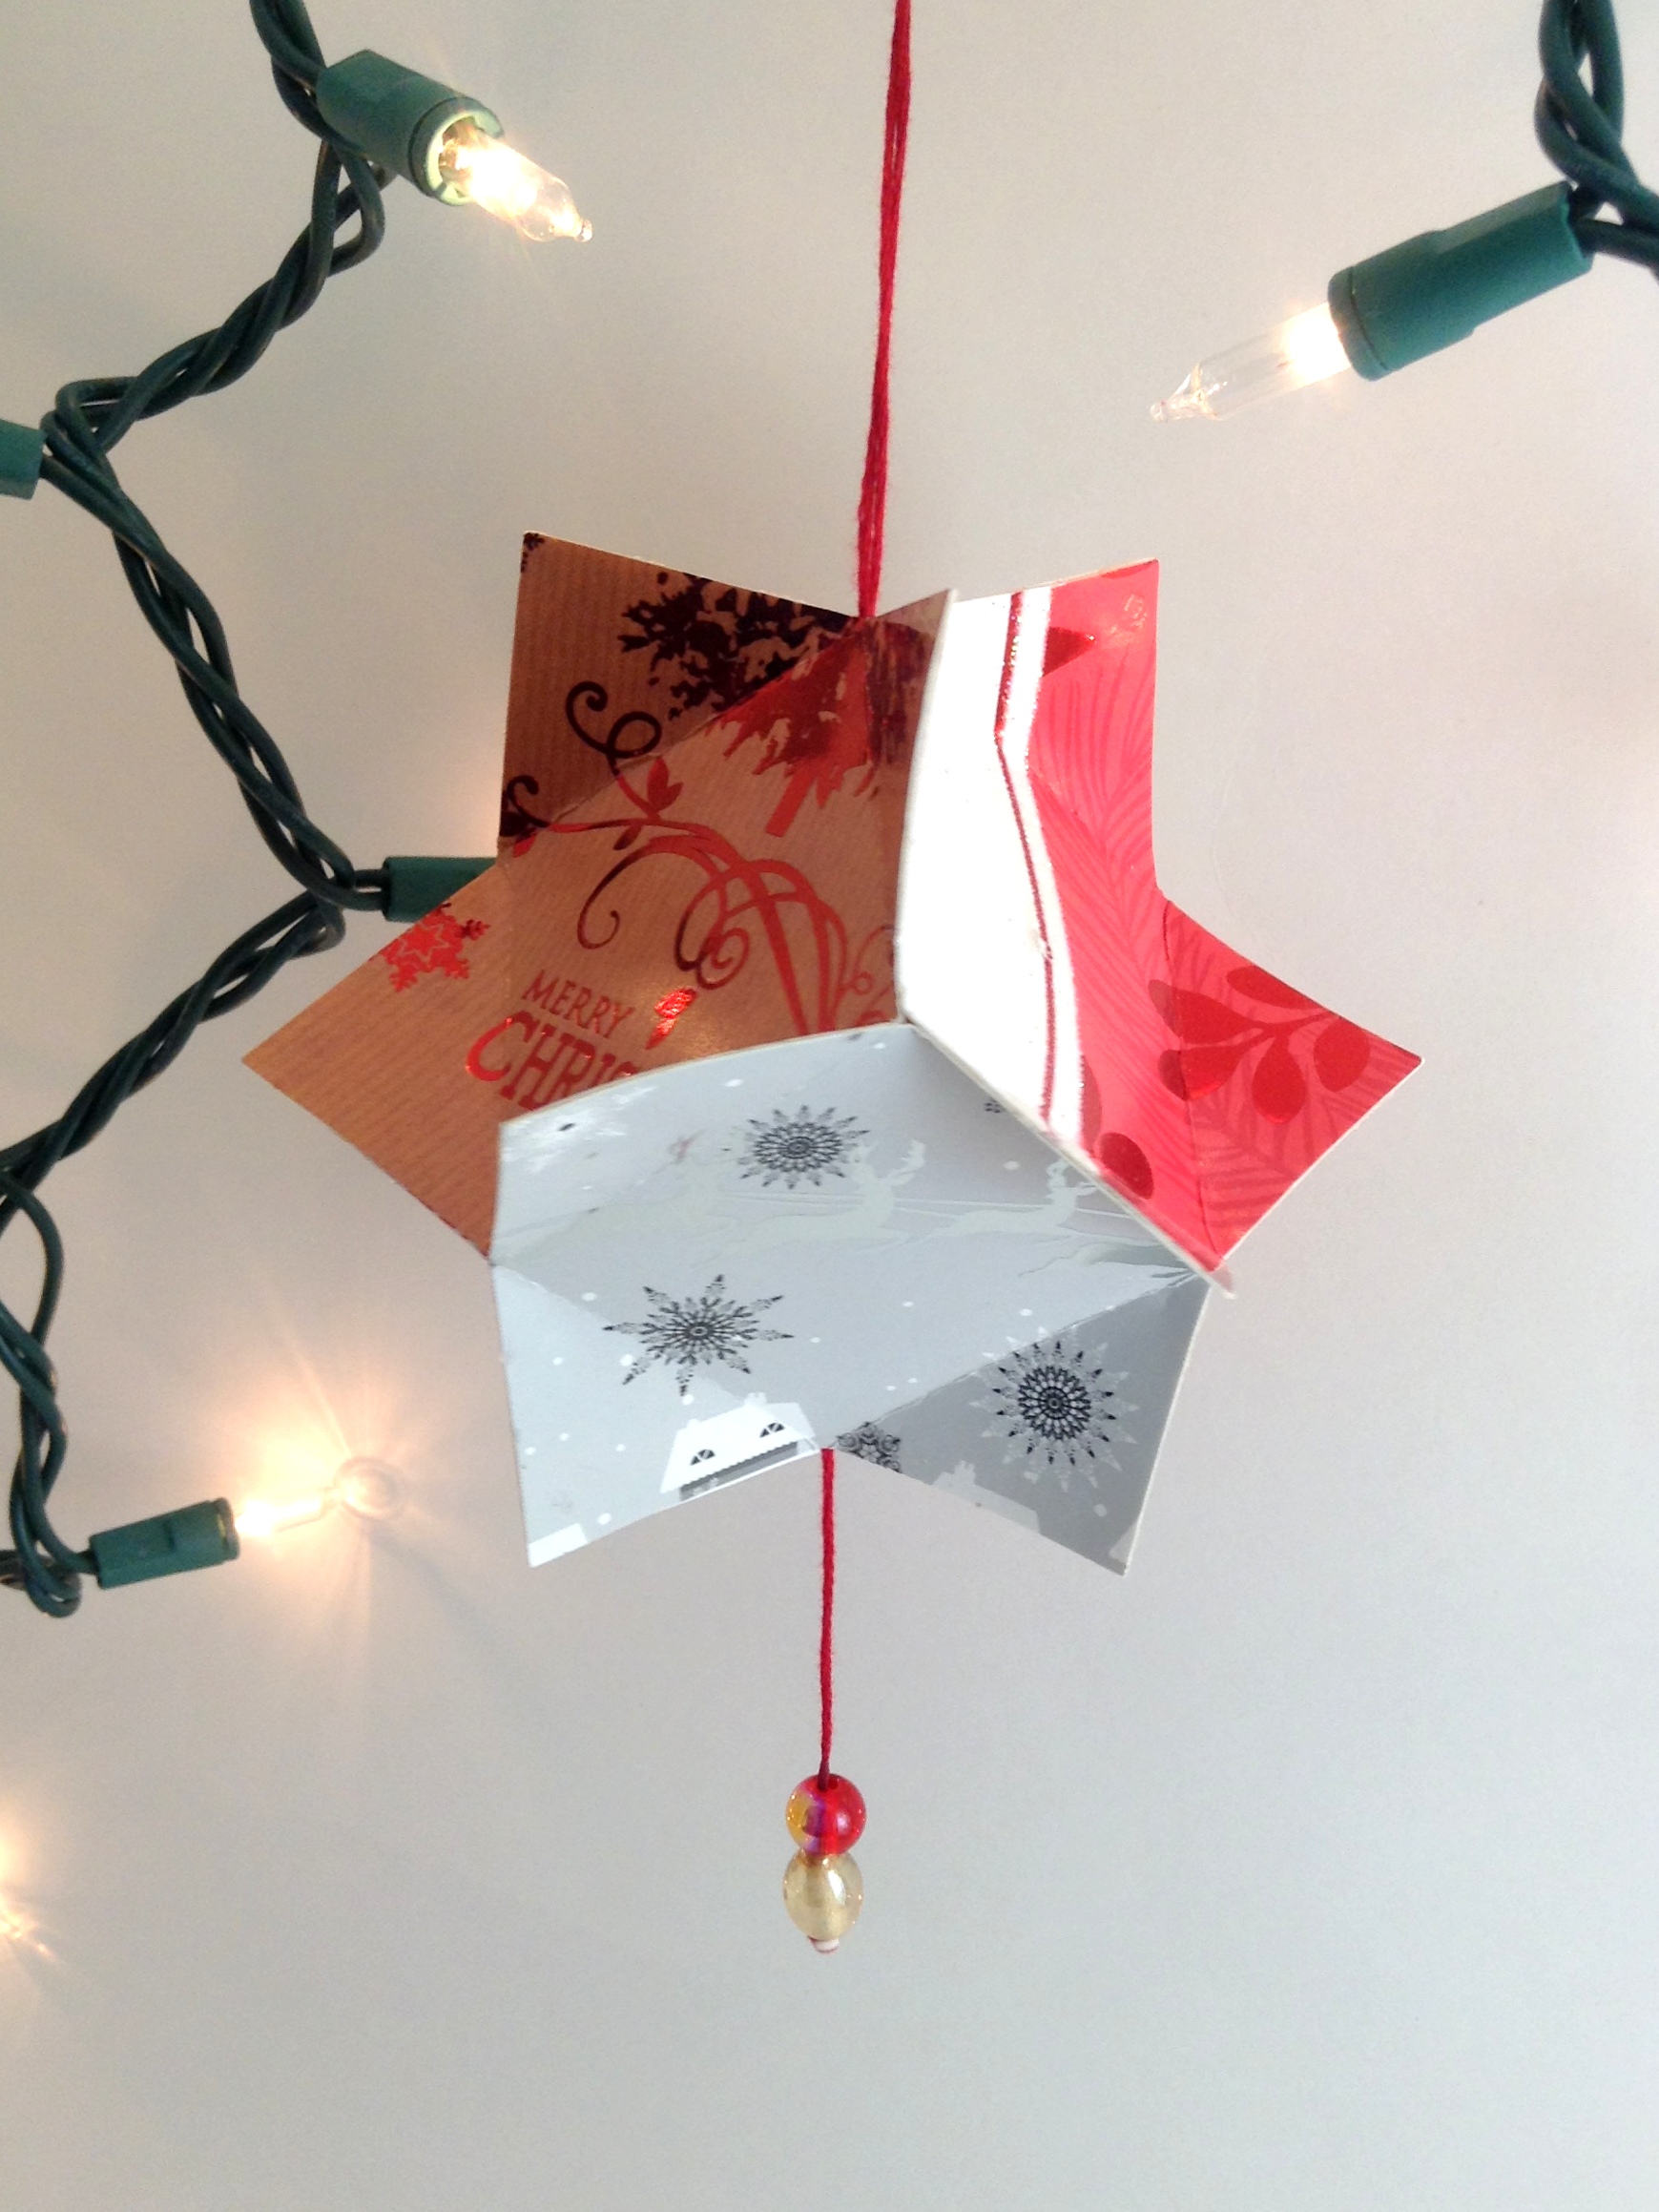
2013: Still one of my favorite patterns! I’d like to make this again.
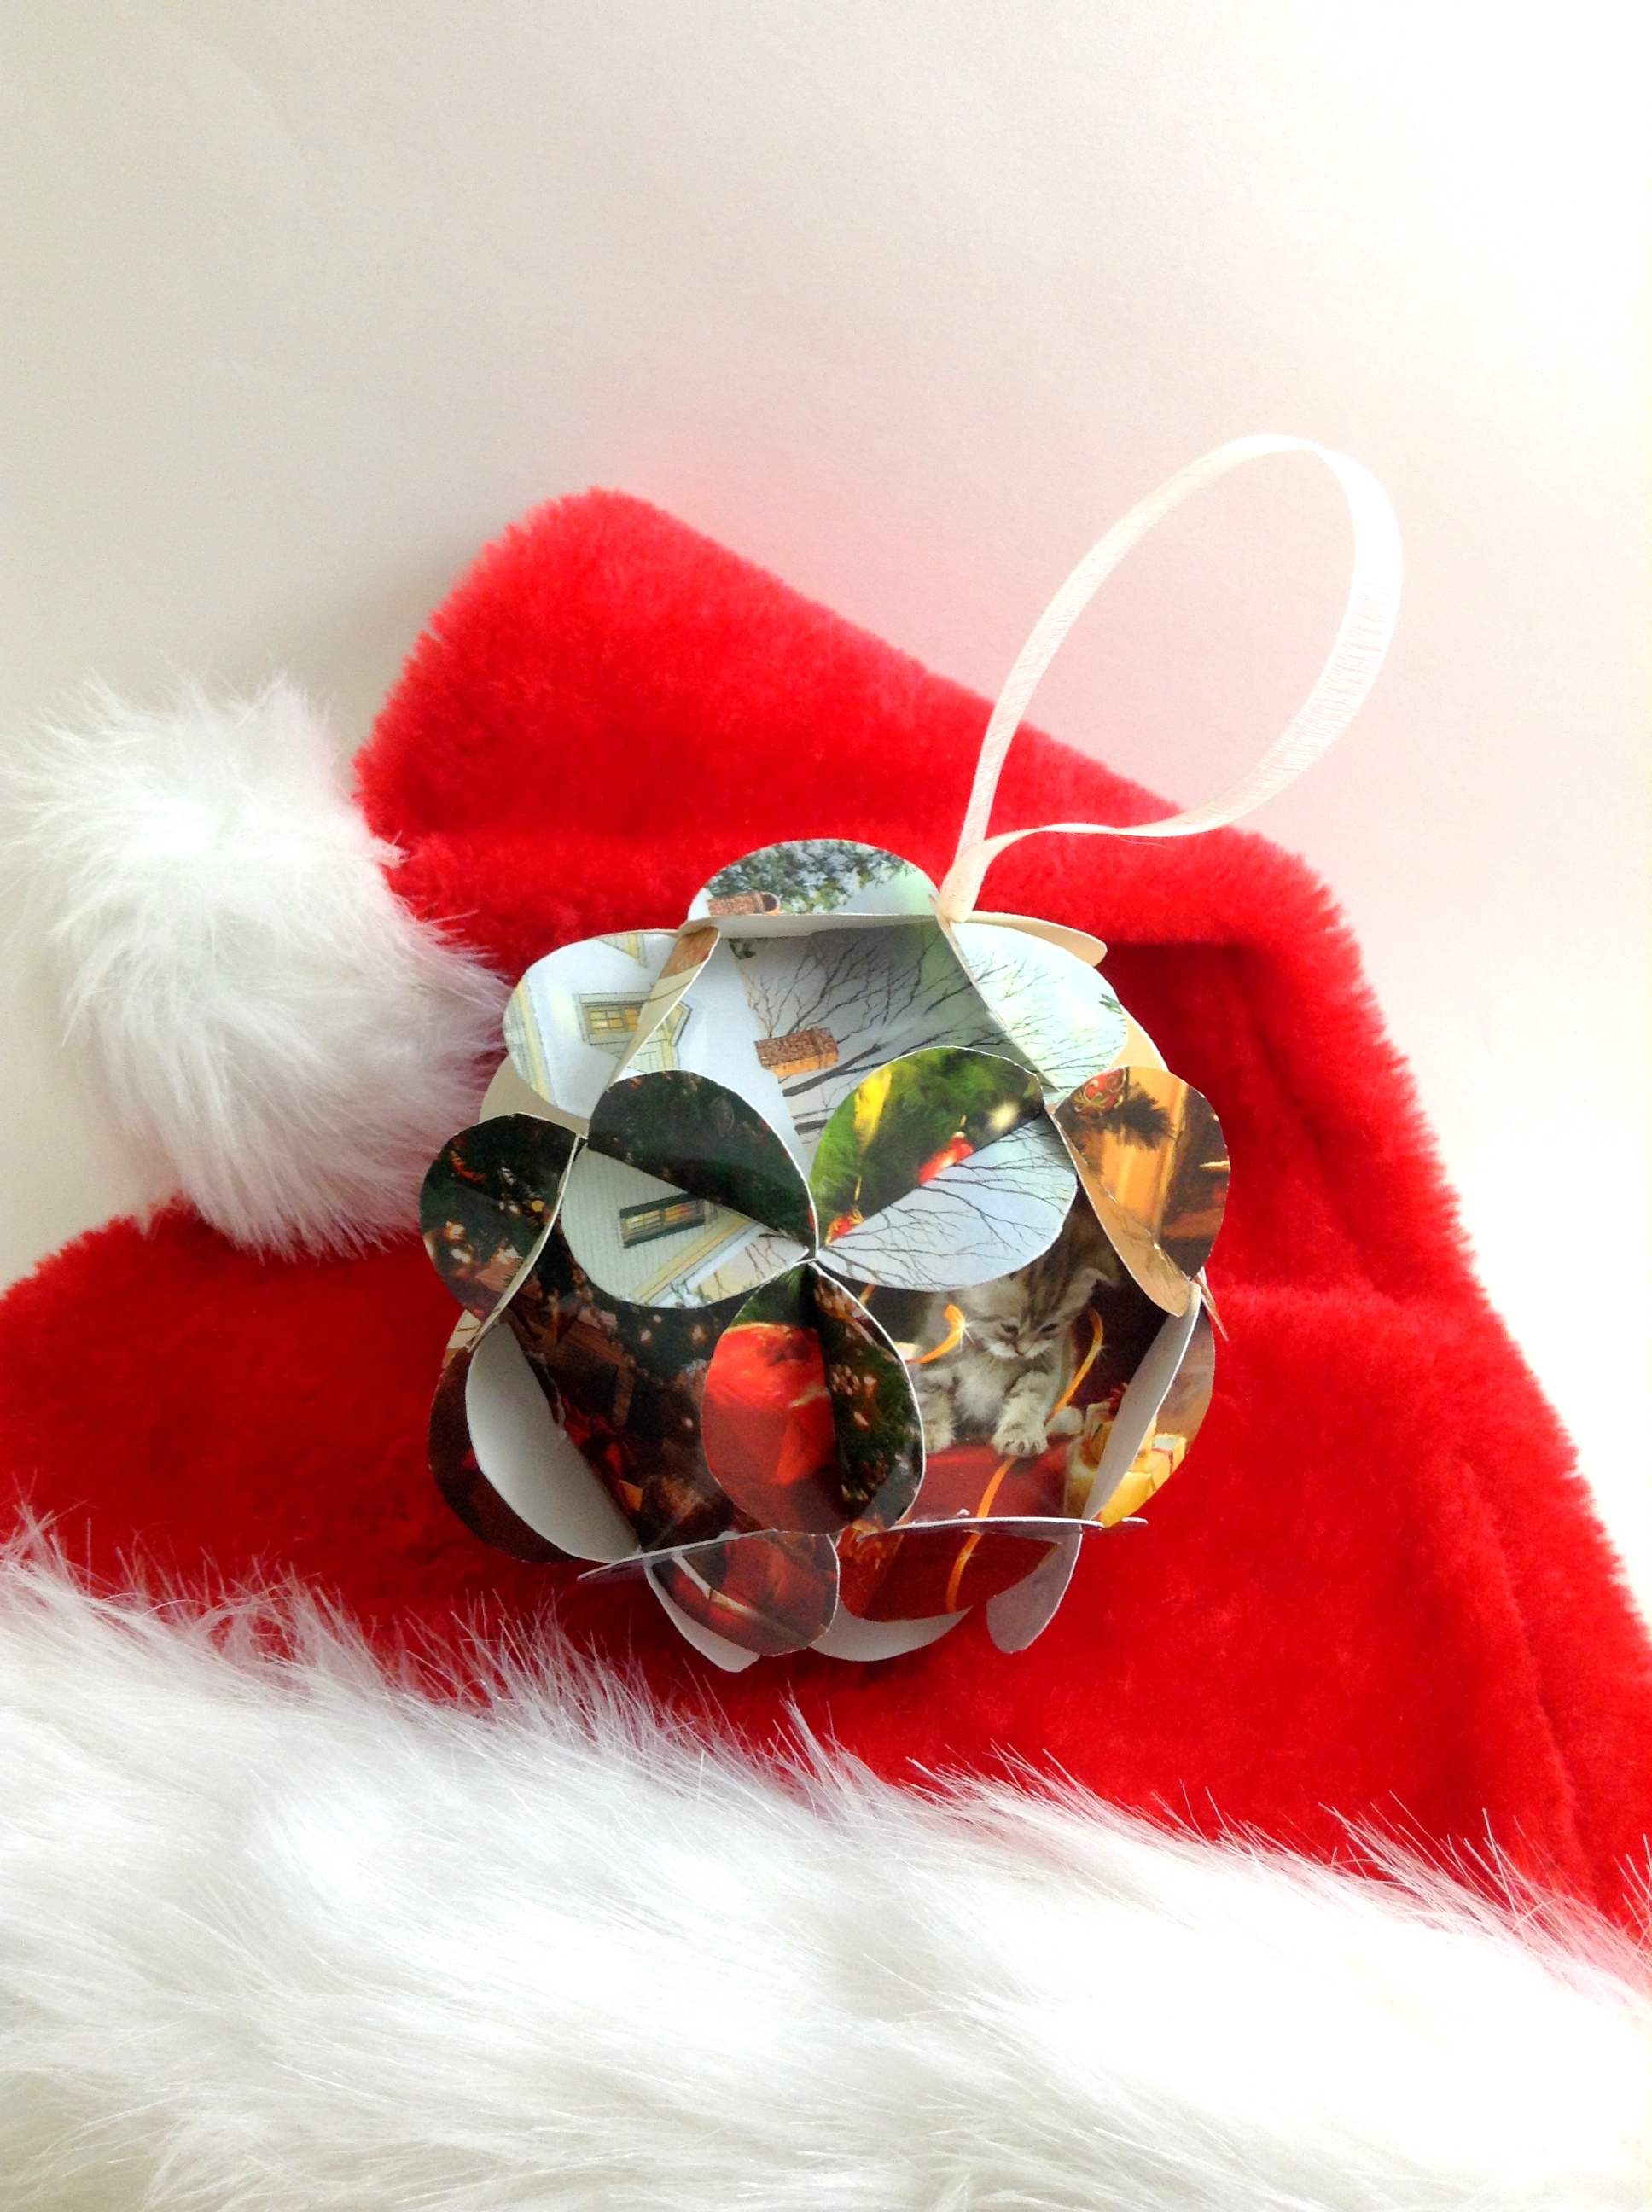
2014: No pattern for this one, but the construction is simple: Cut multiples of a bilaterally symmetrical shape, fold them in half, and glue the halves together. Before gluing the last section, thread a hanging string.
2015: The tutorial for this one has disappeared, but it’s also an easy one. Cut out 6 equal squares, and fold the corners of each to meet evenly in the center. Glue the corner tabs to each other to form a cube shape, threading a hanging string before finally closing the shape.
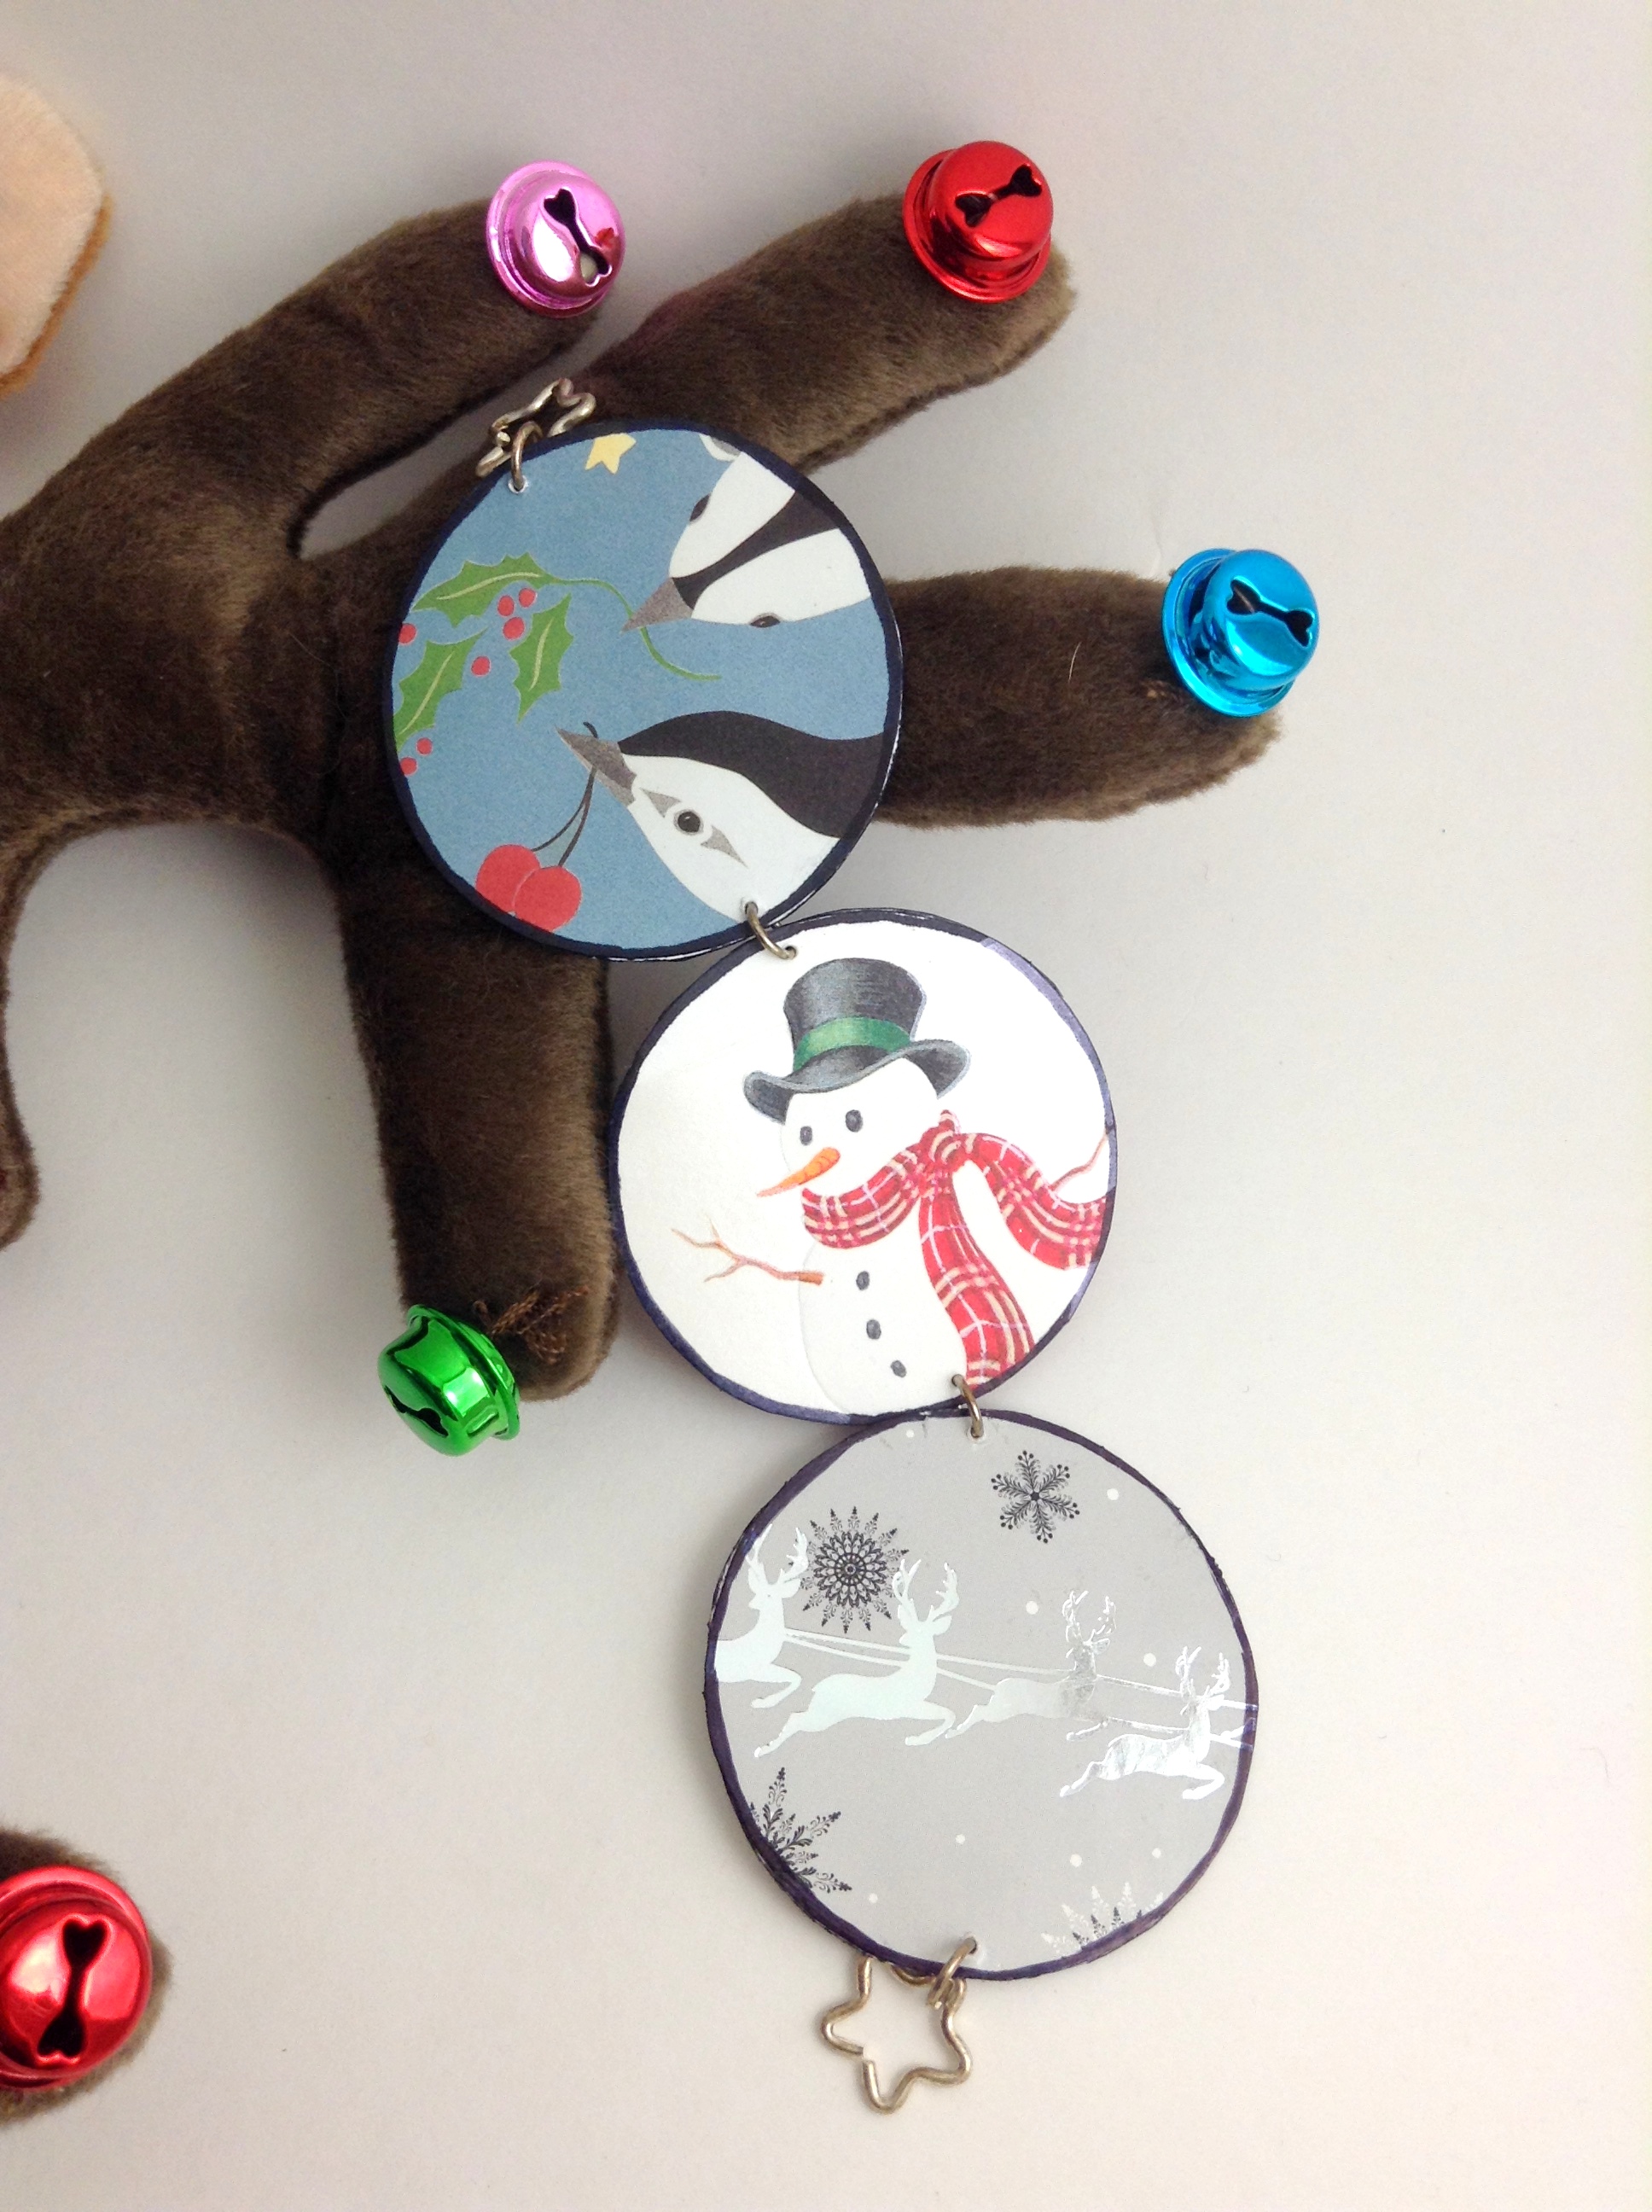
2016: This was a lazy one - circles of card glued together and assembled with jump rings and star charms on the ends.

2017: I don’t know what happened to this year’s cards. Maybe we didn’t receive any? When I looked back for this post and realized I didn’t have a 2017 ornament, the completist in me wouldn’t let it go. I scrolled back through my old swap pictures to see if I still had any cards from the Sweat Shoppe Ornament Swap that year - and found in my stash a card from Thimbles71. Thanks for sending me a cool enough card that I saved it! I cut out this little turtle and some strips to arrange in a starburst.
2018: This was a tricky one to assemble! No glue, the pieces just slot together. This is the biggest of the lot - I could have gone smaller, but that would be tough to assemble without ripping. Next time I would cover the back of these pieces in clear packing tape for added strength.
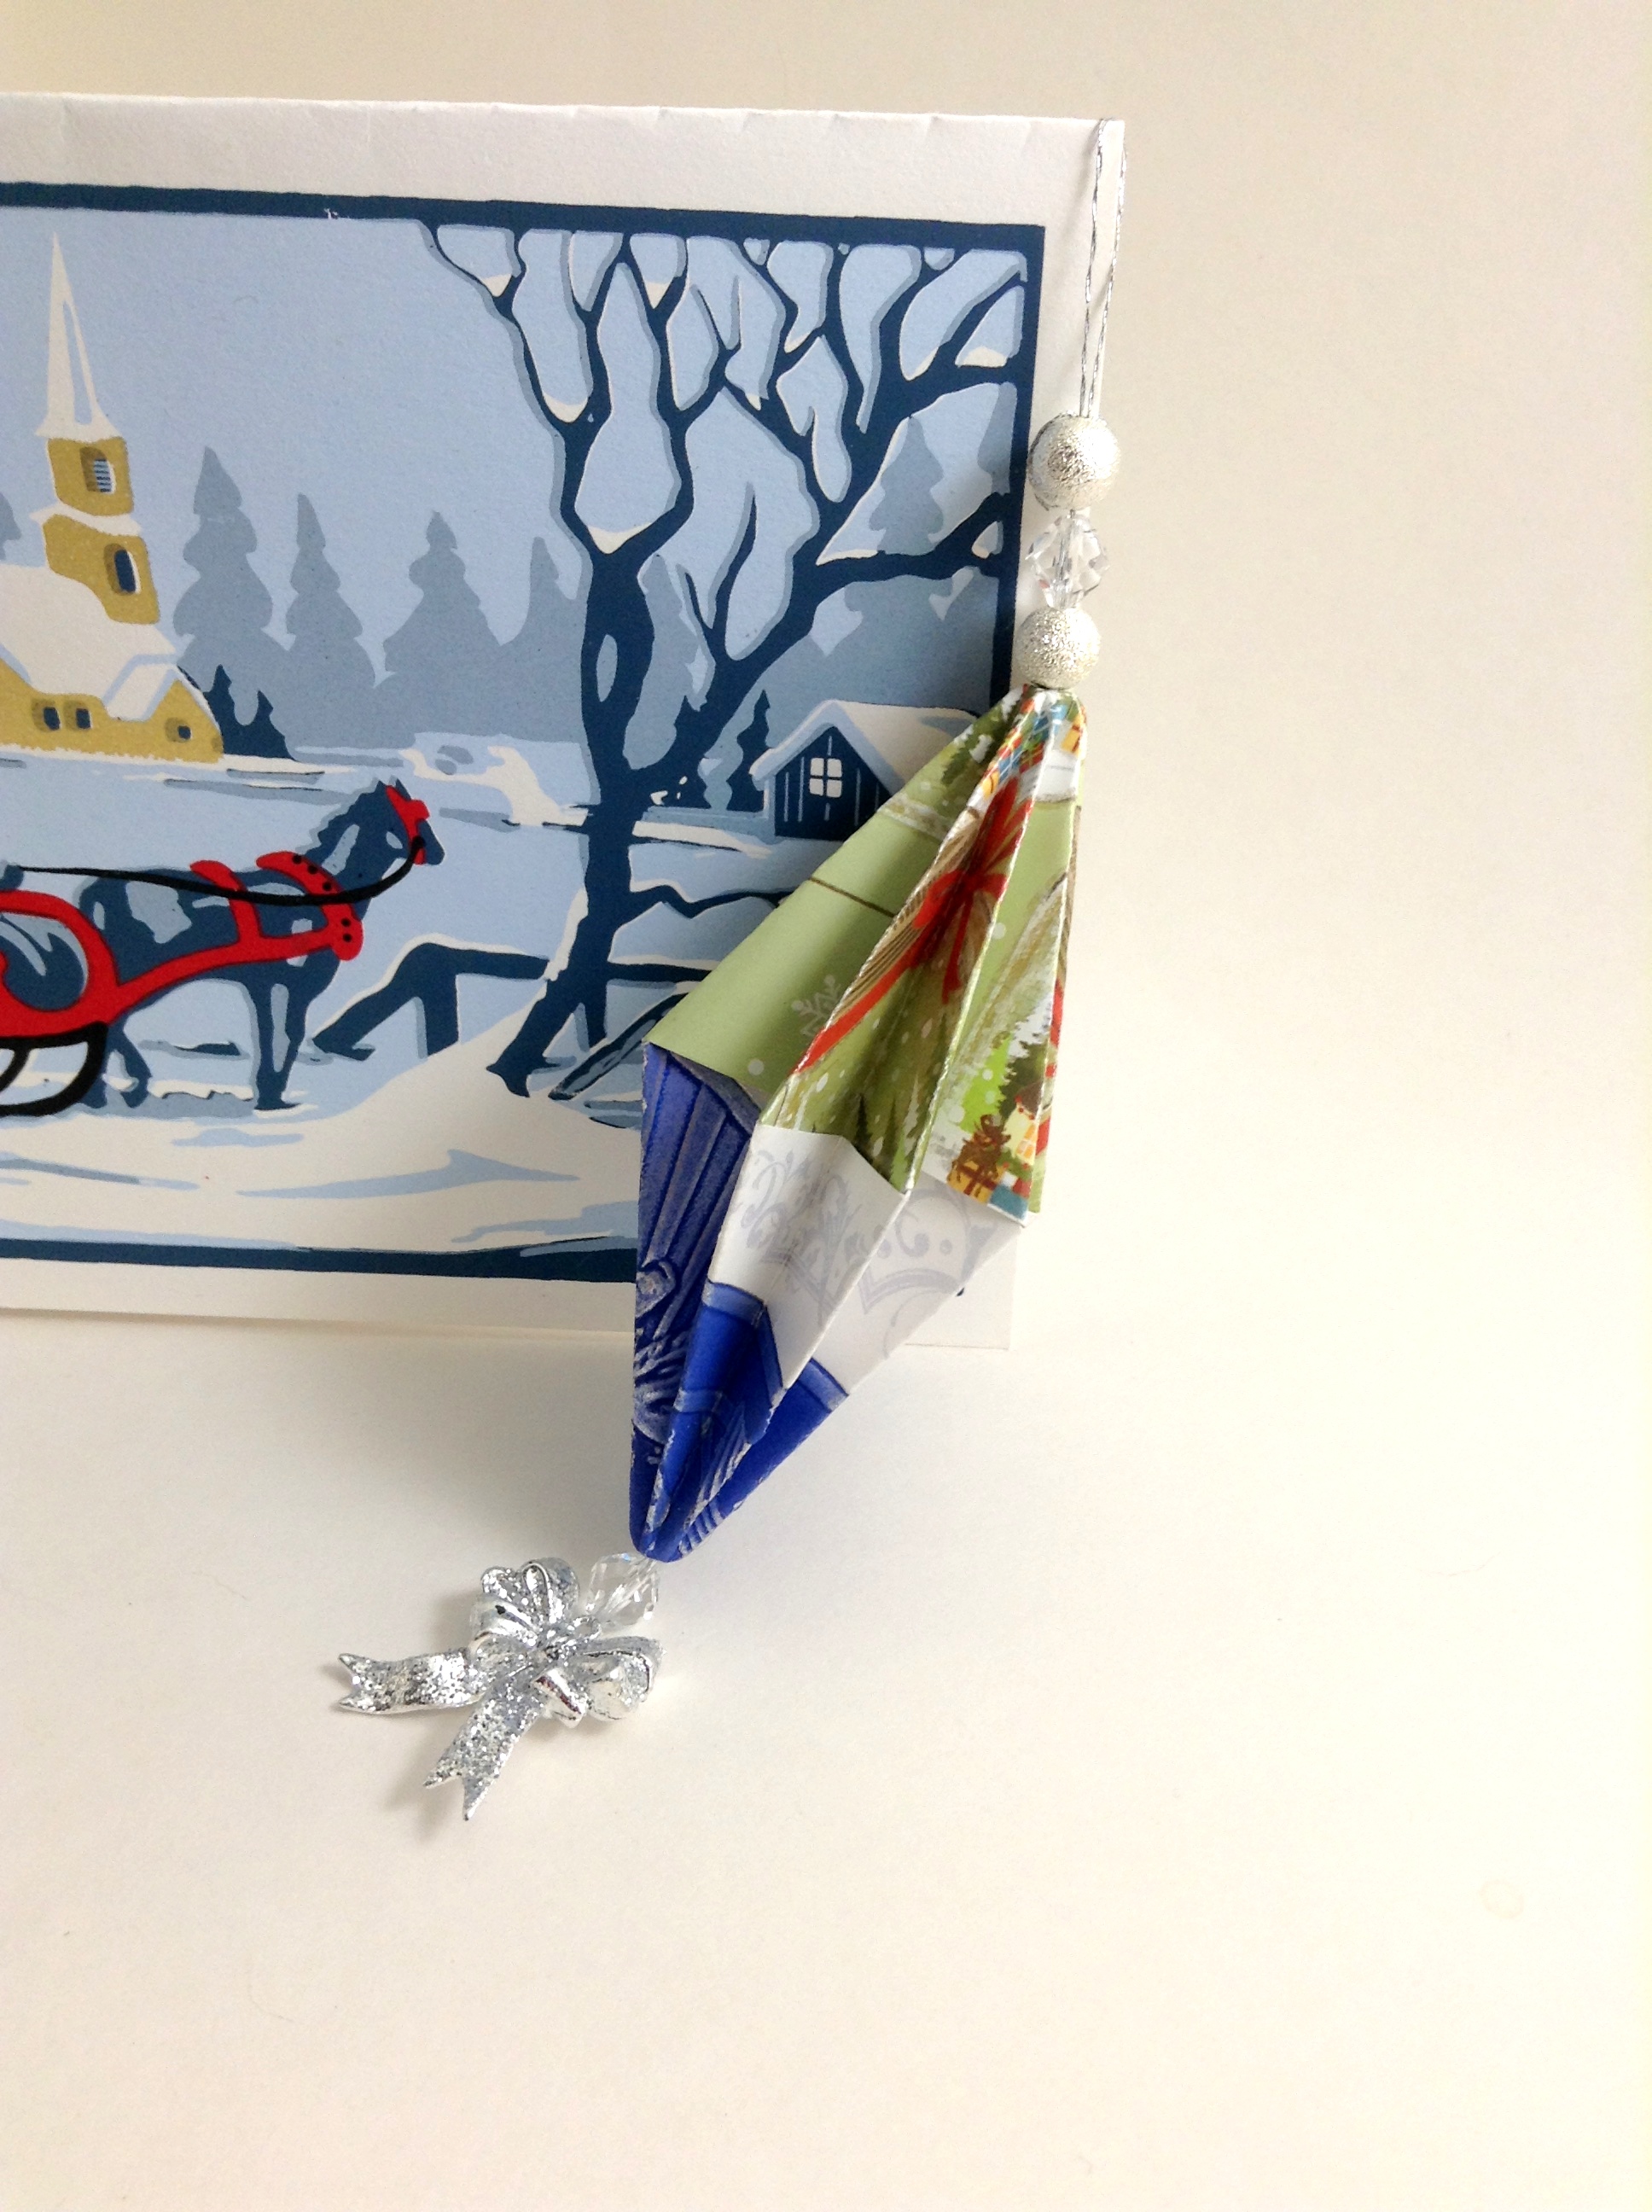
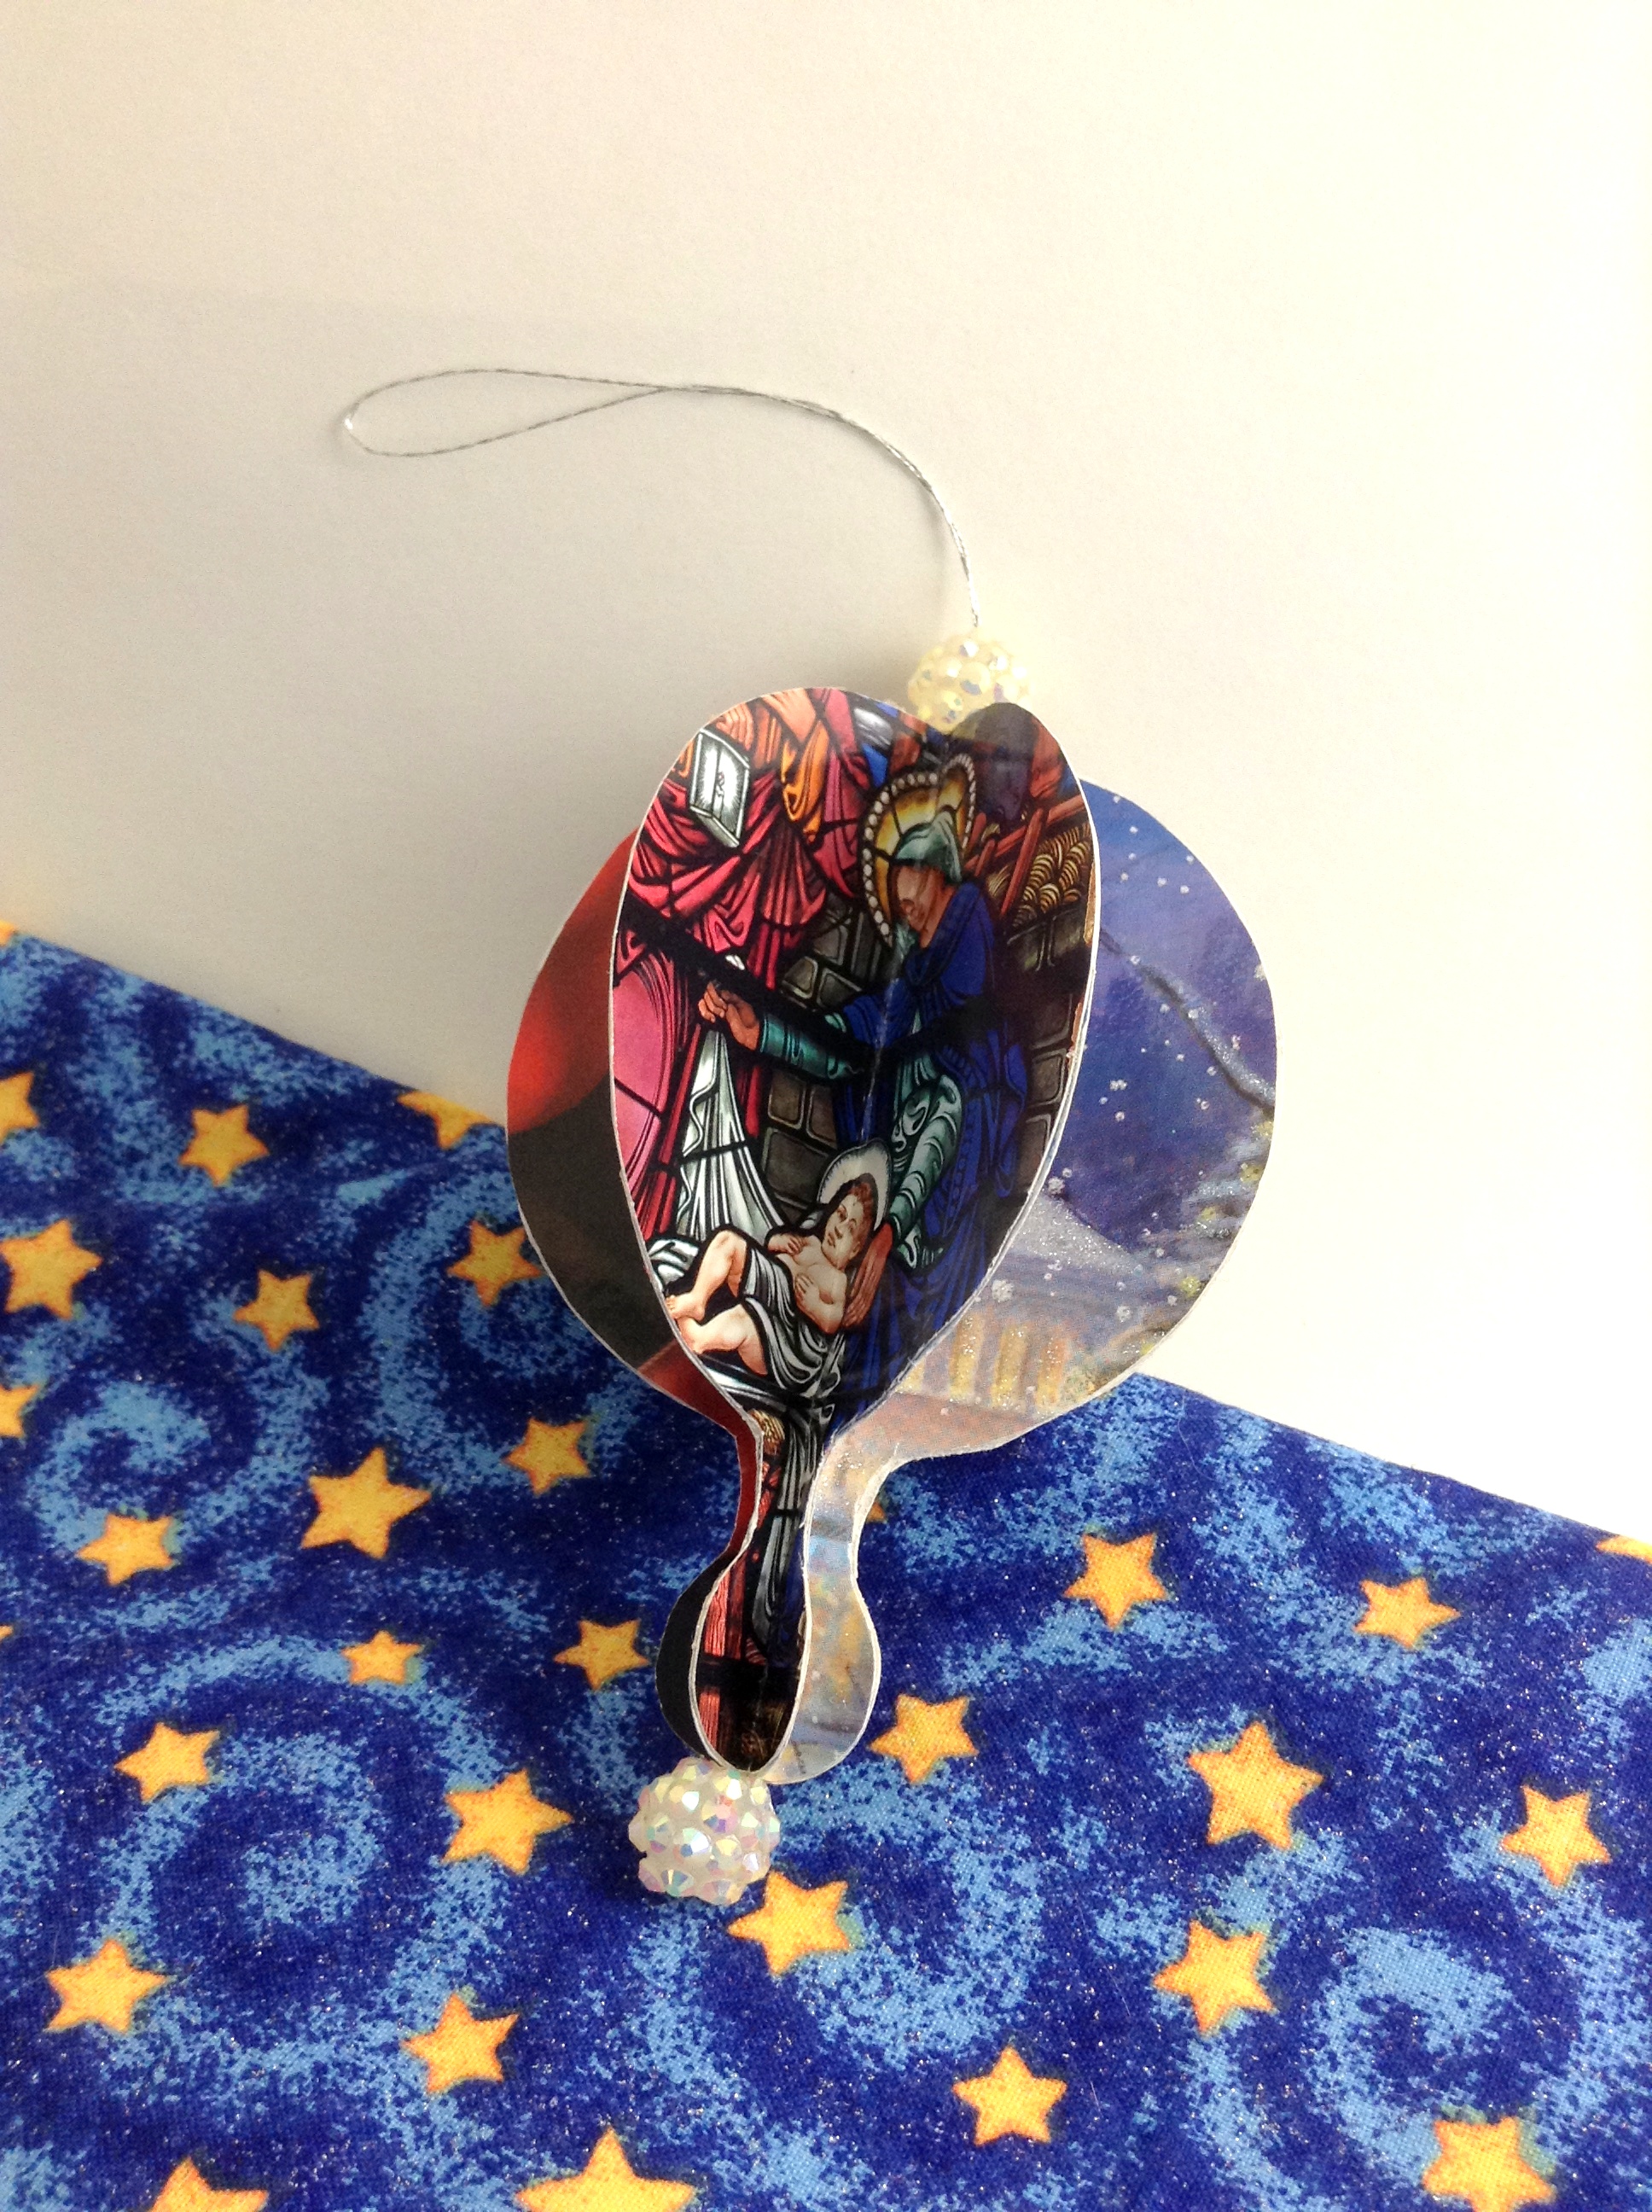
2019: I like the elegant design of these, and it only takes two pieces. Perfect because I received some cool dimensional cards that wouldn’t be easily cut up and folded.
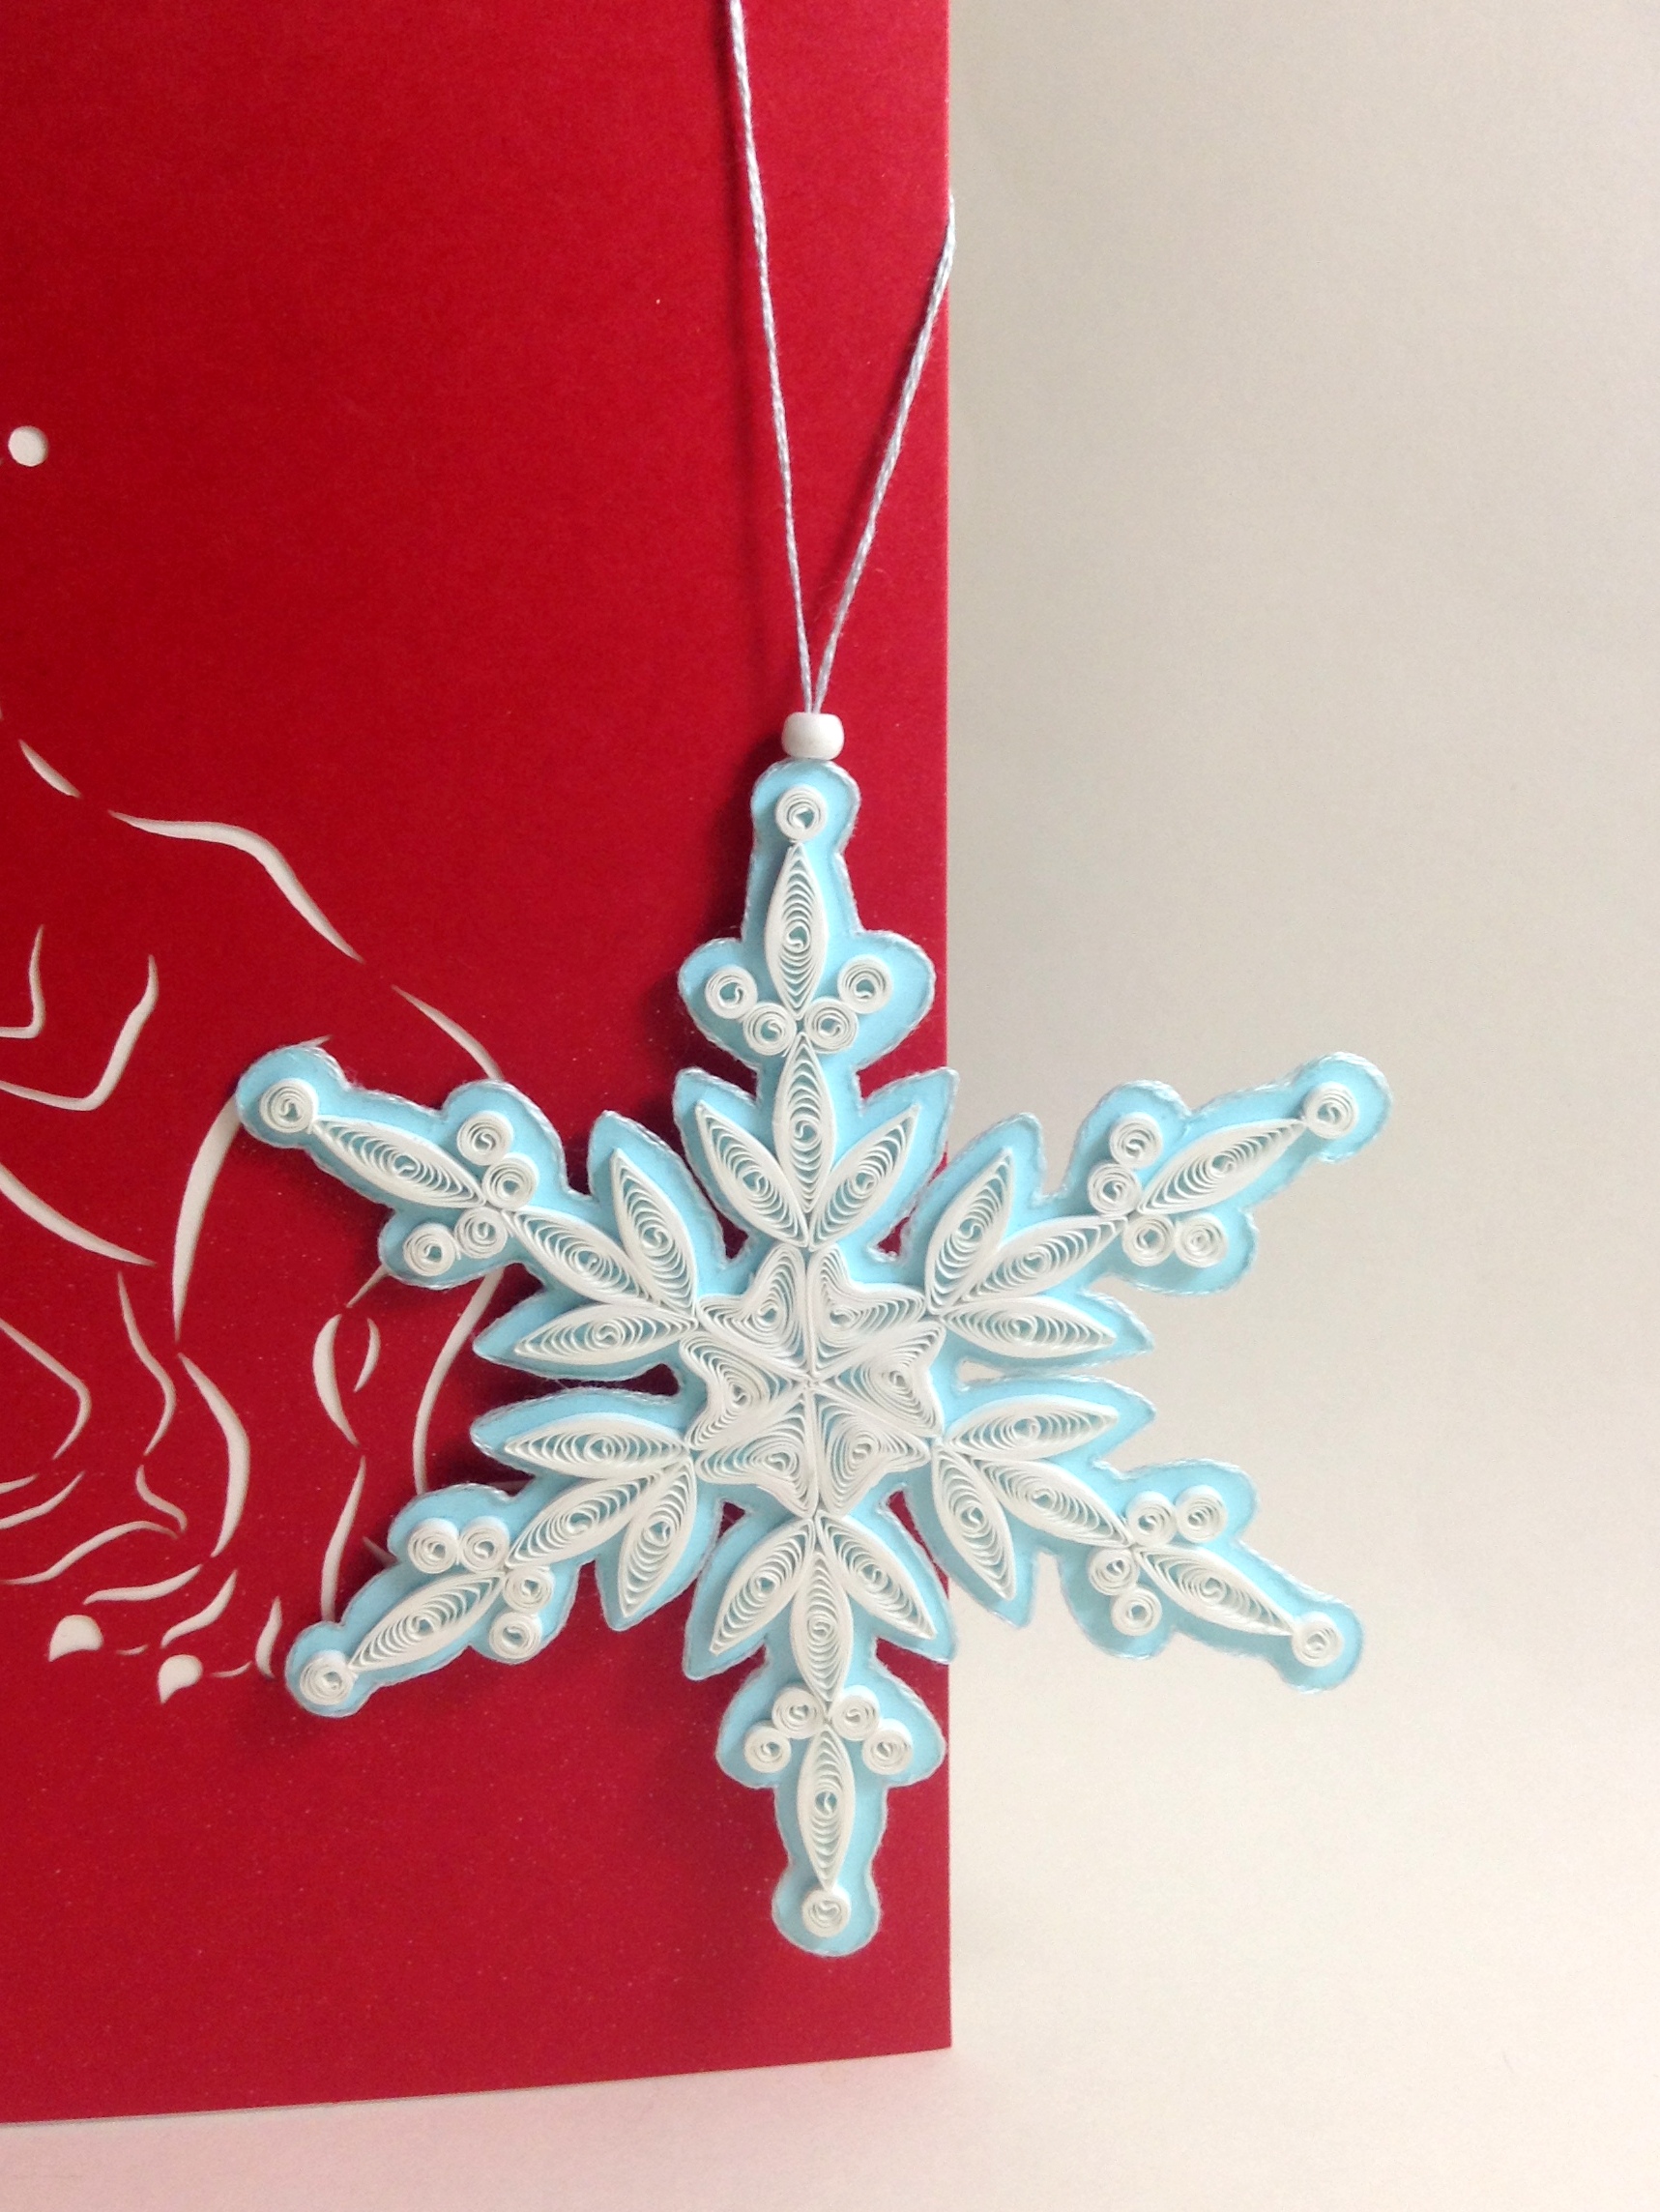
2019 extra: One of the 3D cards was this beautiful quilled snowflake. It took more time than I expected to cut around the design and glue 2 strands of embroidery floss all around the edge for a more finished look. In the end I really love this one though.


