I am participating in the Use Those Fabric Scraps Craftalong, which has created a burning desire to make more fabric rope wreaths like this one I made a few weeks ago.
I always make my kid’s elementary teachers an end of the year gift, and wanted to make the school principal something as this is the last year that I will have an elementary aged child. I decided I would make her one of these wreaths. They are pretty and they stash-bust! (Shout out to @aimr who sent me a large assortment of sunset colors to help me fill in the red portion of this–I don’t like red, so none in my stash!)
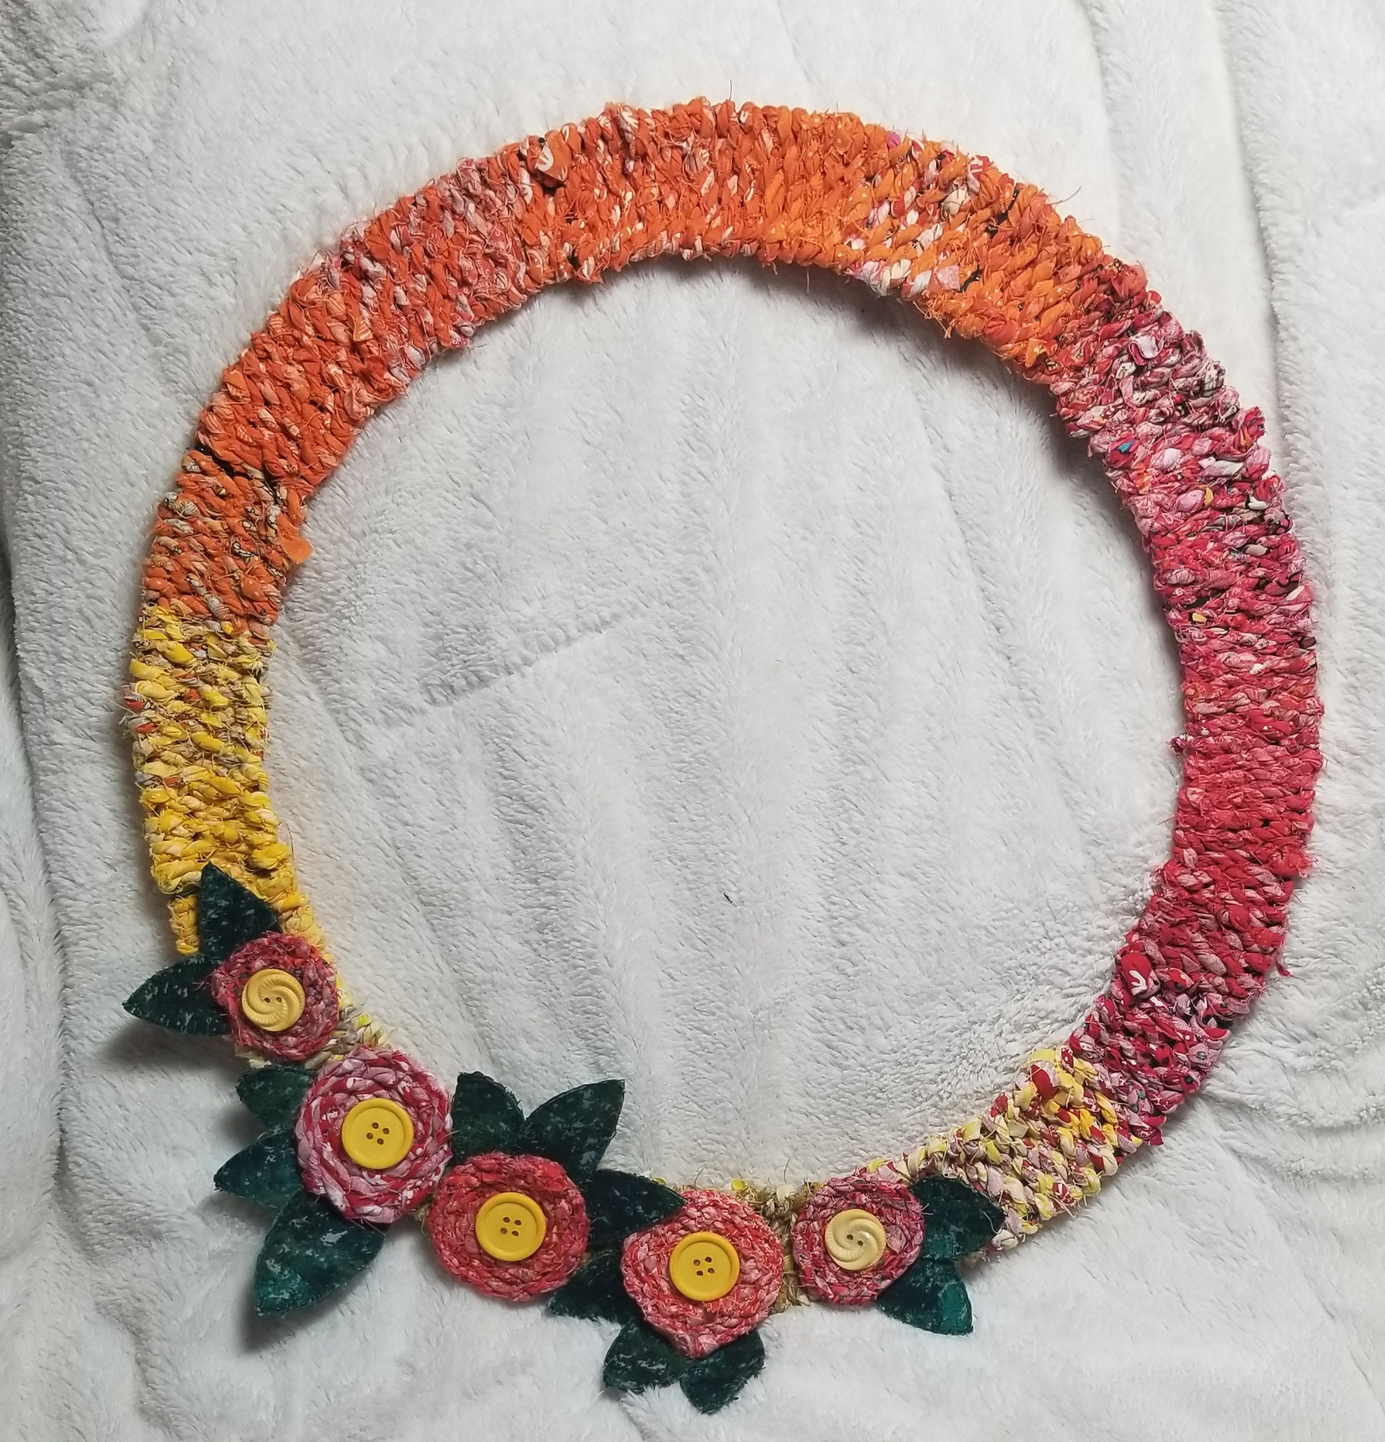
I am so excited about how this one turned out! I love the light gradient effect as the yellow fades to orange which fades to red! And, I really love the red flowers with the yellow buttons carrying over into my yellow fabric weaving! Full circle (pun intended!)
After making the previous wreath, I learned a few things. 1) use small portions of rope (tie as weaving) then make more rope as you go 2) stabilizing the leaves make a huge difference!
Now for the tutorial
(Please be aware that while I am showing steps, the fabric won’t always match because I was taking pictures from several projects in different stages to make this for you.)
To make the fabric rope
Cut scraps into at least 6 inch lengths at about 1/2 to 1" wide (they don’t have to be the same width)
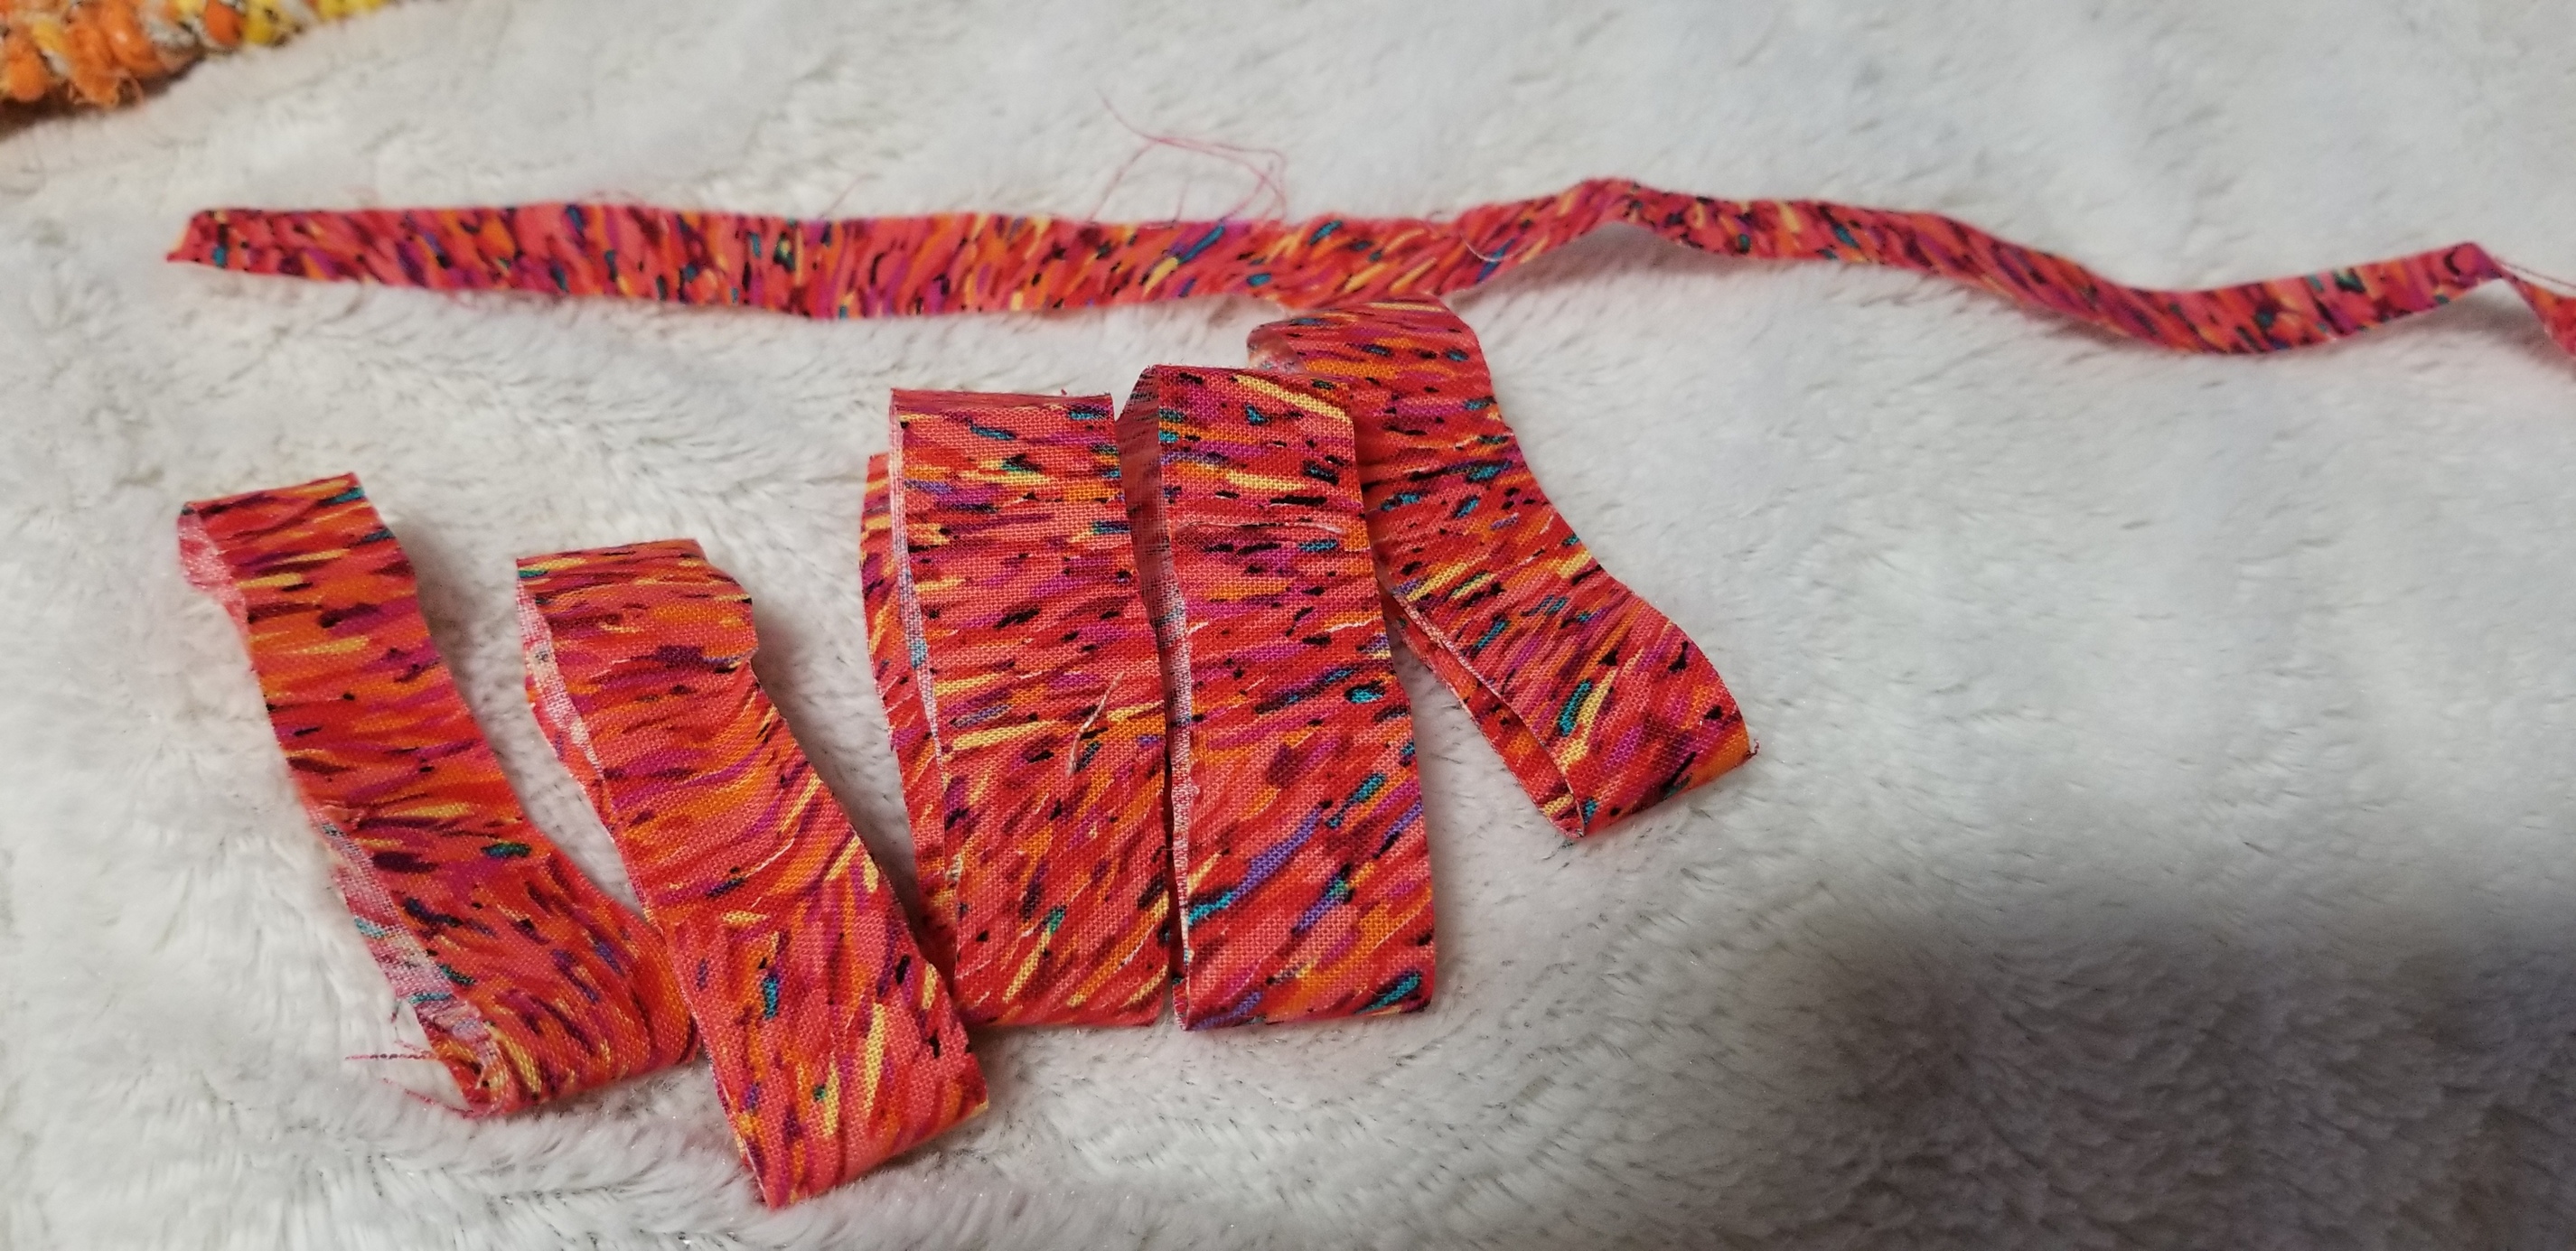
(Here I am using the same fabric).
To get the most color out of your rope,when you are twisting, show the right sides of your fabric.
To begin, take 2 pieces of fabric making sure you have at least a few inches of difference between your lengths. This is important so that you are not adding fabric at the same spot on both sides. Then begin twisting.
This is a lot like simple braiding, except you are only using two strands. Watch the picture from left to right. Keeping the left strand alone, twist the right strand 2 times (right side up, twist, wrong side up, twist, right side up twist, wrong side up, twist) once you have the right side up again, take the left strand you were not using and move it to the right side and repeat the twisting process. You’ll keep doing that until you have about 1-2 inches of a tail and you need to start adding more fabric (remember, you can use two strands of the same, or two different, or mix and match as you go).
Place the next strand of fabric on top of the the tail with right sides facing up. To connect them, you will start twisting them together.
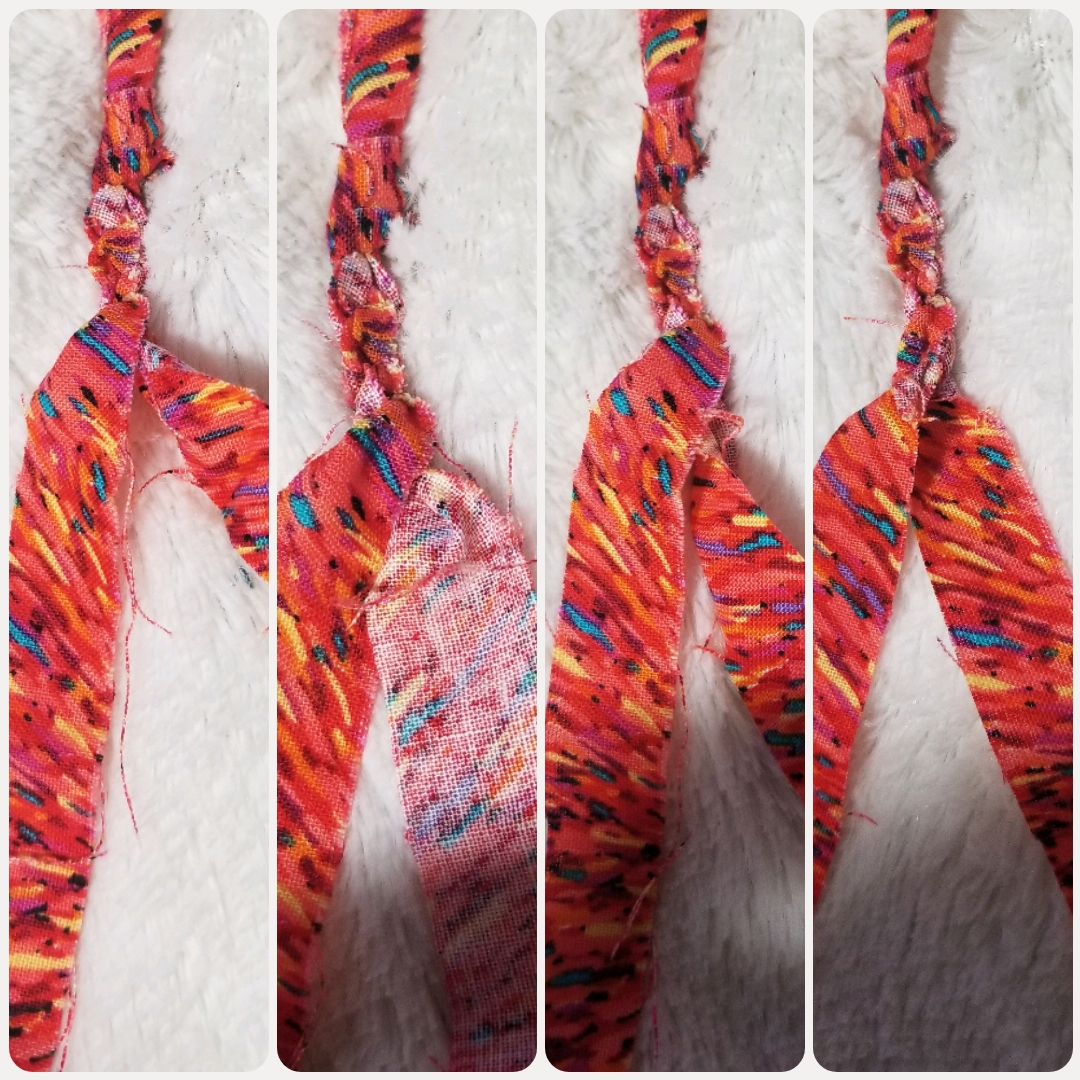
I usually repeat the twisting process about 4 times when I am connecting fabric, then cross the fabrics over (twist), then cross back, so then when I have the “new” piece back and I twist again, it’s pretty secure. These are the parts where you will see bits and pieces of the ends of fabric which give the wreath an even more scrappy look. It’s ok!

To make the wreath
Remember, keep your fabric rope no more than about 18" as you are weaving because it’s too hard to weave it when it is long and the joints start falling apart.
Other than that, tie your starting rope to the wreath form, then you will alternate your weaving, by going under the middle wire then over the middle wire like so:


Work around the wreath and then tie it to the back to end your weaving.
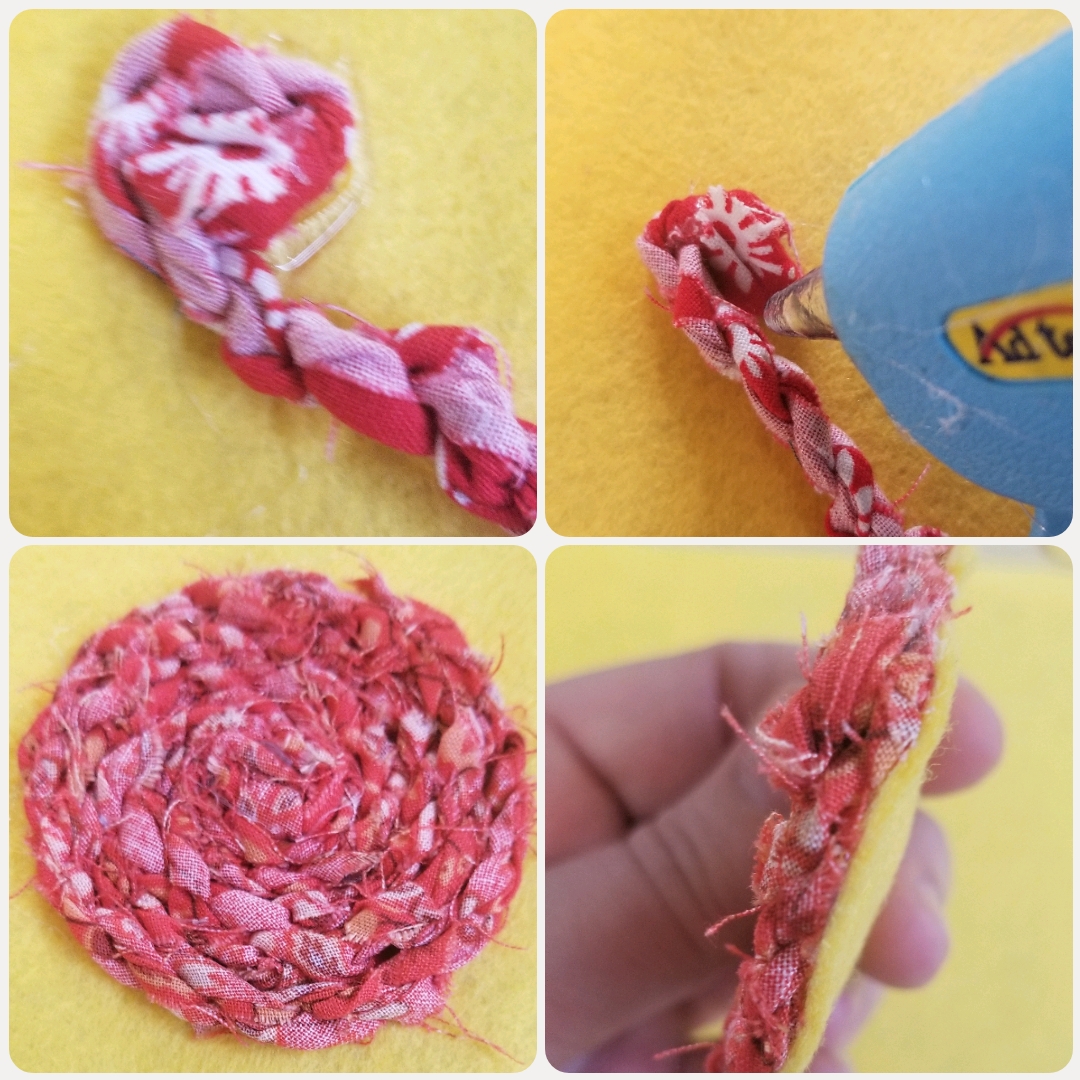
*To make fabric rope flowers
You will hot glue your rope to it’s tail then go around and around gluing close to the rope on felt until you get a flower the size you want it. Then, you will cut the felt as close to the flower as you can.
Add stabilizer of your choice to the back of scrap fabric to make leaves. I did not use a template, but just free handed them.
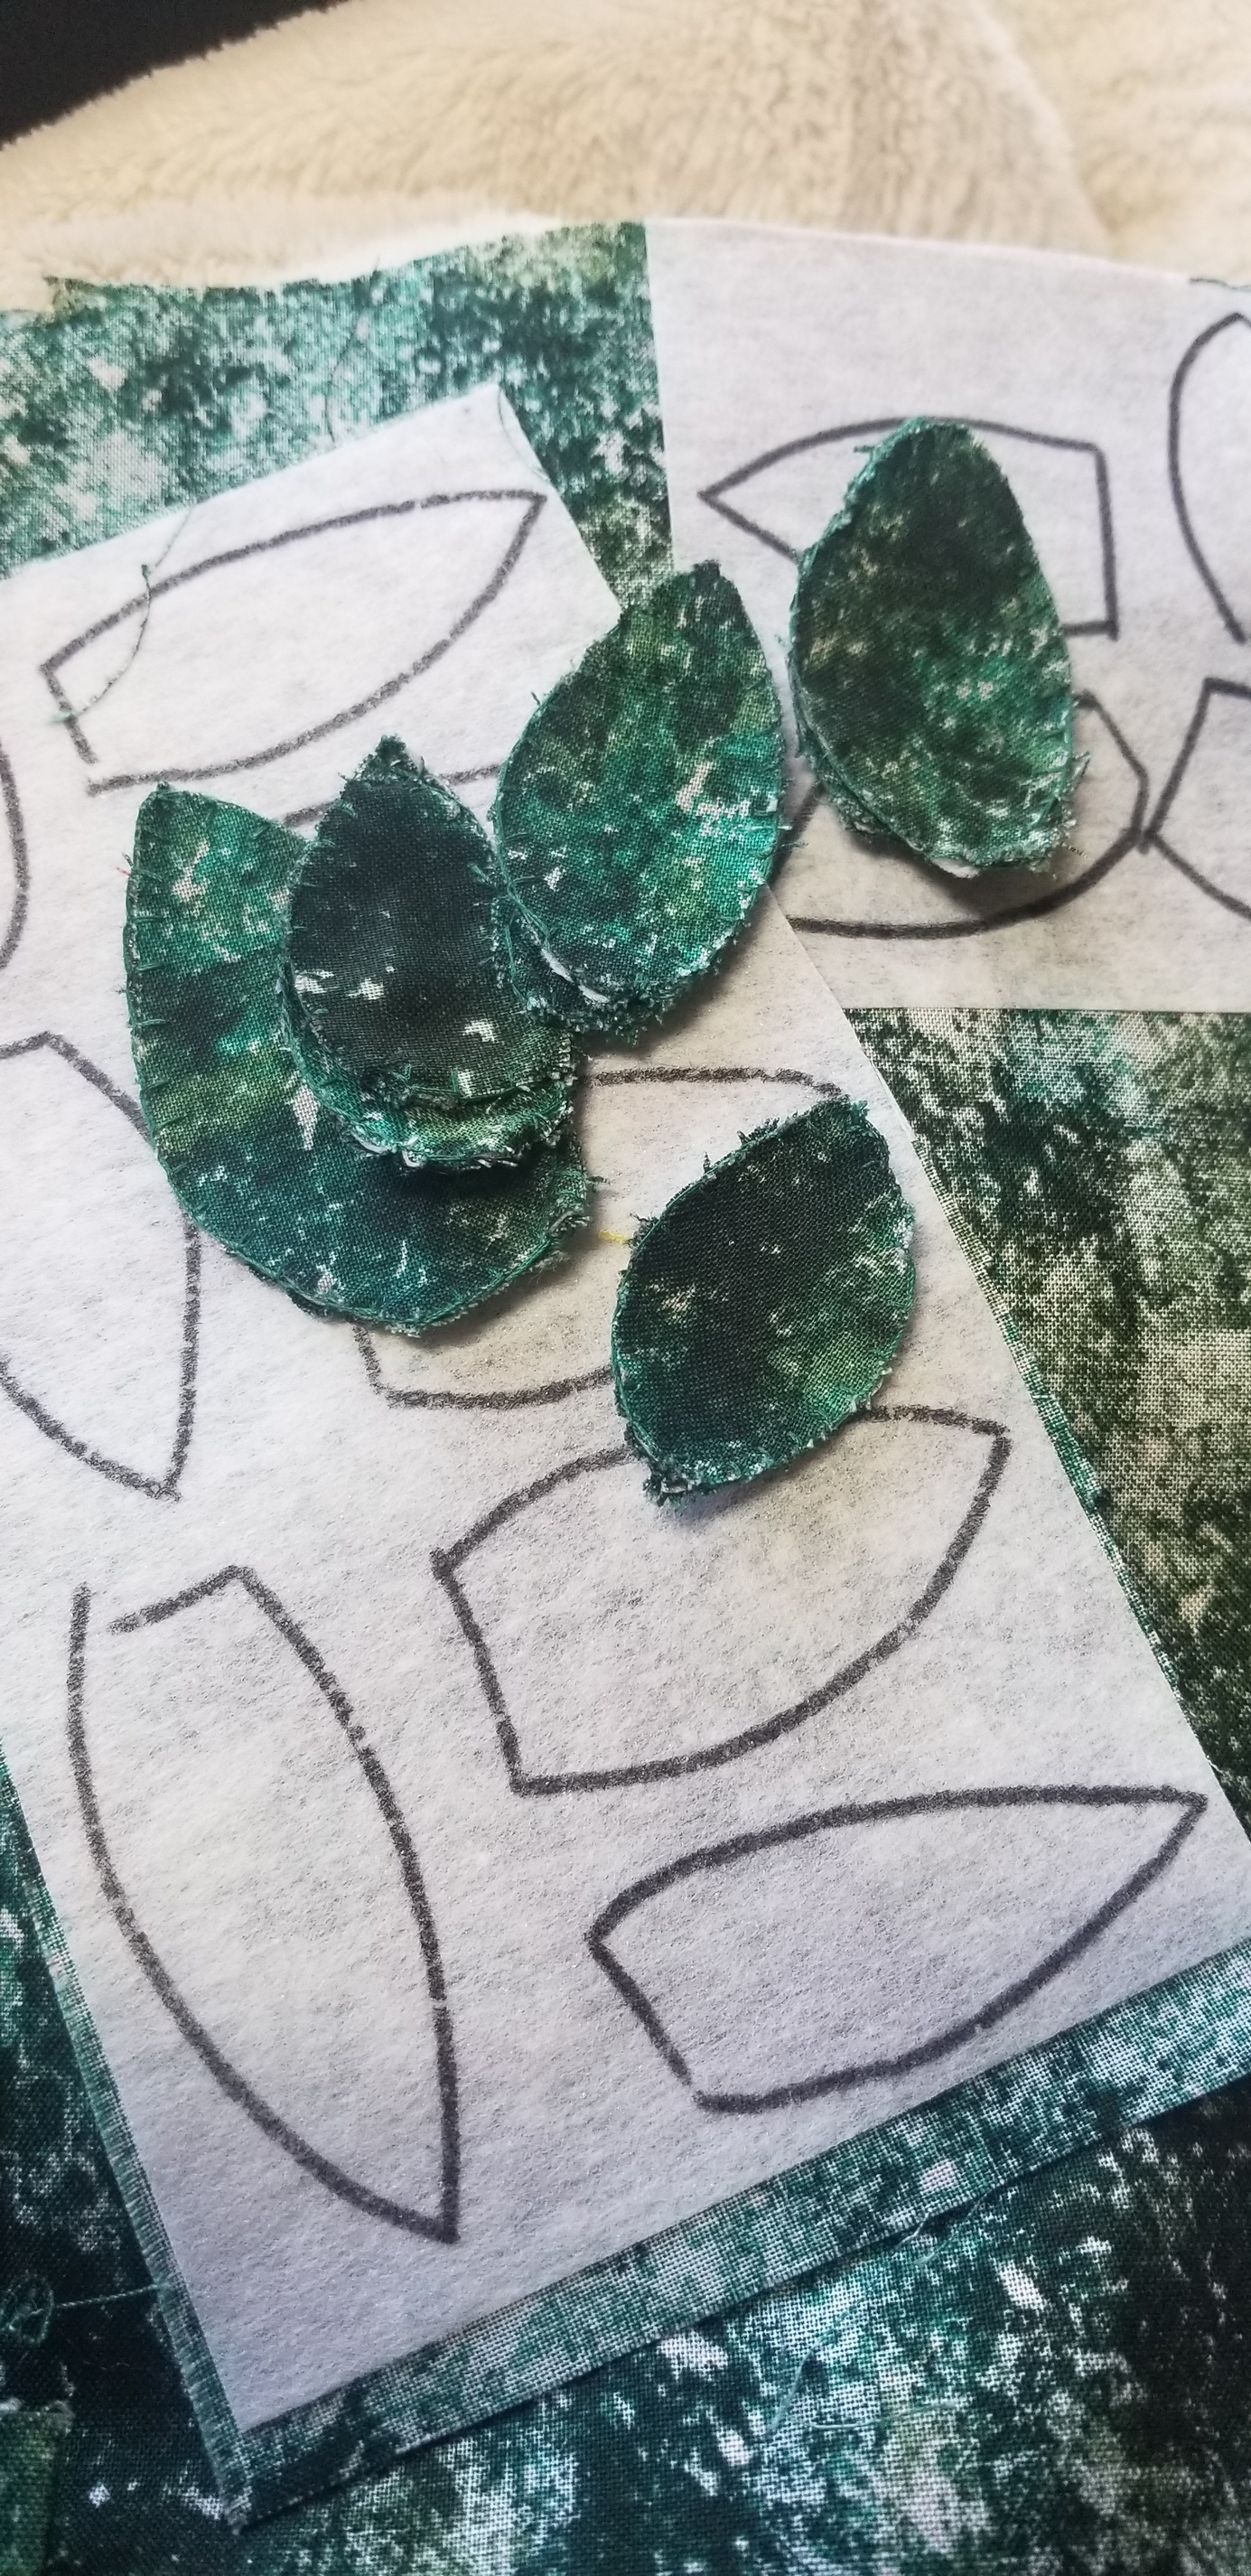
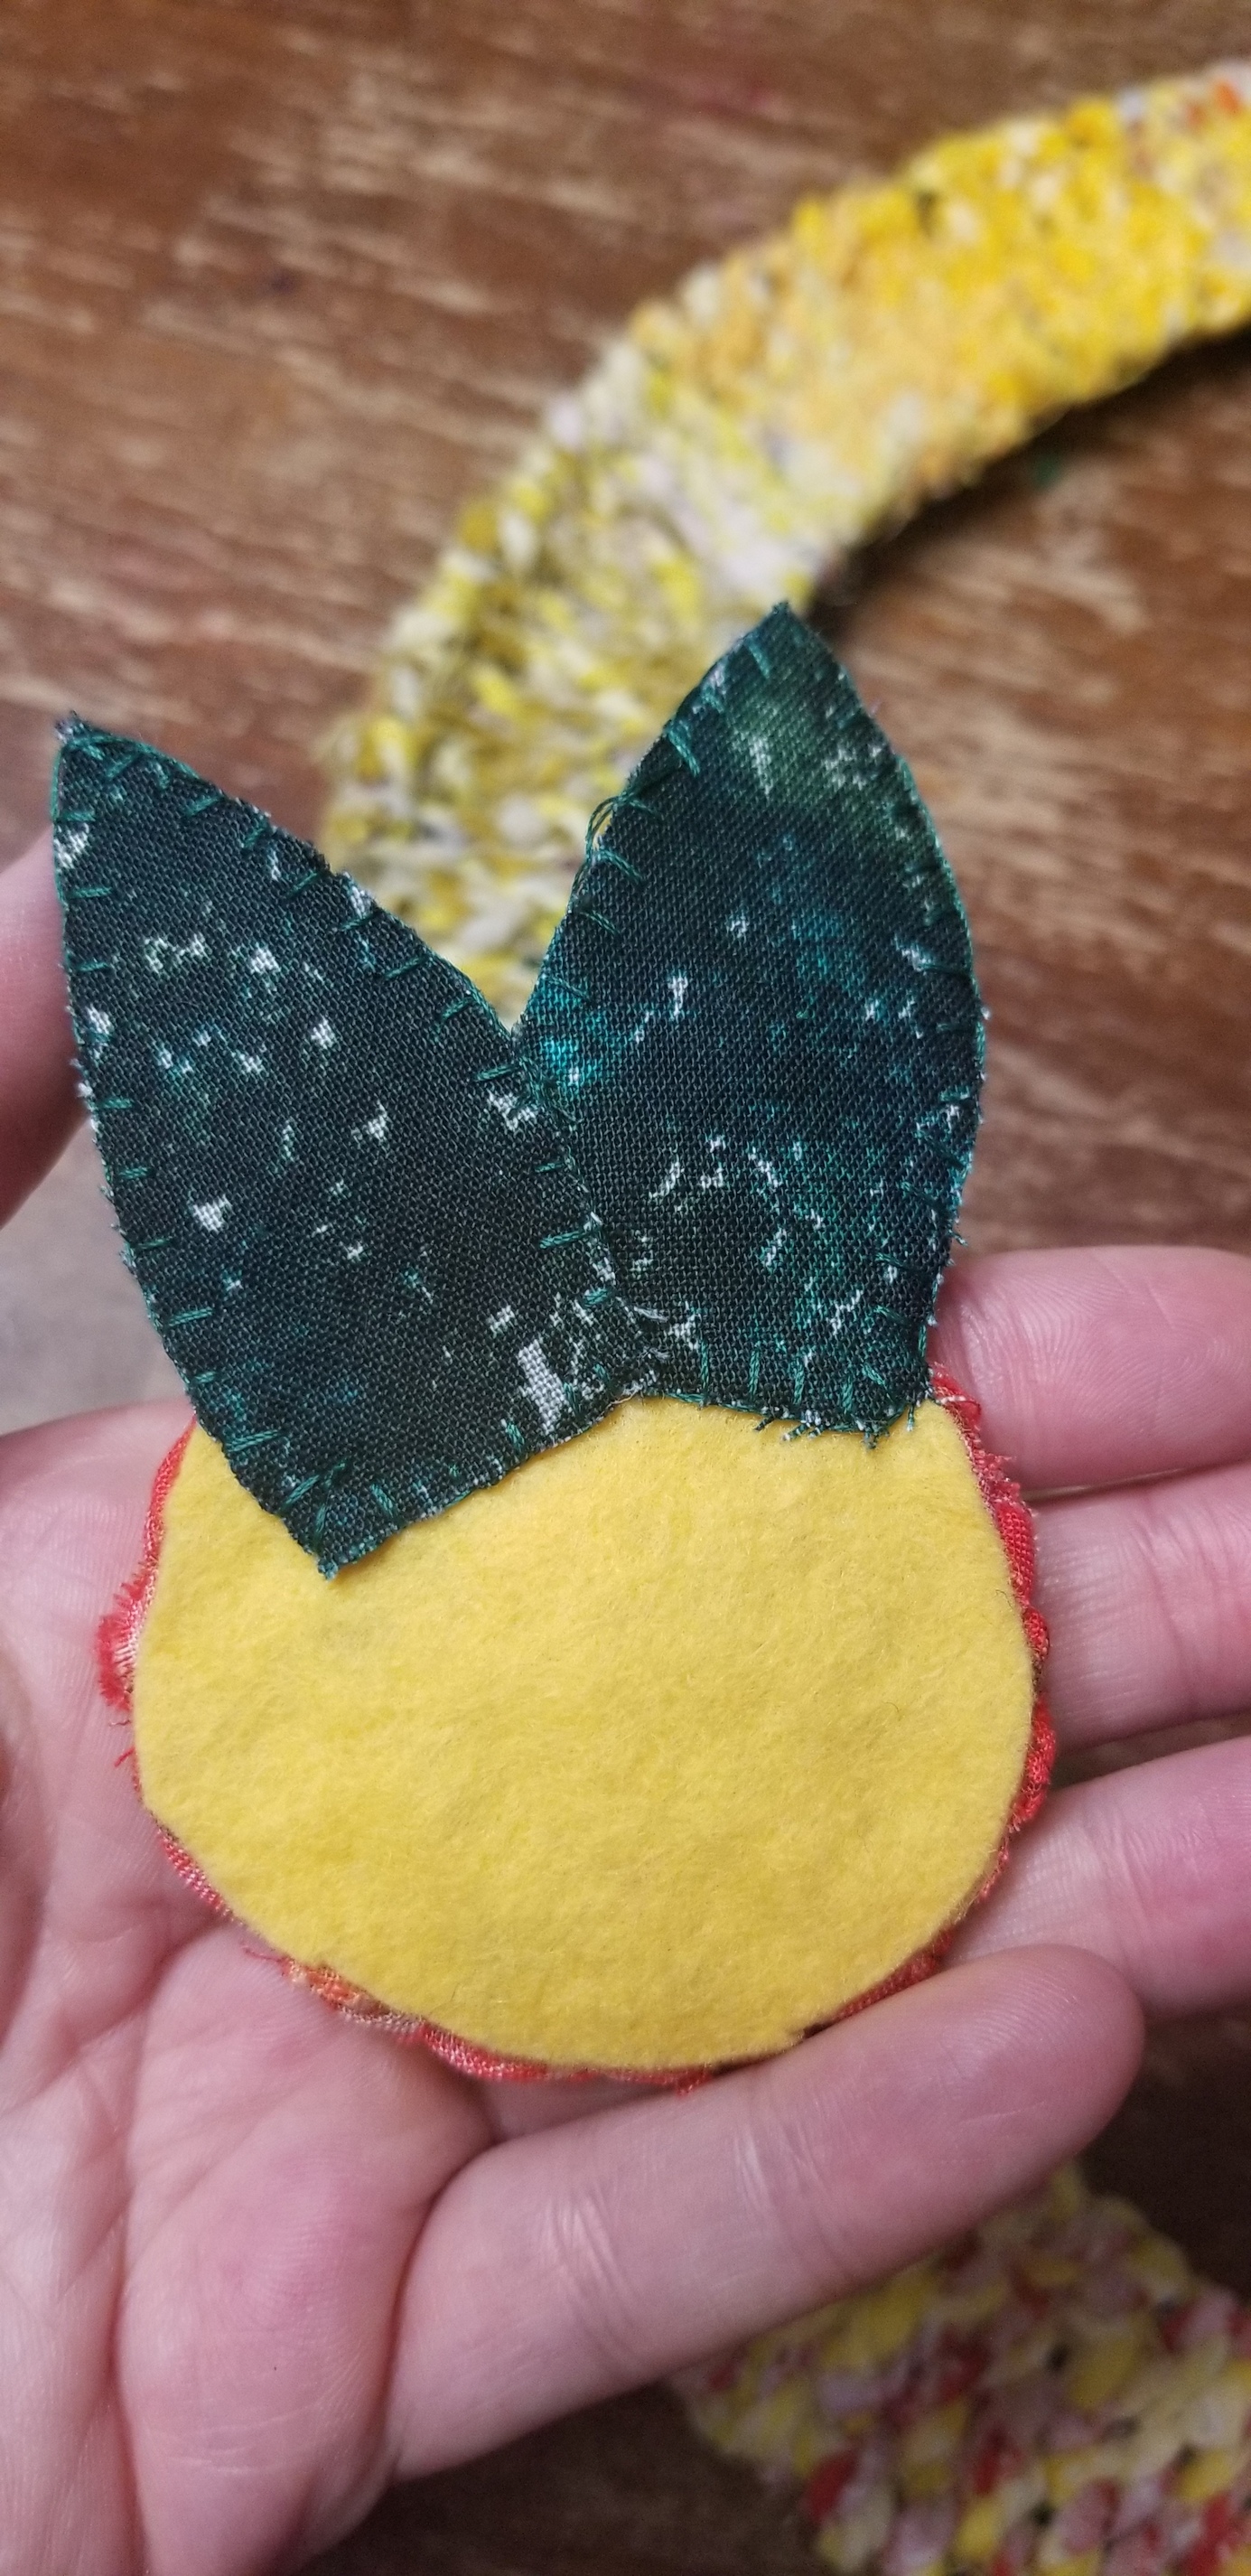
I then held them wrong sides together to more green fabric and cut them out. I used the blanket stitch to sew them together. Once they were sewn together, I hot glued them to the bottom of the flowers where I decided they should be.
Now you’re ready to hot glue the flowers to your wreath and a button to the flowers, and your wreath is finished! Add as many flowers and leaves as you would like. I used a couple clear contact hooks to hang…they connect to the wires on the back and so the wreath will lay flush against the wall!
